| Forum 106 XSi http://forum.106xsi.net/ |
|
| [davenport] English 106 xsi http://forum.106xsi.net/viewtopic.php?f=115&t=23841 |
Page 5 sur 8 |
| Auteur: | davenport [ Vendredi 26 Juillet 2013 20:18 ] |
| Sujet du message: | Re: English 106 xsi |
Ok... ordered placed with TRi... fingers crossed the correct bits arrive next week (my french really is terrible!!) |
|
| Auteur: | BoOst [ Samedi 11 Janvier 2014 16:31 ] |
| Sujet du message: | Re: English 106 xsi |
| Auteur: | davenport [ Mardi 27 Mai 2014 19:14 ] |
| Sujet du message: | Re: English 106 xsi |
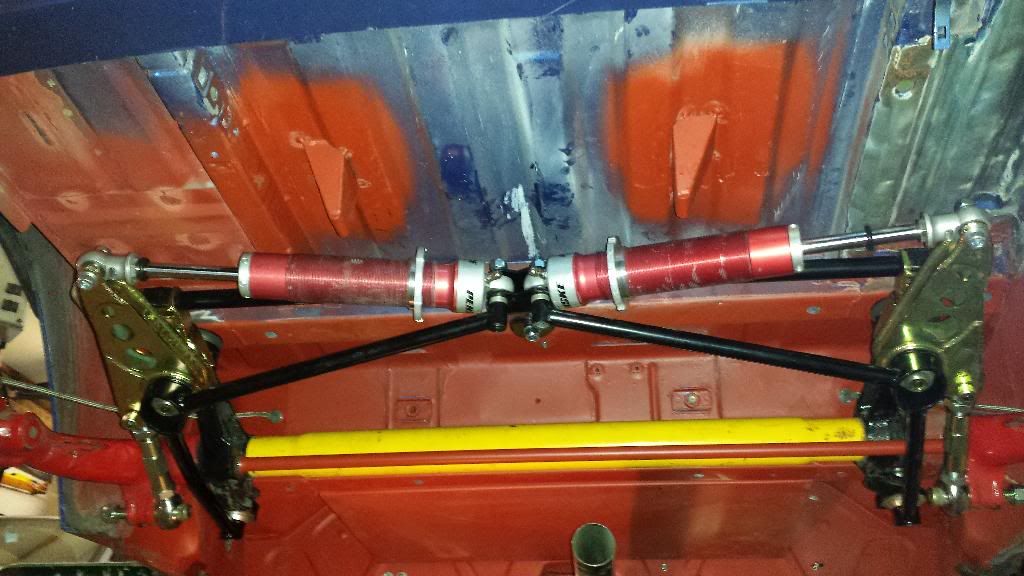
Steering arms fitted up and thanks to the shorter arms on the satchell struts they clear the rack without needing a bend 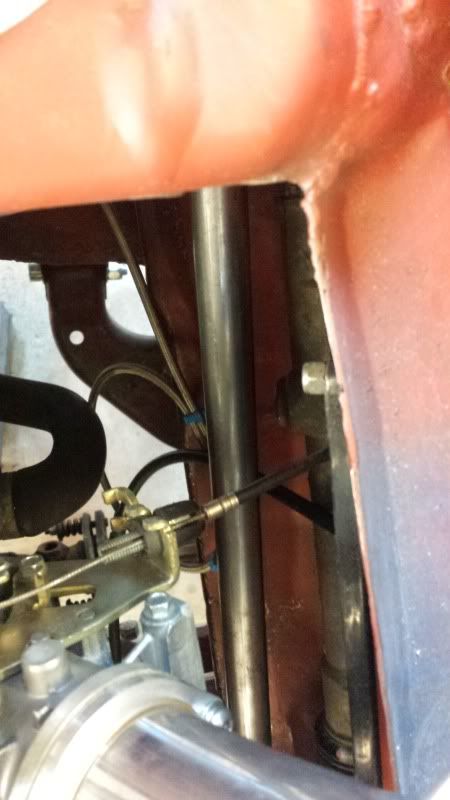 Stuck the topmounts in the central position 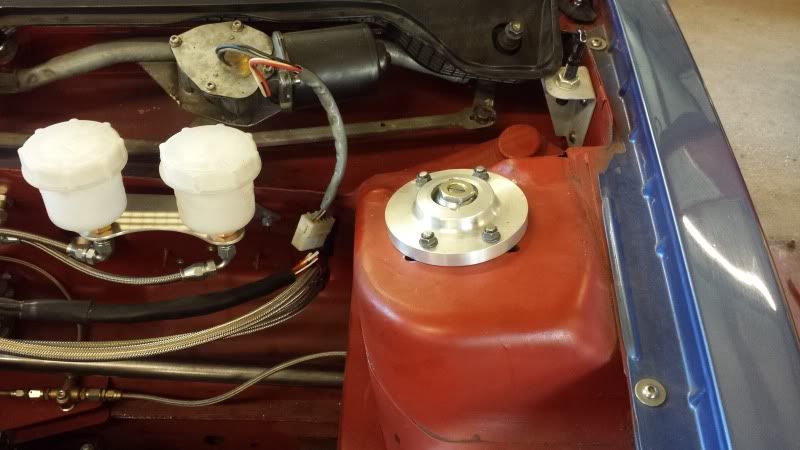 and checked camber adjustment on the hub/strut adjuster 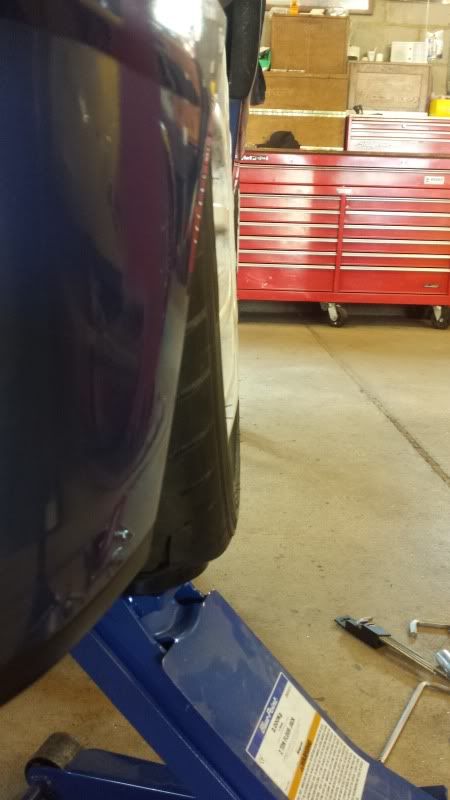 yup, that should be plenty... bumpsteer guage:  DTI arrived this morning (mega quick delivery!): 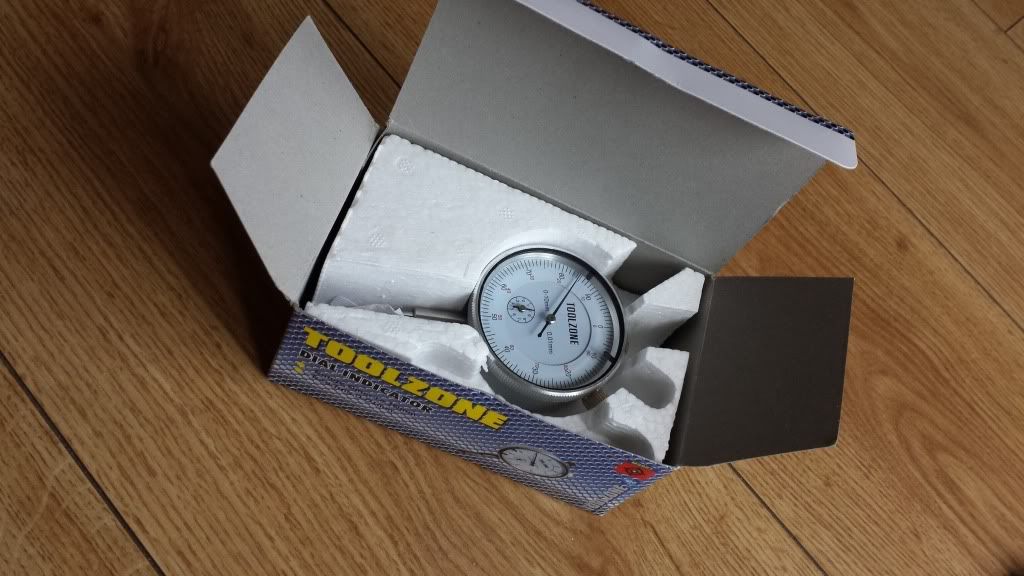 and after a false start "liberating" some ally plate from work, I put out a call to a mate I used to work with... came home this afternoon to find this leant against the front door (cheers jase):  to make playing around with the steering arm height on the strut easier I "found" a bag of nylon spacers that'll do for mocking up, I can then record sizes and make some up in ally: 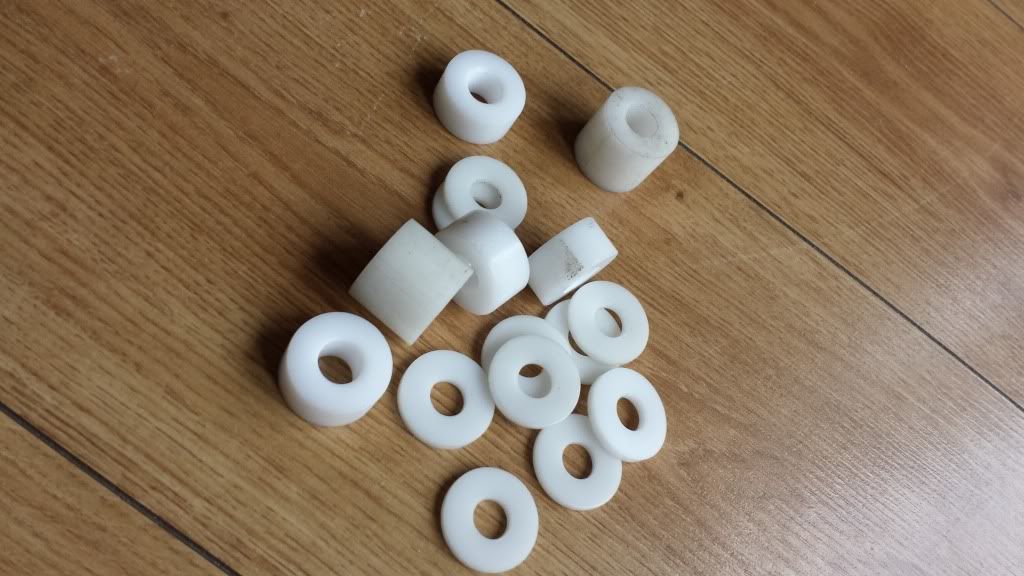 Finally with the steering arms sorted (not needing a bend) I can put some flats on it to make adjusting easier.. to do this I drilled out a unplated M20 nut to 1" and will stitch them on: 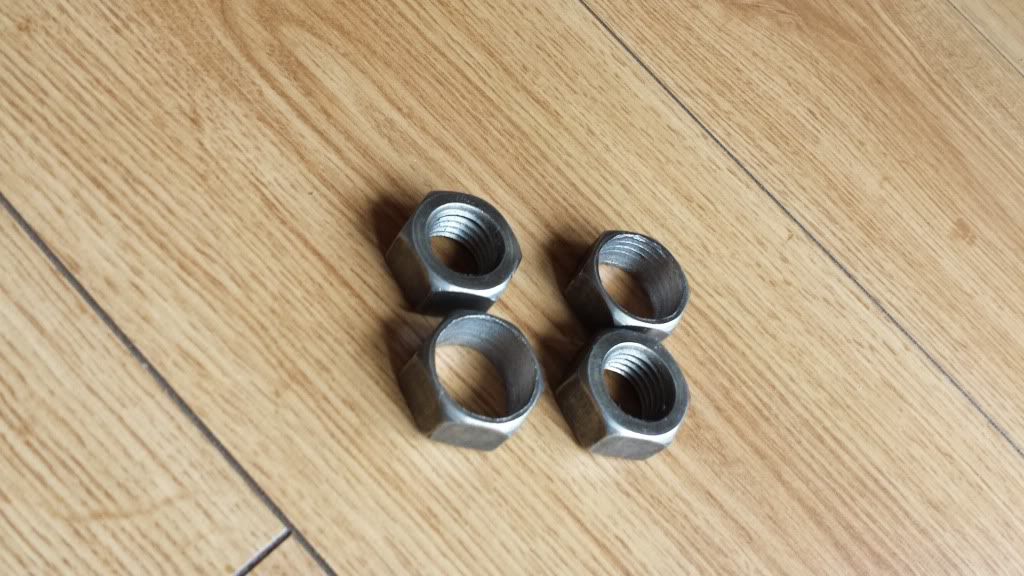 ... ...Didnt get time to record and adjust things but dropped a caliper off and drilled/holesaw'd the plate... it seems to work!!!! 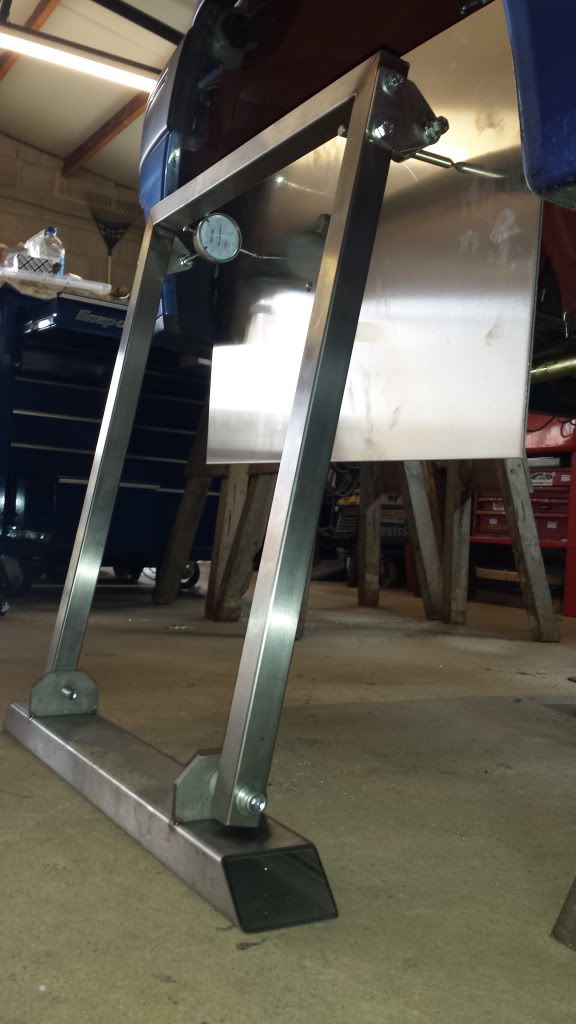 The hub plate needs trimming down but its always easier to do that than make it bigger folks!!! didn't get much done at the weekend as Friday/Saturday I was walking the tightrope of trying not to shit myself (another bug from the boy, cheers son!) sunday was a mates babys christening.. but in between church and the party I got 30 minutes in the garage... so, I used to have 1 of these: (not mine in the pic but an old cased EC1 branded with TDF) 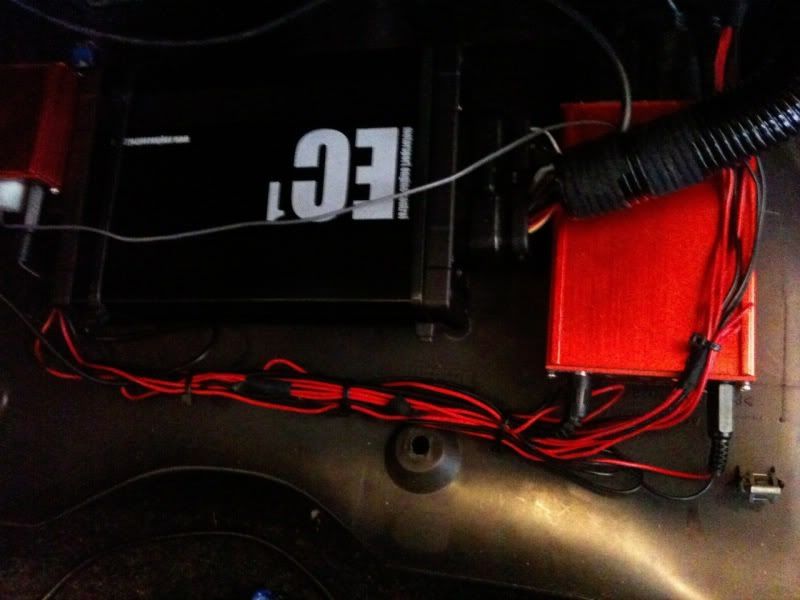 that fitted into this: 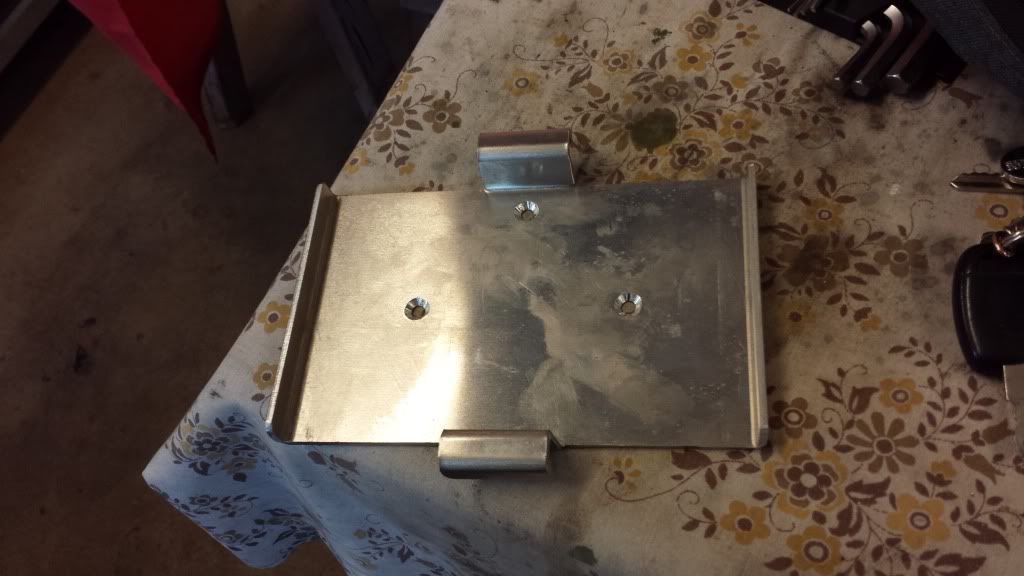 and that bolted onto these:  now after the little fiasco that was "my looms" I spoke to SpecialistComponents that actually make the ECU and asked about recasing it for me, not only did they agree, they updated the software and made me a coffee while I waited and had a tour... so, now I have this: 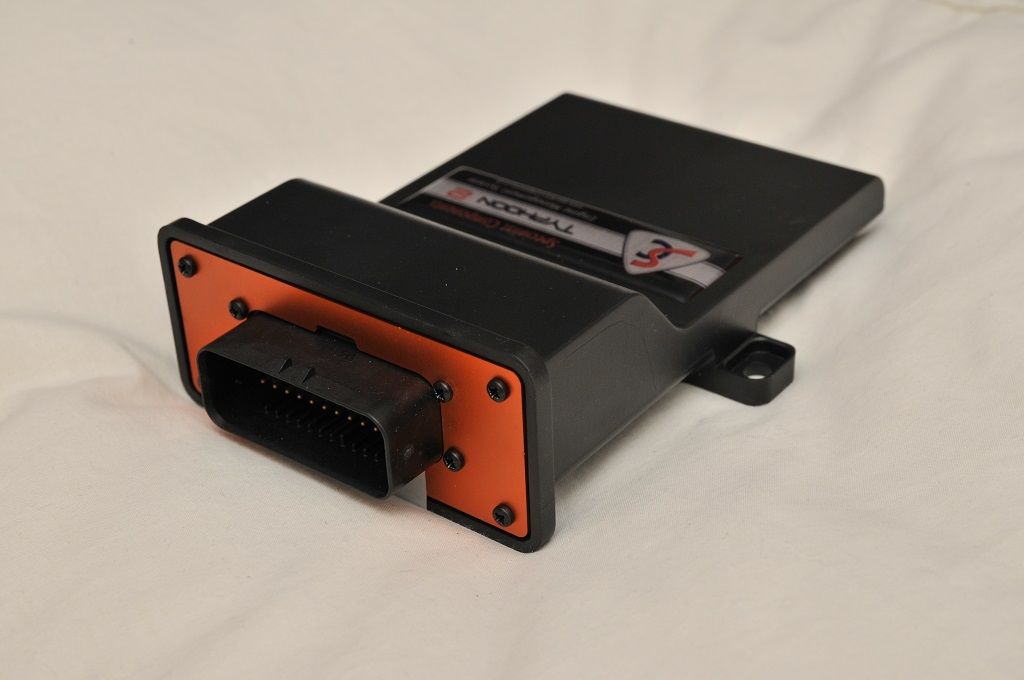 and needed to make this: 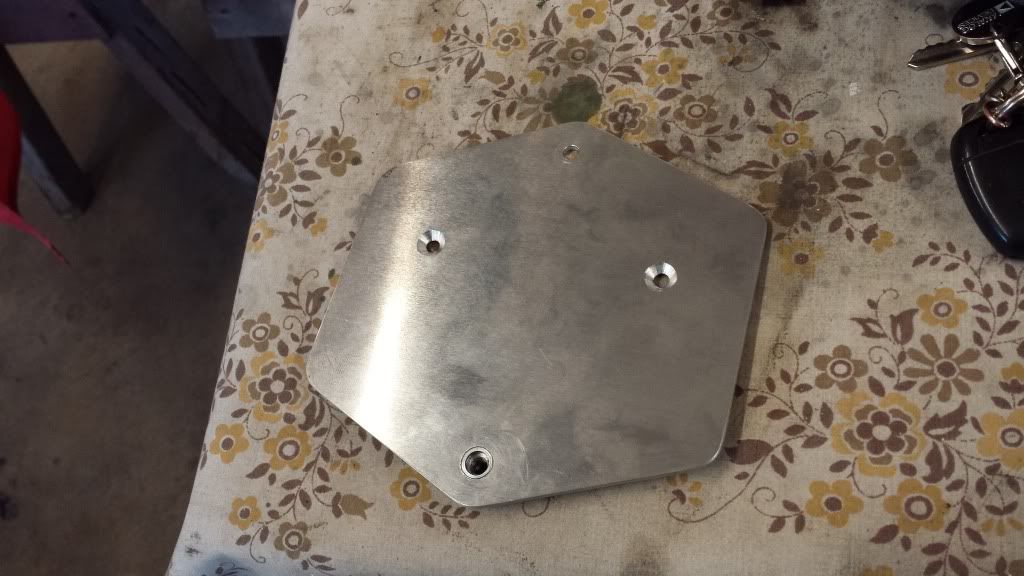 to bolt up here: 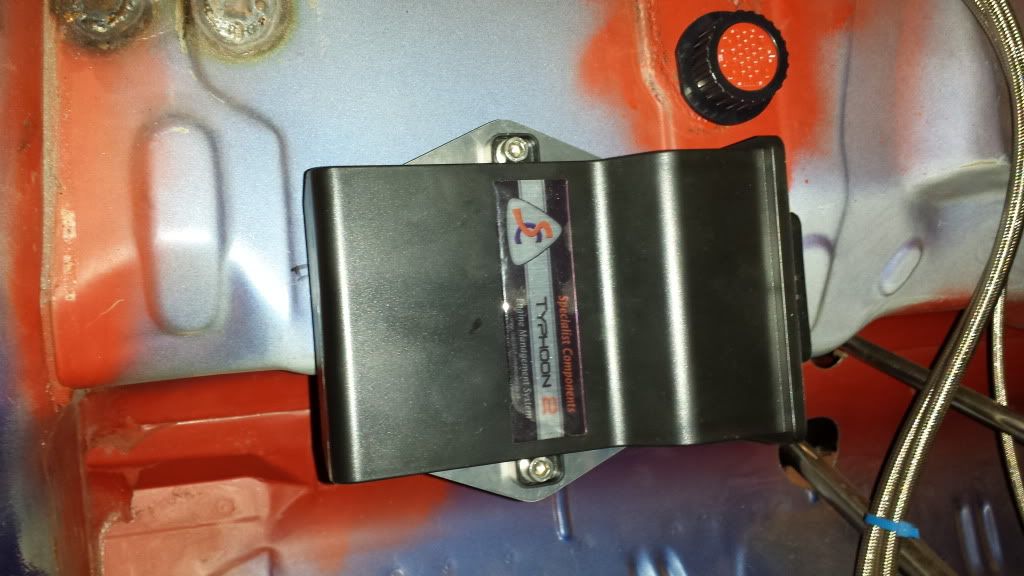 via the magic box of Peugeot pick-n-mix parts a suitable set of shafts were found (307 outers/MA box inners) 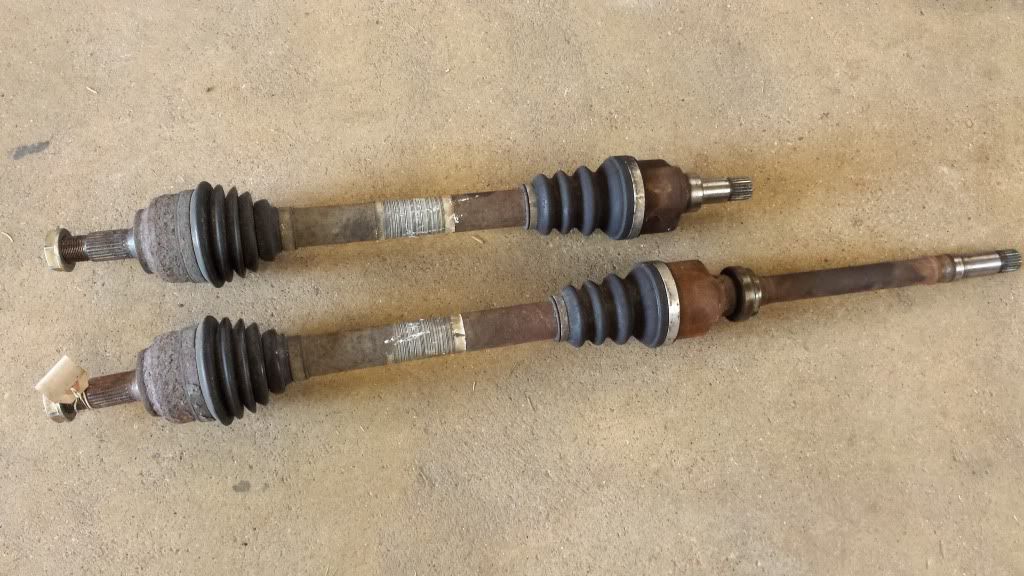 these just need chopping and shortening and wil be given a refurb... finally some pics of the suspension: 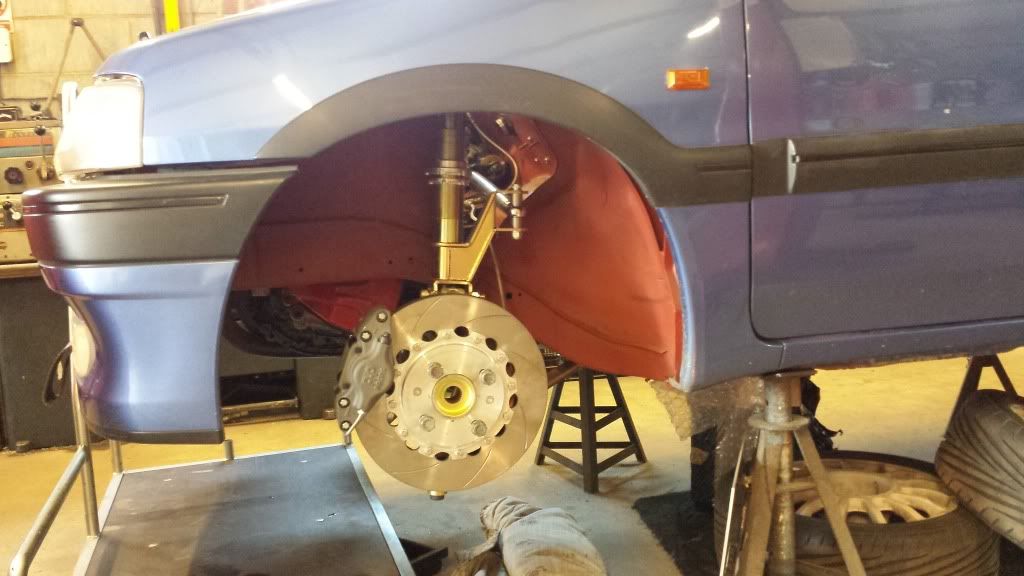  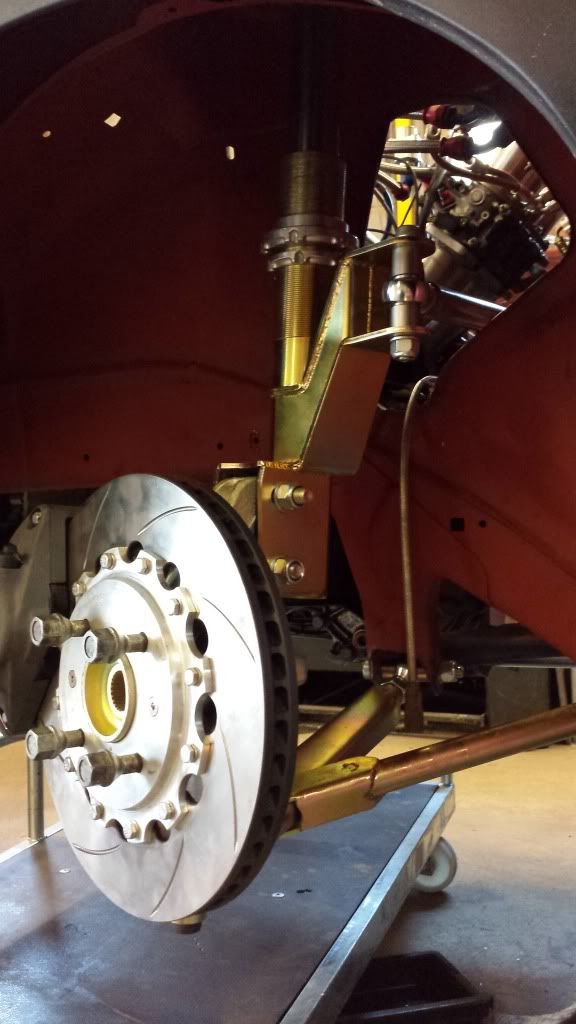 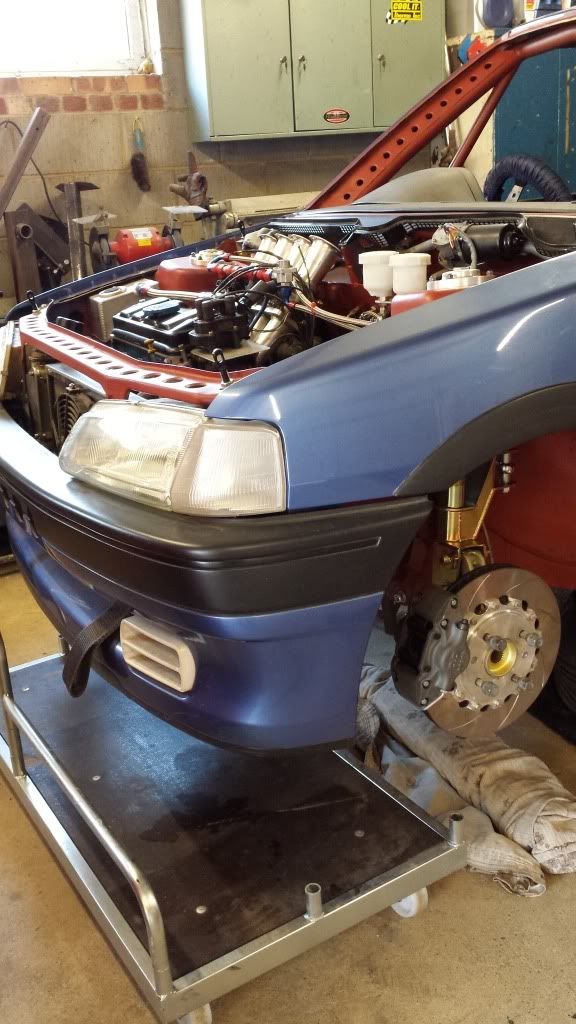 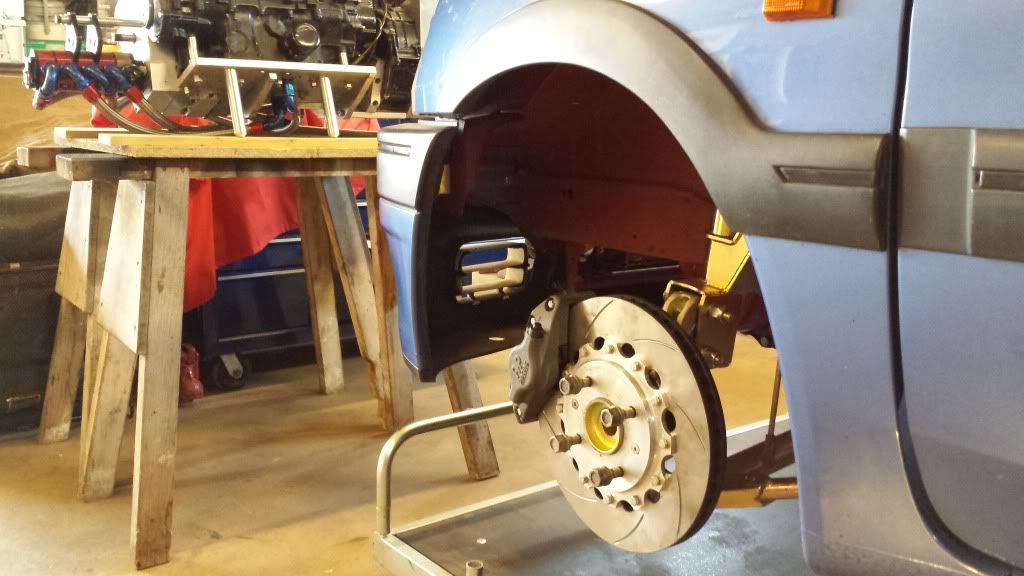 Well... work is still busy and im still on 7 days a week 7till5.. cant complain really the money is handy... Havent been down the workshop for a few weeks but last time I was I started playing with the bumpsteer, I was using a small scissor jack as it gave nice controlled movement, but being so low I needed a block of wood to stand it in... thats not very "motorsport" is it?? A chunk of wood with soaked in engine oil!!!! there was only 1 thing to do, I waited till the storeman popped out for his mid-morning shite and moved fast... I scampered out with a couple of laser cut plates 8countersunk bolts and some threaded spacers which just happened to be the height of the chunk of wood I was using..... 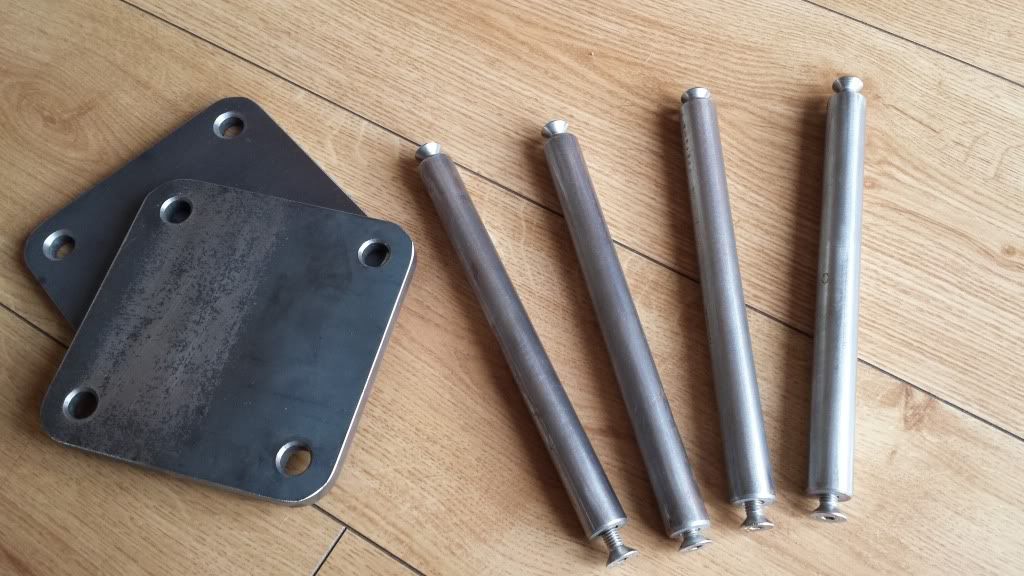 a bit of countersinking on the plates and bingo.. 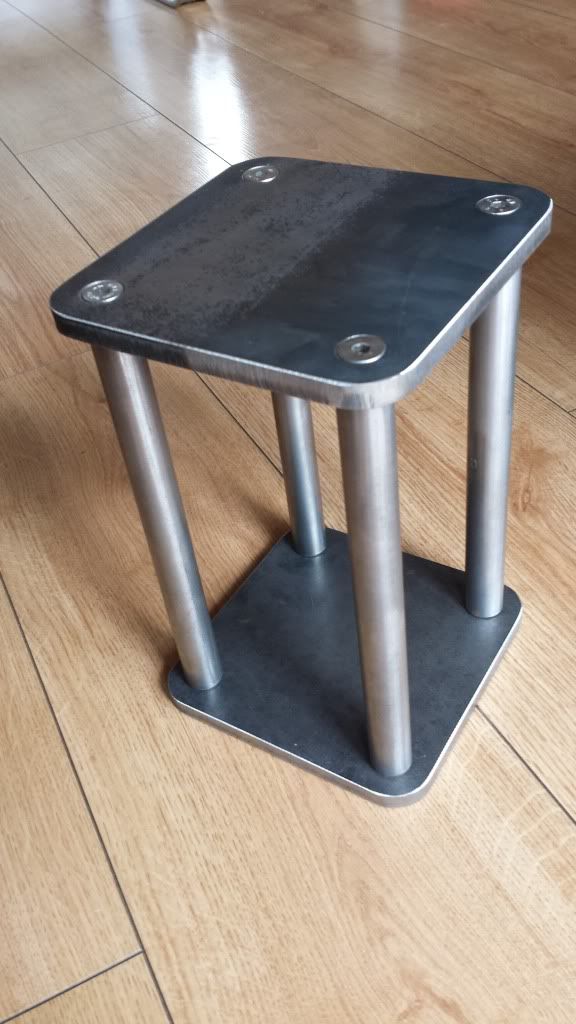 MASSIVELY ott and unnecessary but hey, it looks the part! Ebay bargain... 20mm hubcentric spacers for £6.50 these may be a bit too big but for that price I'll gladly machine them down.. 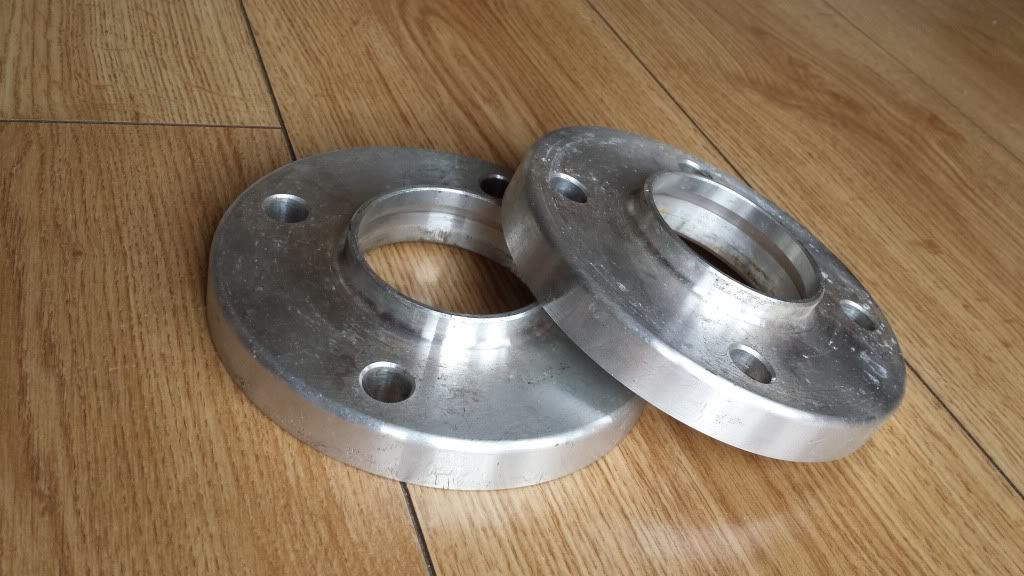 finally the TRI wheel studs arrived, 12.9 rated. rolled, silky smooth, threads and a nice domed end.. cheaper than anywhere in the UK for equivalent spec  with the engine shifted over luckily everything still operated like it should my custom gear linkage just needed some rod ends wound out, the gearbox still cleared the chassis.. unfortunately the centre scuttle panel bracket thingy was now fouling my trumpet, off with the bodies, out with the dremel, off with the bracket: 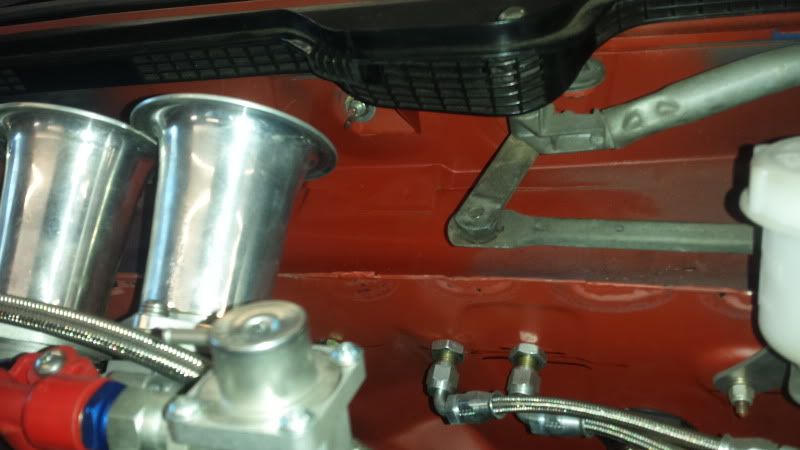 happy days:* I then started shaping the tubes that will form the turret to lower wishbone pickup bracing, you can just about see them tacked in place on the pic: 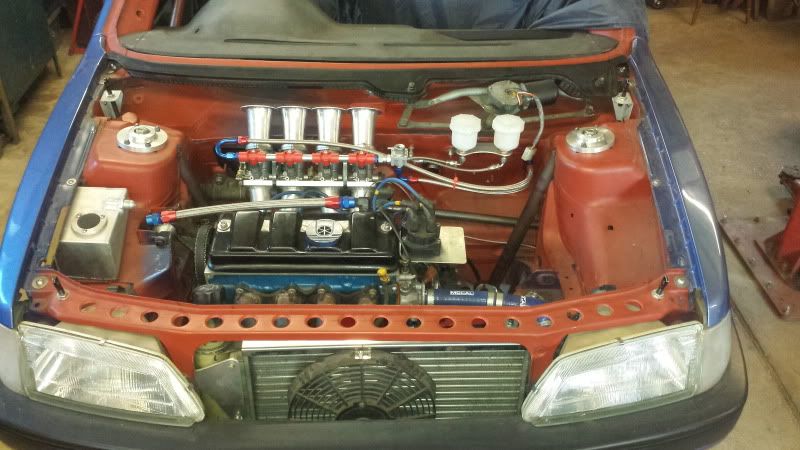 finally the pushrod rear suspension!!! its a new setup designed by my friends over @ Satchell Engineering *non techy bods skip this bit* the standard 106 (and many other pug) rear suspension is an odd setup in as much the wheel travel to damper stroke ratio is only 3:1 (wheel moves 3mm damper moves 1mm) this results in dampers having to be MEGA stiff and trying to control the wheel with minimal stroke.. its a big compromise... a few people end up turreting the rear which stands the damper upright and you get a lovely 1:1 ratio, wicked!! but, if the cars going to be used in competition a lot of classes deem this mod illegal, this setup gets around the issue by retaining all the factory pickups and skinny std torsion bars and use this kit as a "helper" spring and damper unit... *tech drivel over* so the Satchell crew were kind enough to ask if i fancied doing a bit of guinea pig work on these new kits and try the fit to make sure the jigs/proceedures all make it a simple bolt on conversion and have been sending me a few pics of things progressing: 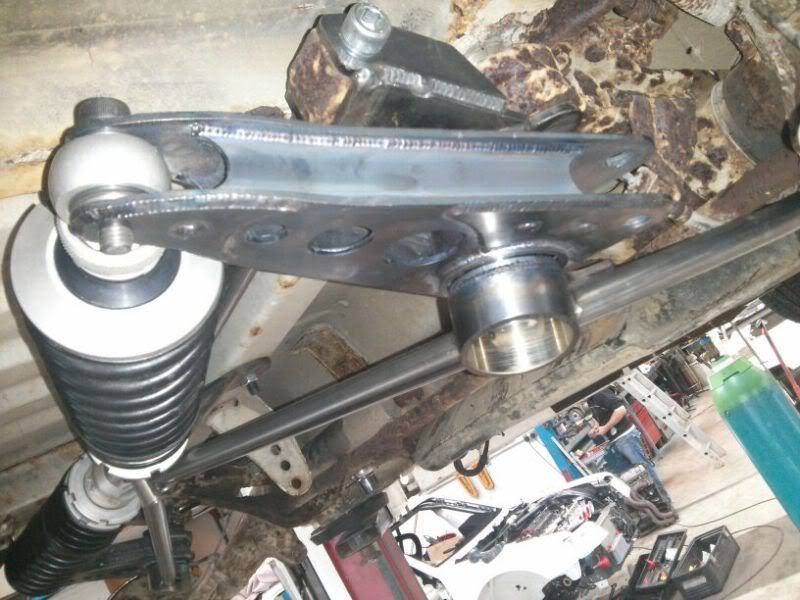 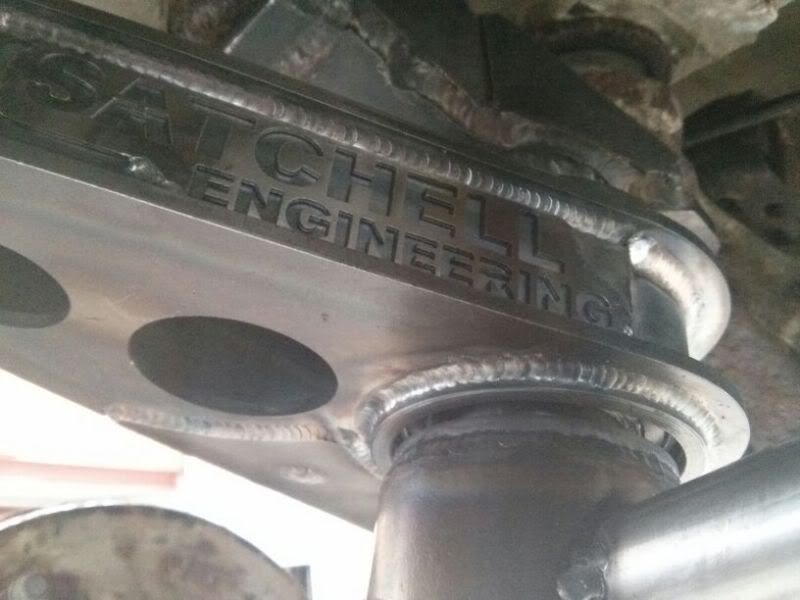 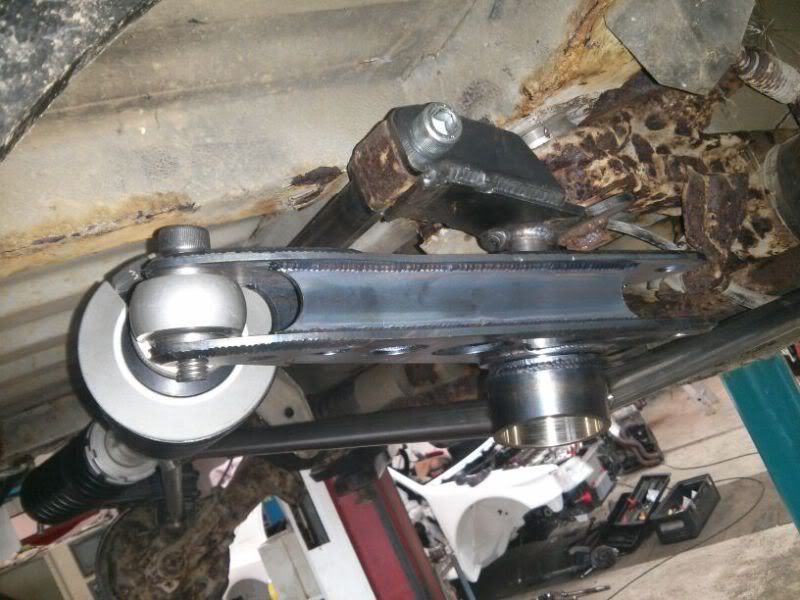 all I needed to do then was select a damper/coilover setup.. they used a GAZ monotube on there trial car, but... I know a few people.. 1 person in particular works for Penske, if you haven`t heard of them, have a look under the bodywork of a few current F1 cars/nascars.. knowing this meant 1 thing, they would be bastard expensive, and yes, when he quoted some prices, they were indeed at the bastard! end of the scale... even the single adjustables... but he had a plan!! after a few days I got another message saying h`ed been rummaging among the old test units and 2nds bins (faded anodising/scratchs) and found 80% of the bits I`d need for some single adjustable units (these can be upgraded to double or triple adjustable) and I could have a finished set for about half the new cost... 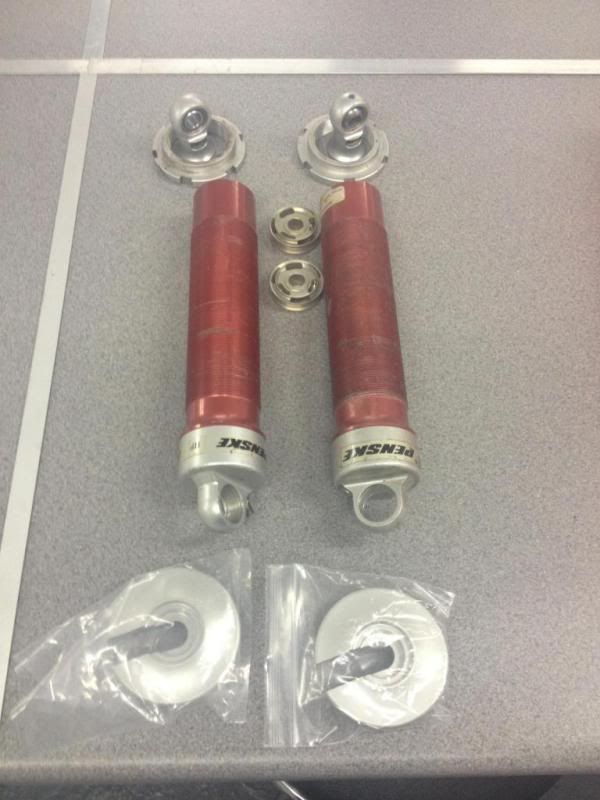 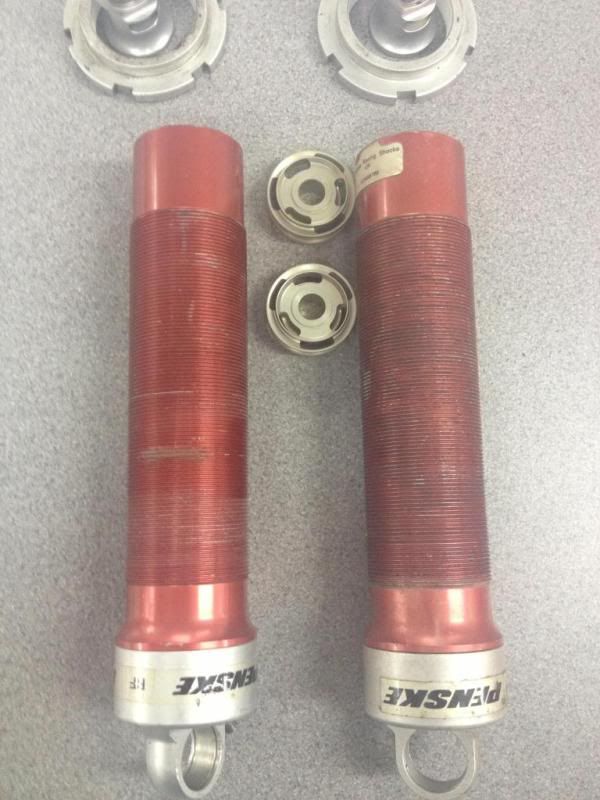 as you can see there a bit grubby but tbh, the insides are mint and there a very VERY good damper......... things have been progressing.. the first kit has been sent over for trial fitting.. 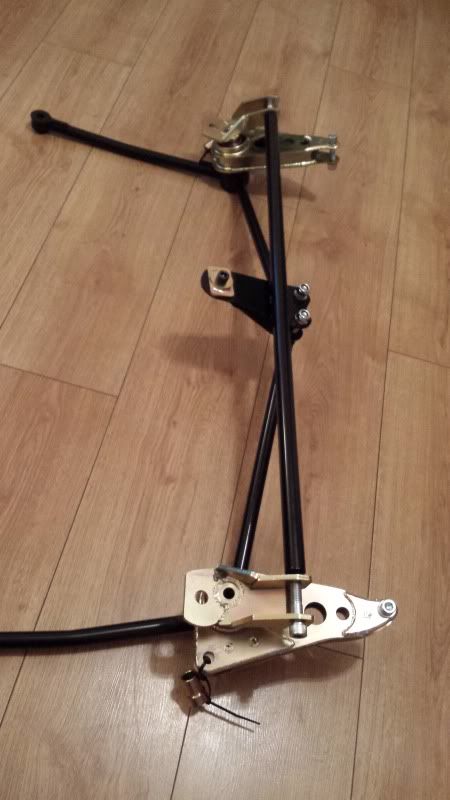 My dampers and springs will be here next week and I have been asked to do a full fitting guide so will show all details then.. for now im just happy its back on its wheels.. but it needs to go lower!! 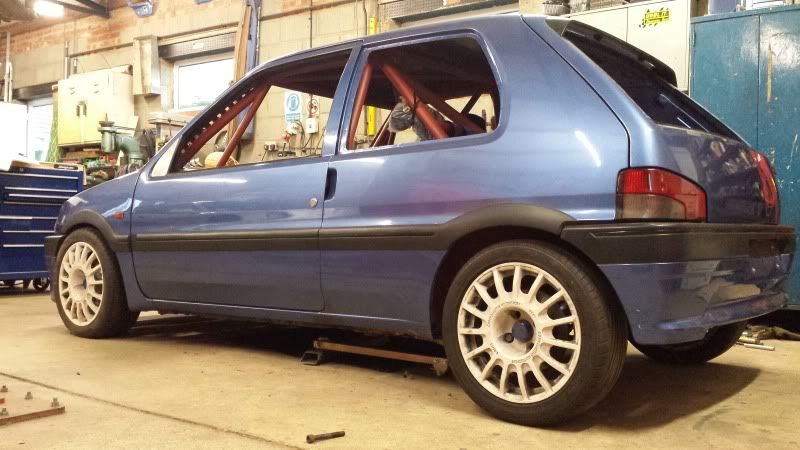 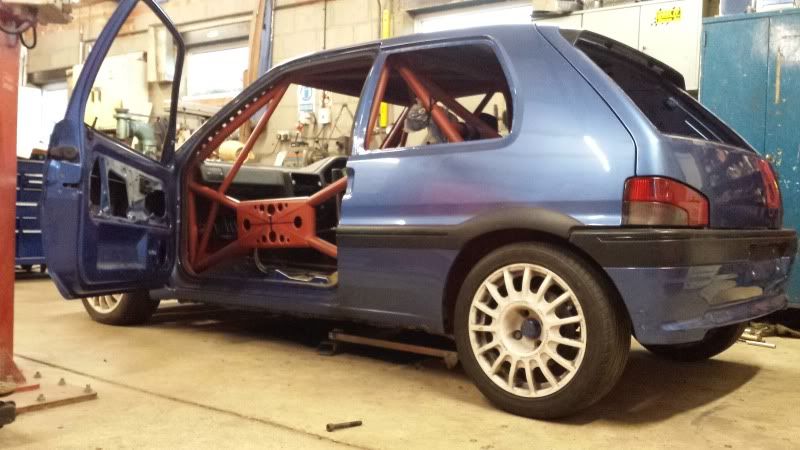 Massive thanks to Dave and Col @ Satchell Engineering and also Ed @ Penske suspension... xmas has come early.... 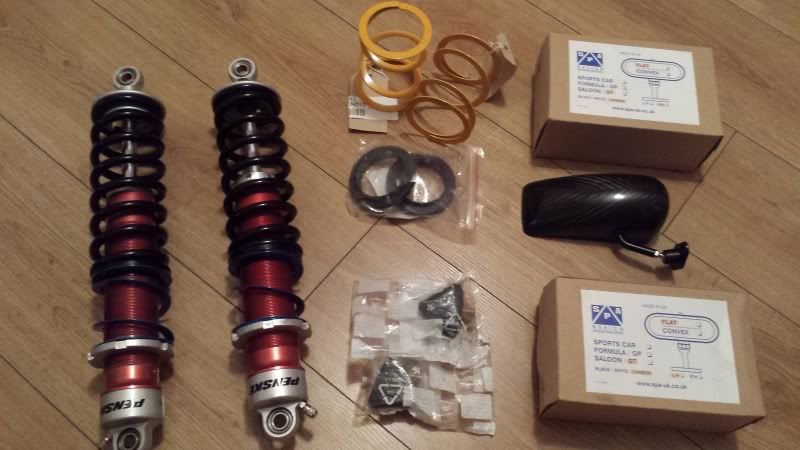 Penske dampers are now mocked up with mains+helpers+joiners helpers+joiners have arrived for the fronts 2 new Peugeot bumpstops and some new mirrors 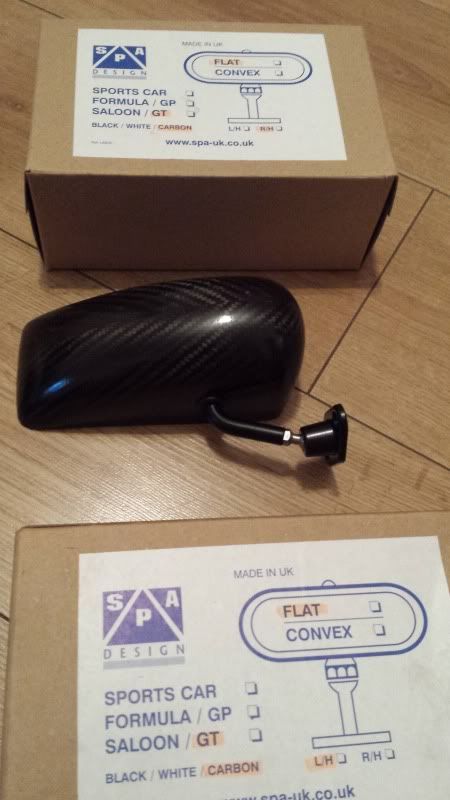 now, I`ll say this now before someone trawls up an old post of mine.. I`m not a fan of carbon, I consider it nowt more than high tech straw and toffee, however!!!! when the right beast at the right price comes along ya get get on and ride it!! thankfully there a purposeful dull/matt finish rather than that hideous uber shiny stuff. |
|
| Auteur: | davenport [ Mardi 27 Mai 2014 19:16 ] |
| Sujet du message: | Re: English 106 xsi |
    that moves like this!!: http://www.youtube.com/watch?v=yRH8d3DYsUU STILL not happy with the rear ride height so next trip to the shop will sort that, set the droop, fit springs, rework exhaust hangers + backbox and declare the arse end, finished!! a few little jobs that I had been avoiding.. #1 getting its arse down...  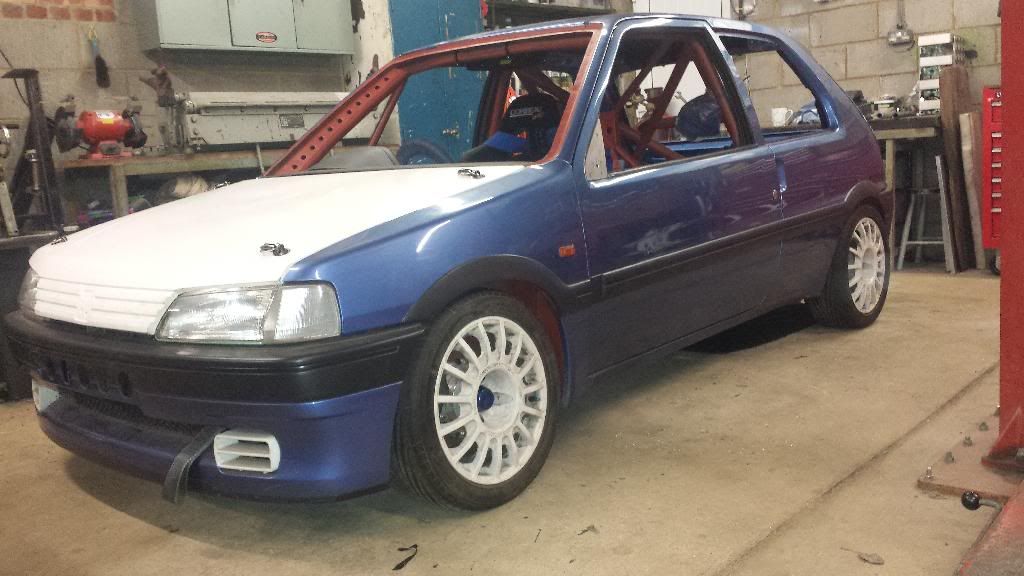 personally I think I`d prefer a bit lower..... but anyhow.... #2 rear view mirror: 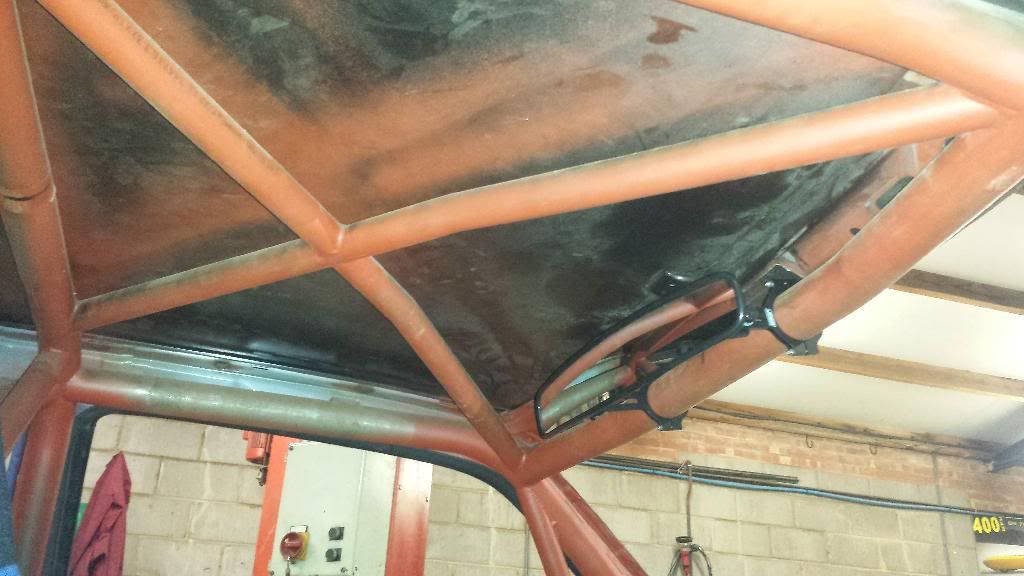 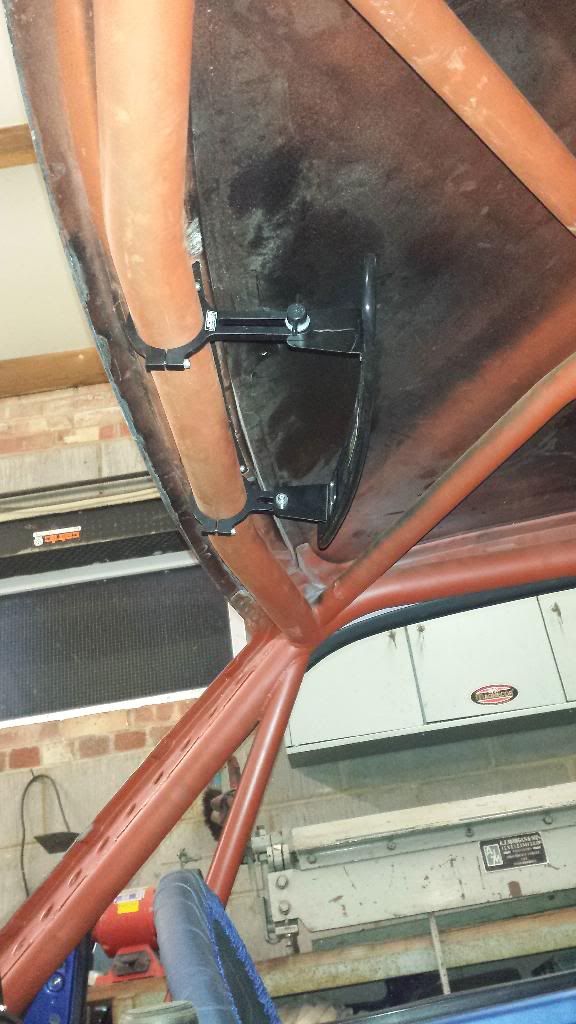 this wasn`t as easy as I`d hoped and just as much of a twat as I`d feared.. the cage bar sits against the shell so using the clamps supplied with the curved mirror was gonna be a PITA, however with the trusty dremel, a hacksaw blade several files and LOTS of foul language relieved a bit of shell and it was done.. WIIIiiiiiiiiiiiiiiiDDE field of vision !! I can see out of the passenger 3/4 window right round the back and even my own receeding hairline and the fear in my eyes... #3 door mirrors: 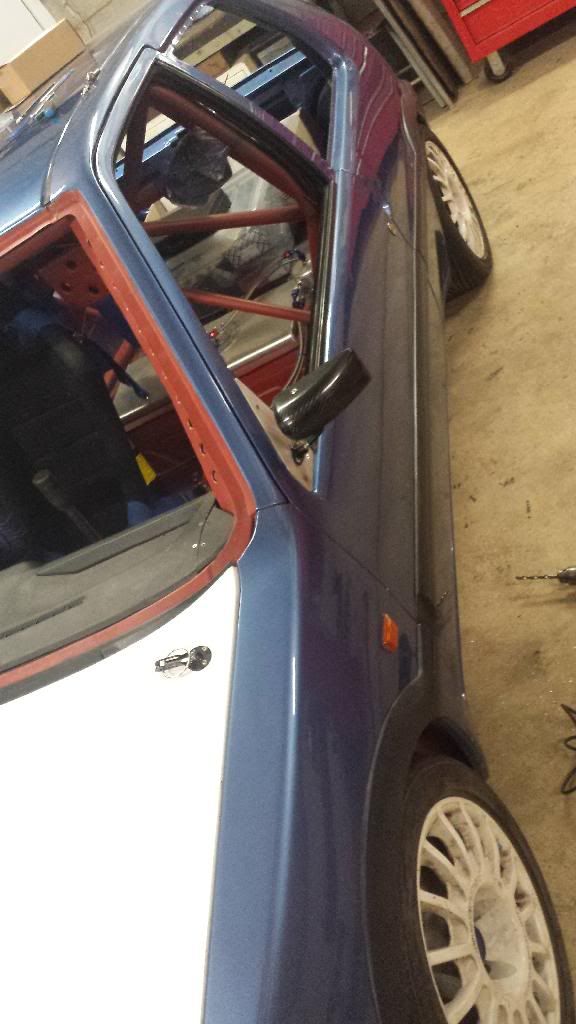 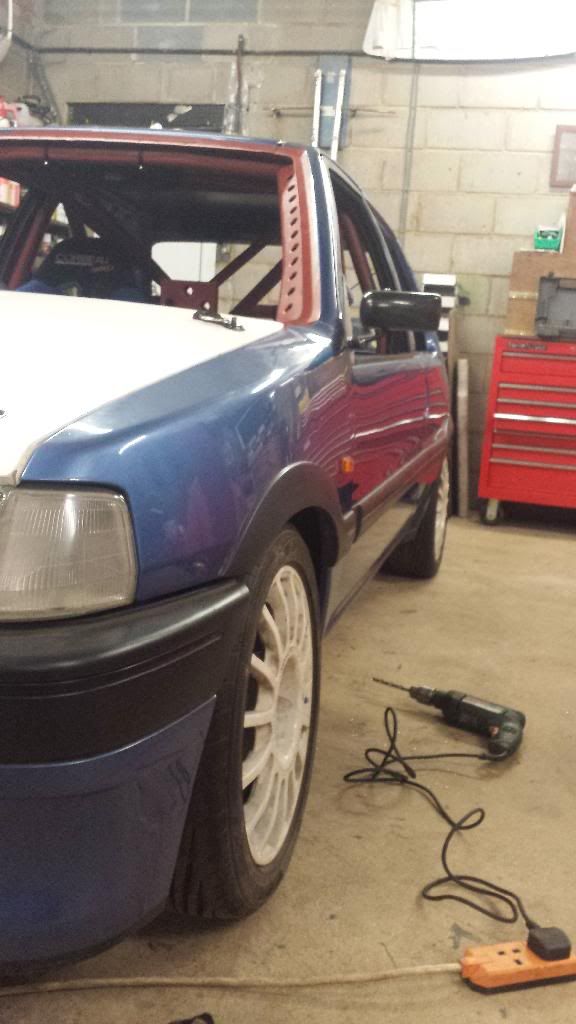 so happy with these!! (even though they are carbon) I always thought these diddy mirrors looked a bit lost on saloon cars, even small ones so these bigger beauties fit the bill perfectly for me, they even have 100cm2 or something so there legal too, WIN!! with the rattlebox having donated its rear calipers to the clio I needed to address the issue.. sourced a set of Mathais for a good price, nothing seized or bust, a good start point! 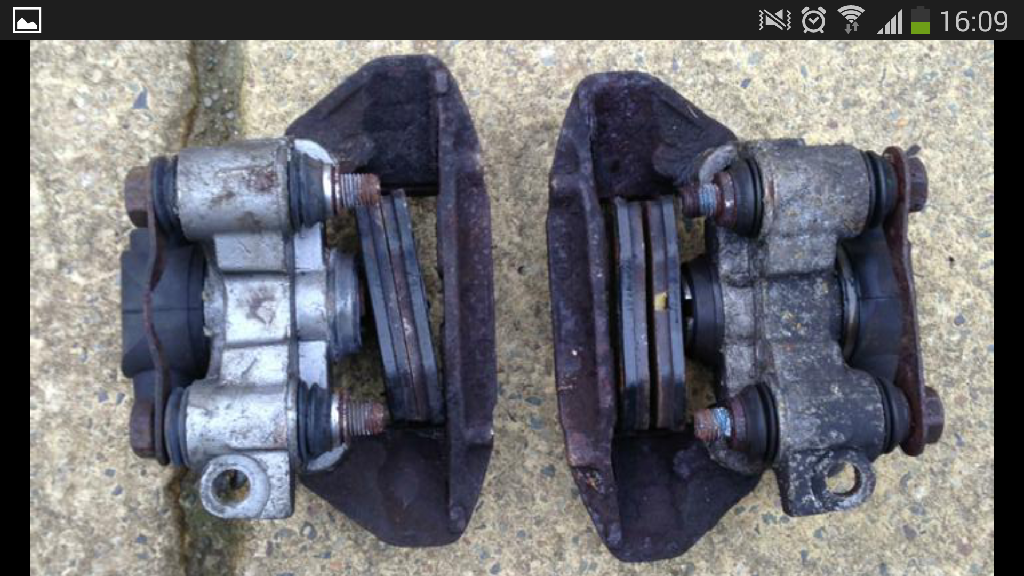 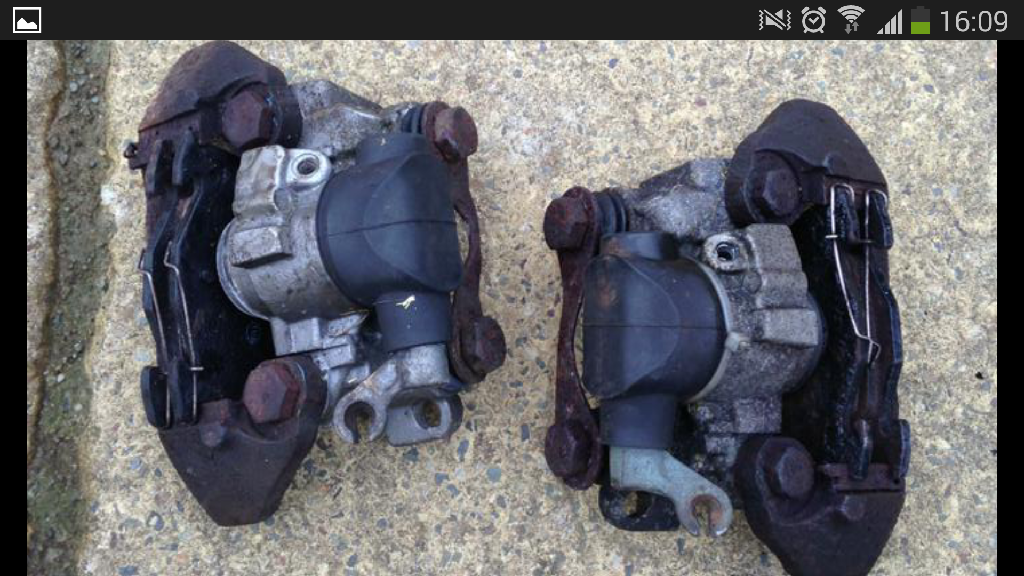 these were promptly took to bits, the holes bunged up and blasted: 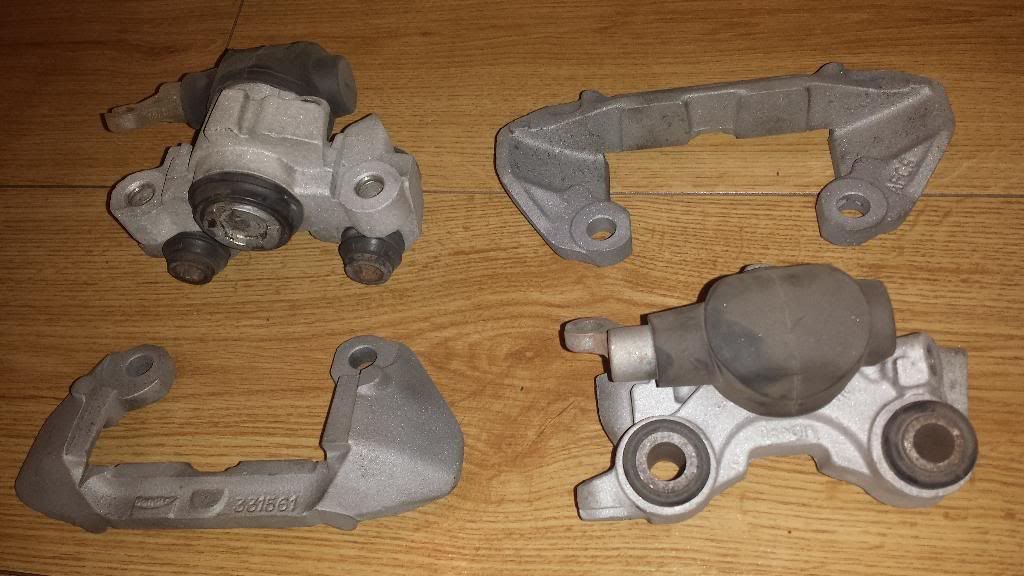 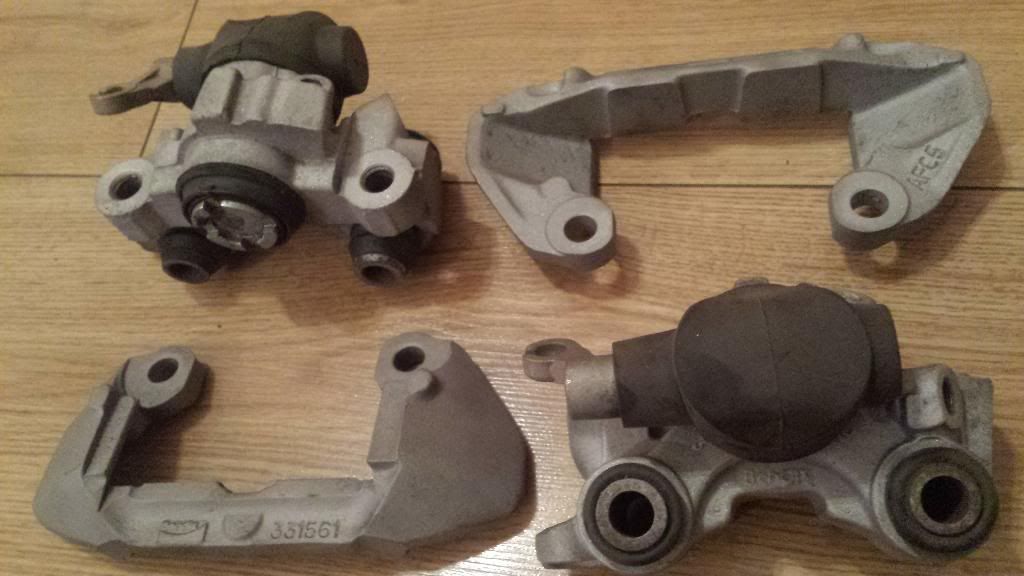 things were looking good, but the bolts that hold the carrier to the all body were pretty shot so I decided to get some new`uns.. a bit of investimagating determined M12 x 1.5 - 27mm long.. the local fastener place only had std or mega fine pitch so ebay!, ebay always has what ya need don`t it?? and indeed they did!! 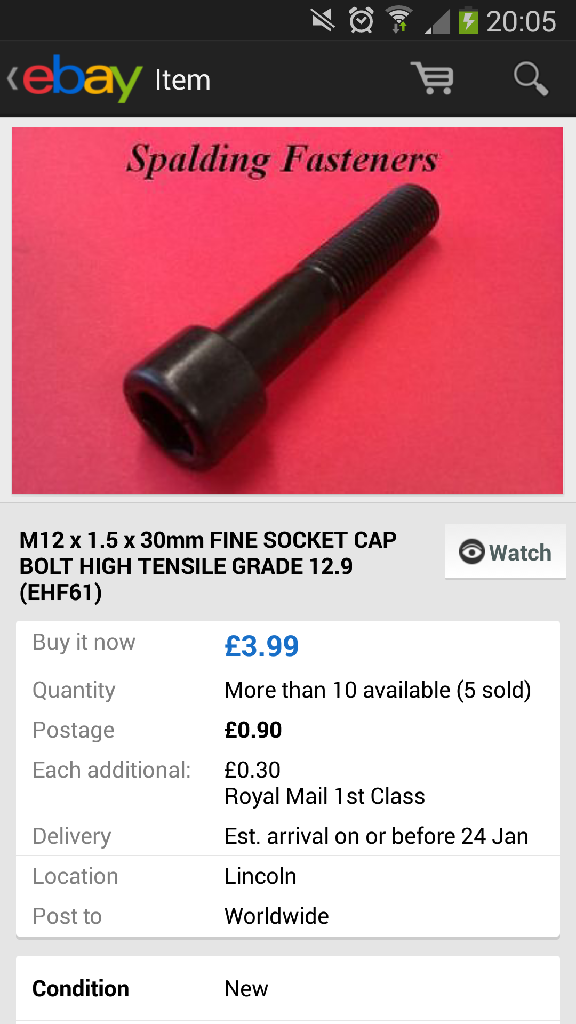 and at that price, they could ****ing keep `em.. I`ll make me own... so, into the stores at work and found some long 12.9 sockets: 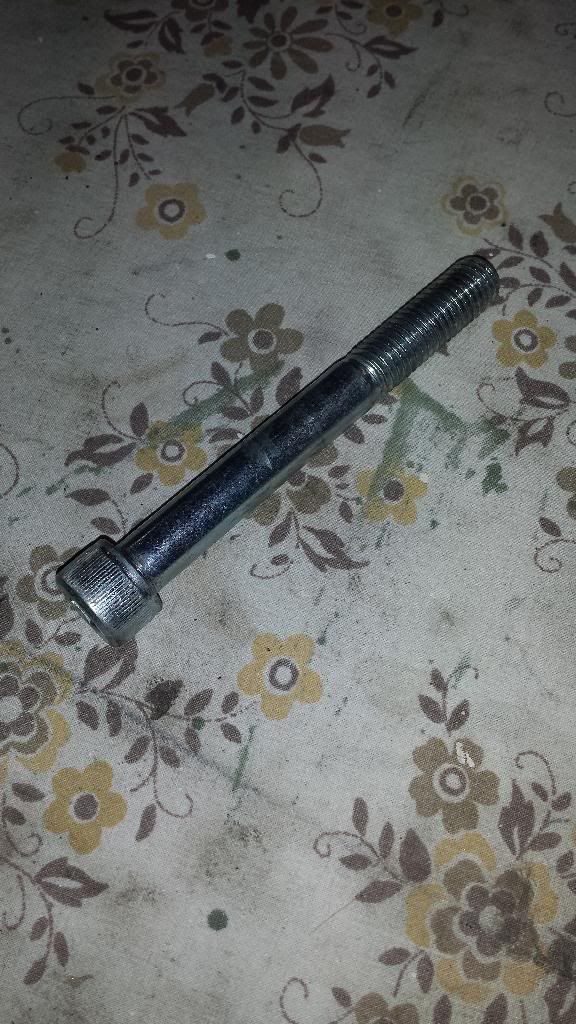 they were then attacked with the thin disc:  put in the lathe and chewed a new thread on them: 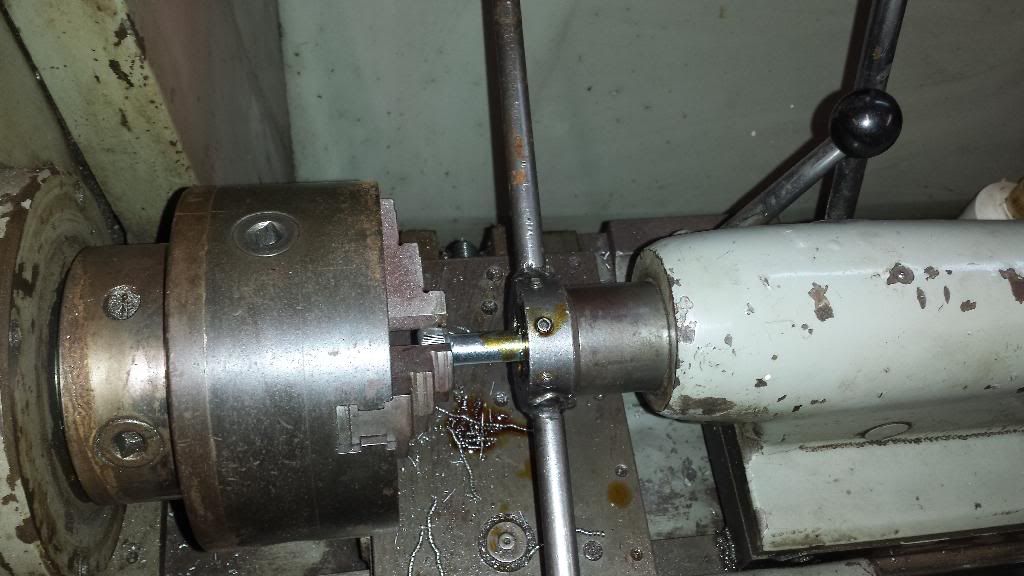 ran a tap thru the ally bodies to clean out any left over threadlock/blast debris: 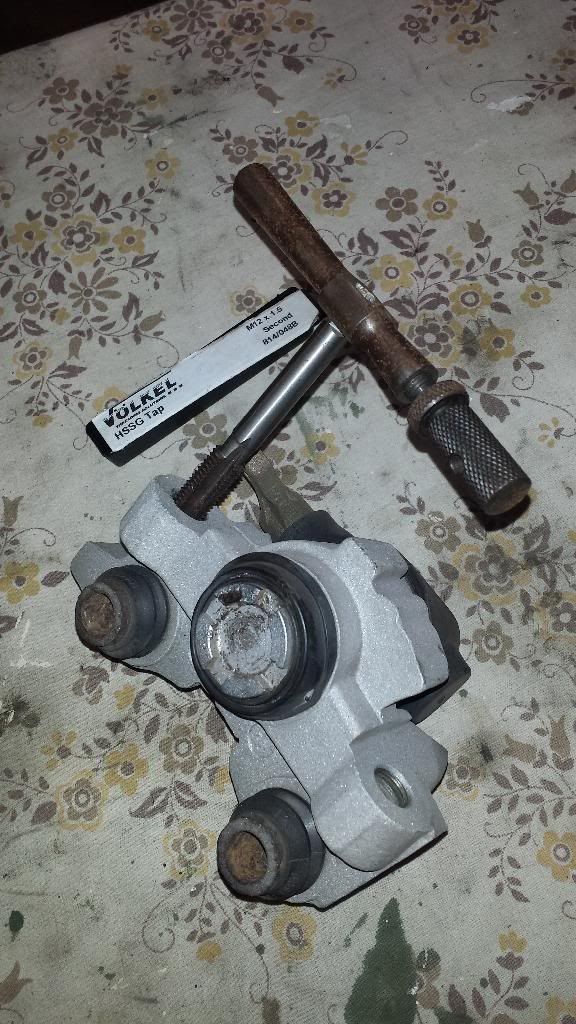 the carriers have been treated to a BZP (bright zinc plated) which luckily has come back a bit dull so they look nice and subtle: 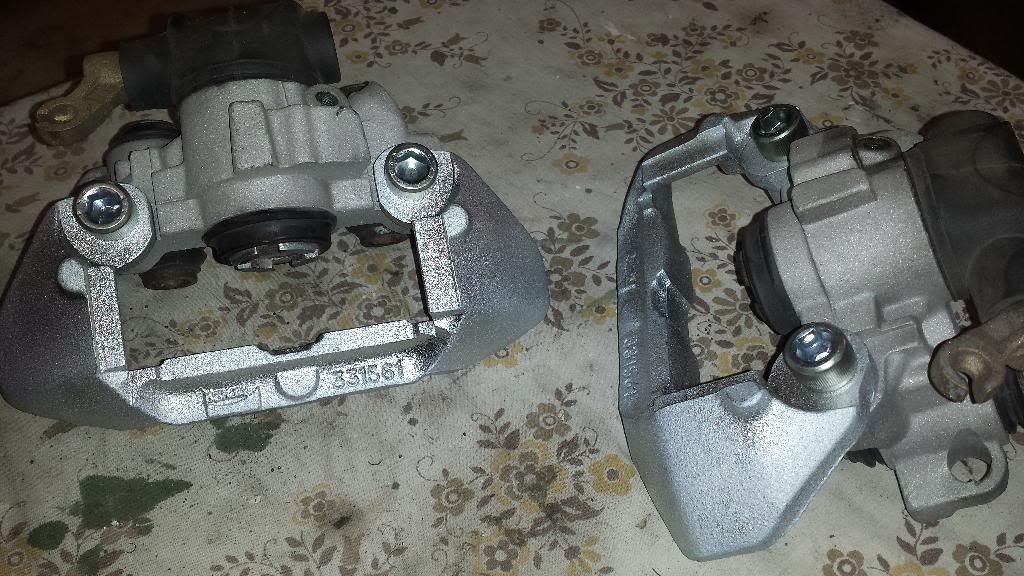 new sliders/seals/pad retaining clips have been ordered from BOSCH in zee germanland, knowing there ruthless efficiency they will be here early next week and I can cross these off "the list"... following on from a thread I started regarding CNC pricing you can probably guess whats been on the agenda.. After a friend of mine spoke to me after a set of top mounts like mine I figured it was the ideal opportunity to sell mine (after I made a new set of turret tops for him) 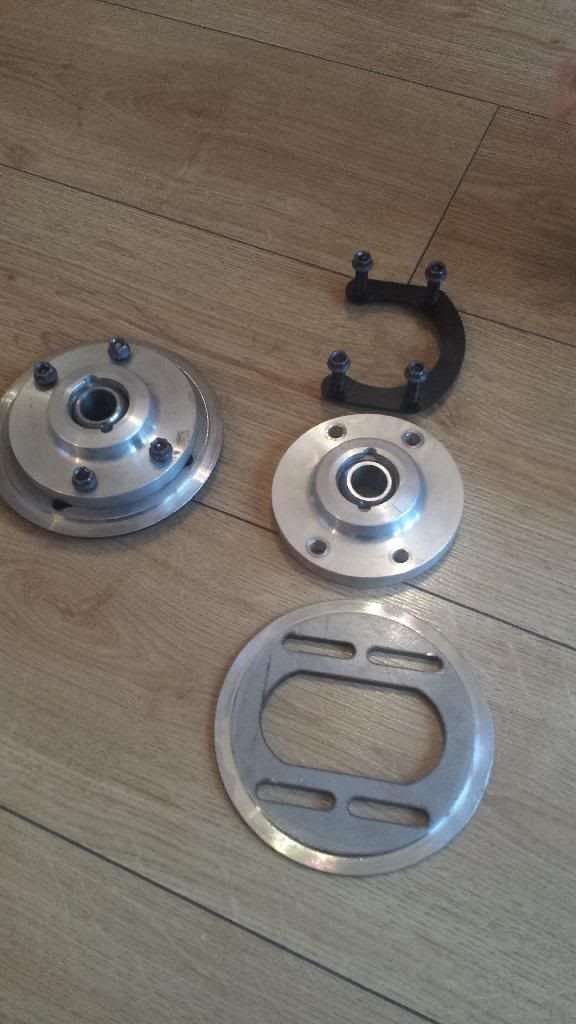 and press on with the 'trick' items.. |
|
| Auteur: | davenport [ Mardi 27 Mai 2014 19:18 ] |
| Sujet du message: | Re: English 106 xsi |
With the design fully completed:  and a jig made to drill the new 6 holes and the 90mm centre hole (this will also allow me to change springs thru the top saving a lot of time and work) 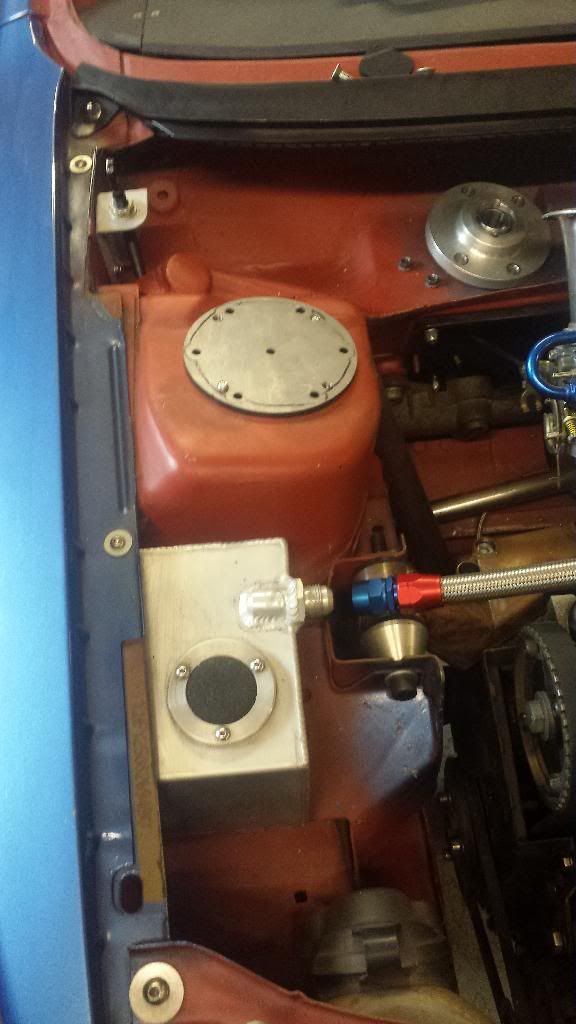 a few cnc companies ignored my emails.. a few came back with ££££££ quotes.. eventually a couple came back with viable options 1 of which I have dealt with before and know his quality is always good.. fingers crossed I should have them in a few weeks... the turret tops have been modified (again) to accept the new billet topmounts, the reasons being I no longer need camber adjustment as that's done on the strut/hub connection of the satchell front end and I also liked the idea of being able to swap springs quicker and easier by bringing them thru the top.. so.. a bit of welding.. a bit of holesawing.. a bit of drilling and hey presto!! 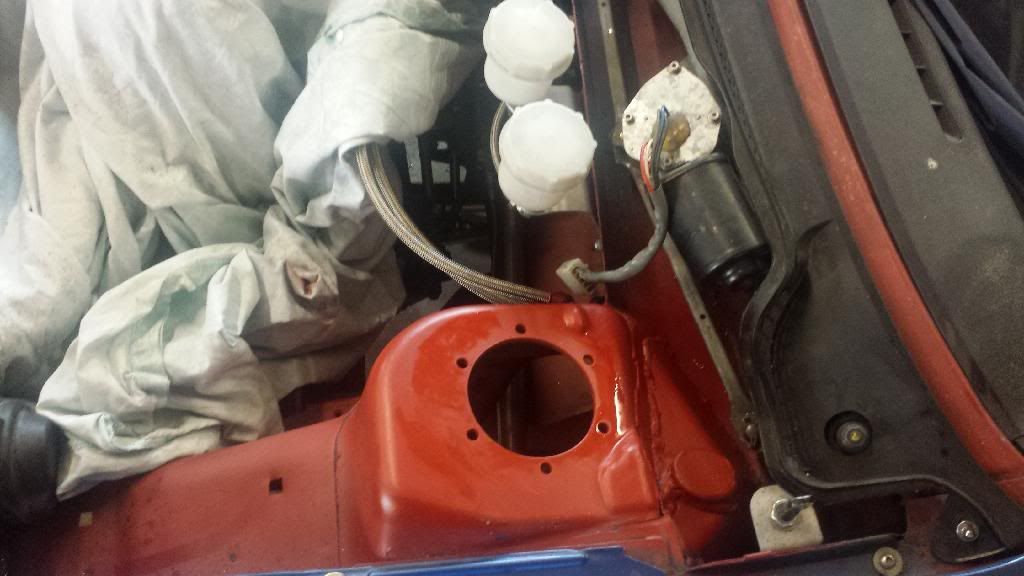 which allows me to do this 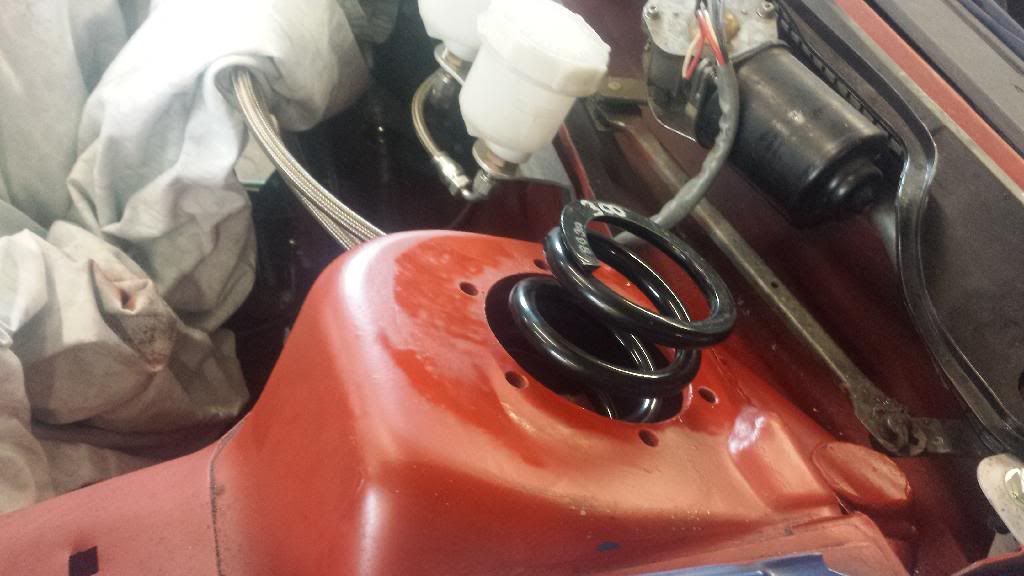 all I needed then was the billet!! they weren't finished before we went away so my efforts were directed to the dampers - the Bilsteins are LOOOOooong ol buggers and have a lot of droop this causes a few issues the joints on the suspension end up having to go thru a LOT of articulation and driveshaft lengths change quite a bit not to mention the handling issues it also introduces.. so, I popped over to see "the man... the myth... the... ENIGMA!!" that's is Colin: 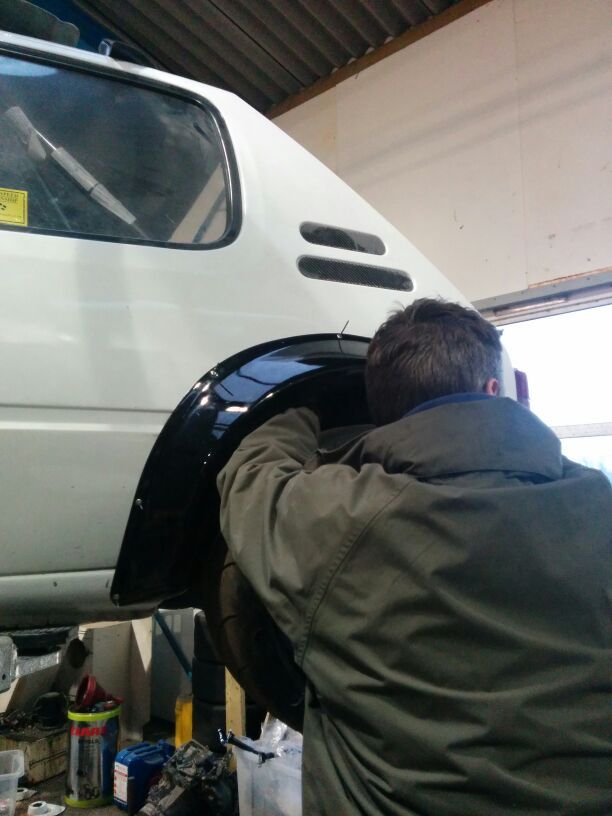 not only him but also Dean/Dave and as luck had it Sandy.. while chatting away Dave kindly did this: 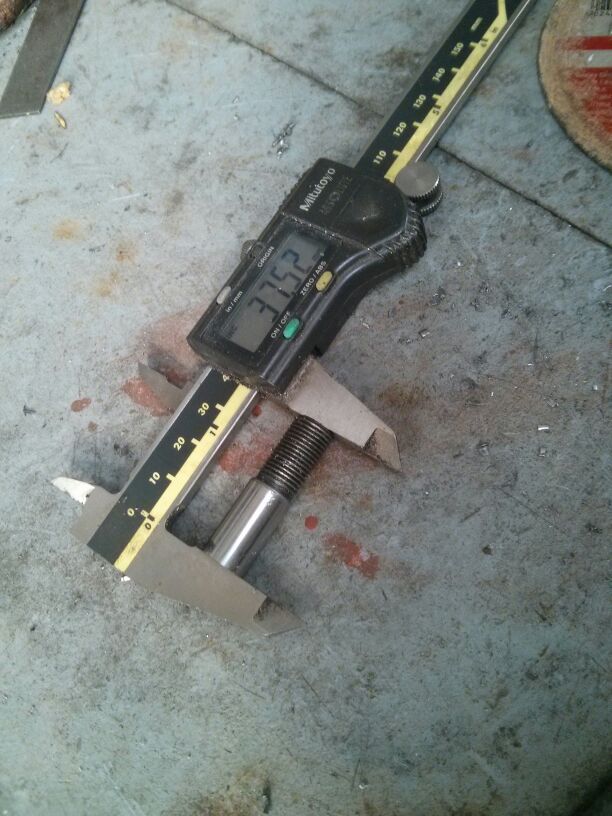 and rethreaded the end.. HERO! I spend a a few more days doing stuff like this:  then came home.. (gotta say the NEW 308`s are pretty cool, the touchscreen dash is funky, they`re comfy and despite being gutless it did a 1000+ miles at over 55mpg) *cough* I then bought a 307 family car *cough* got an email to say the topmounts were finished:    new bearings pressed in: 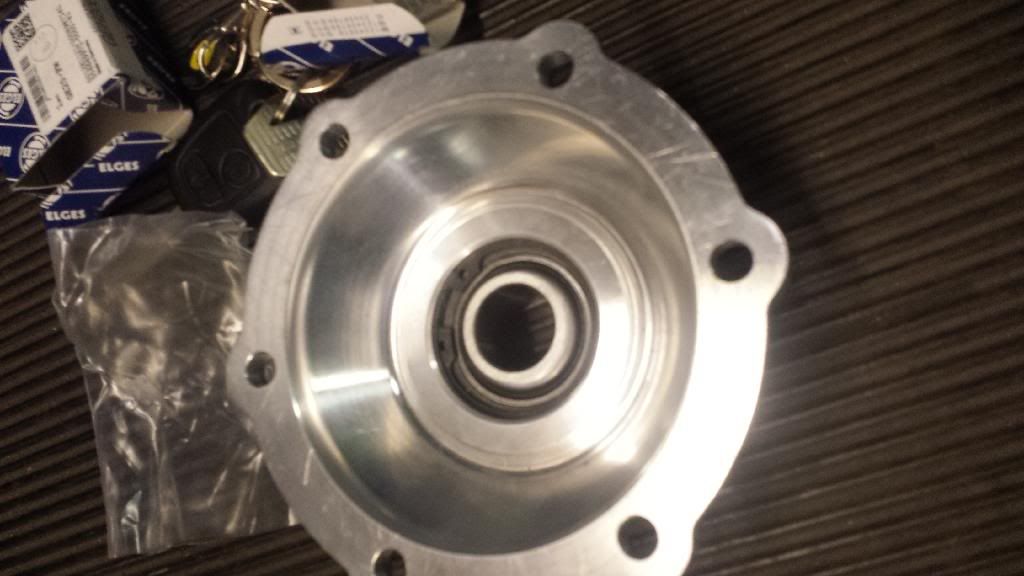 a MASSIVE thanks must go to Andy @ Kaitech for these, I didn`t request it but he even mirror polished them bless him.. and that's about where I`m up to.. the front end can be rebuilt and driveshaft lengths reset AGAIN!!! for the new reduced droop and hopefully finished this time... much love, and again a big thanks to Col/Dave Vanstone @ Satchell HQ and Andy @ Kaitech precision... Dash panel was collected from the harness manufacturer that was supposed to be sorting it all out... 12 months and F**K all to show, so added to the 16 months wasted at "expert #1" makes over 2 years of lies/false promises/bullsh@t... Anyhow. . Reinstated this: 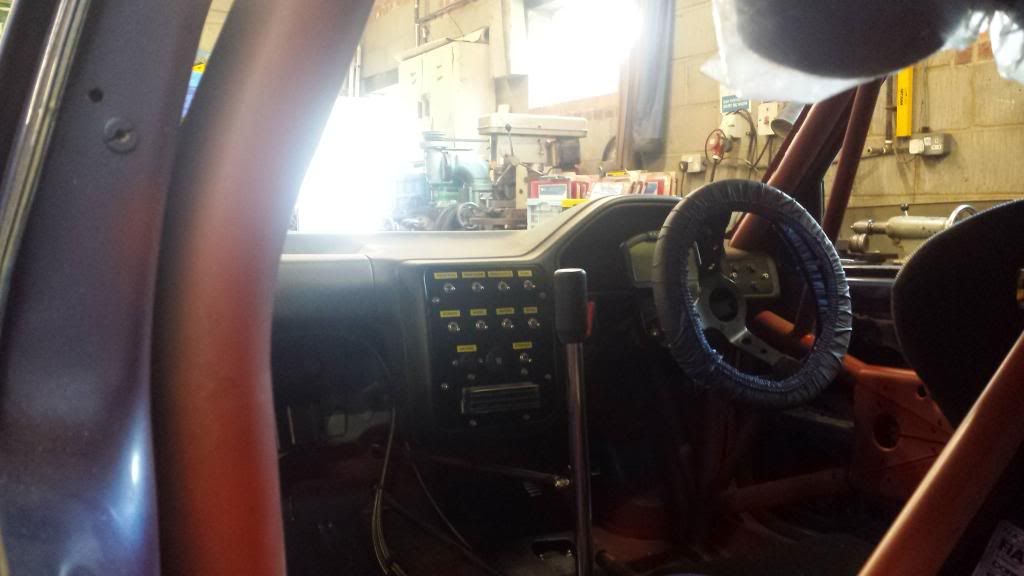 also after a quick chat with the potential 'new' harness maker the relay boxes are getting relocated but I'm still faffing with a bracket on that... Shortened inserts are back in the struts.. 2nd turret top has been cut/welded/drilled/smoothed/primed and the suspension refitted: 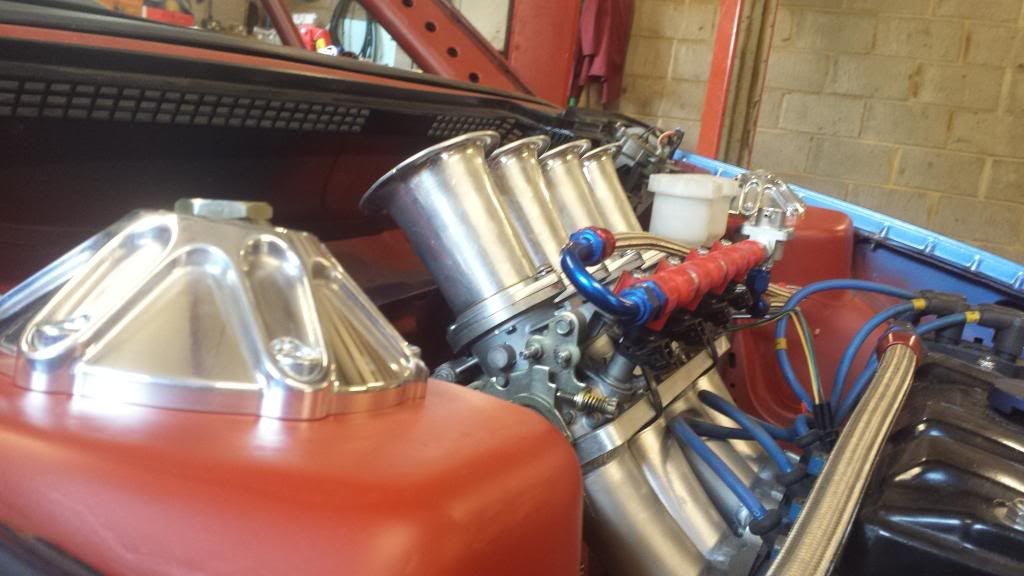 a few people asked if there was actually any bonnet clearance with these.. Heres some proof... http://youtu.be/FTaakVT9Hd4 Loadsa room!!! Also got myself a Vband assembly for the rear section.. still undecided on tailpipe though.. My head says keep it simple.. straight.. clean 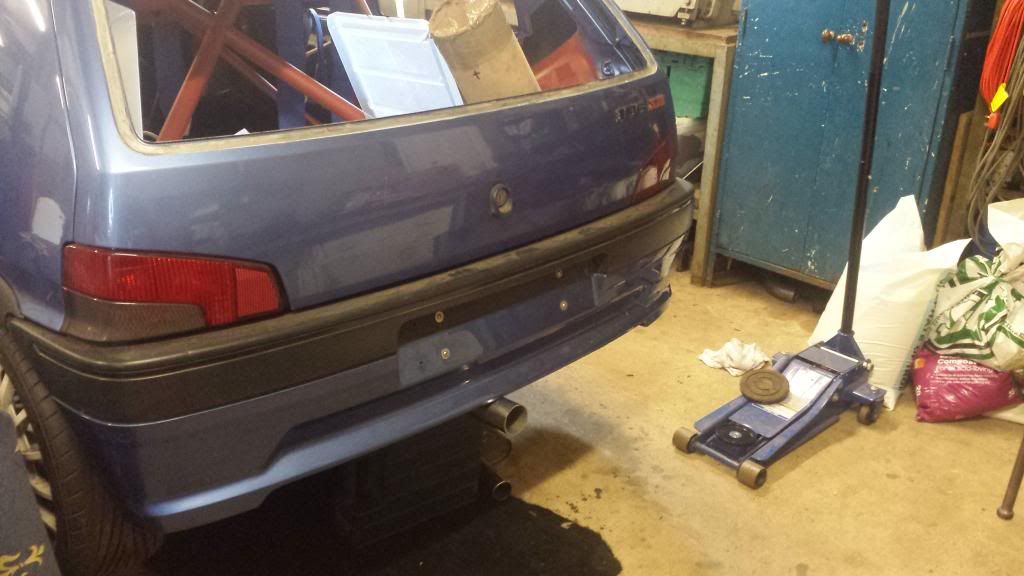 My heart says downswept (like Espens white 205 (shiny racing for those with LONG memories!!)) My testies however say this! 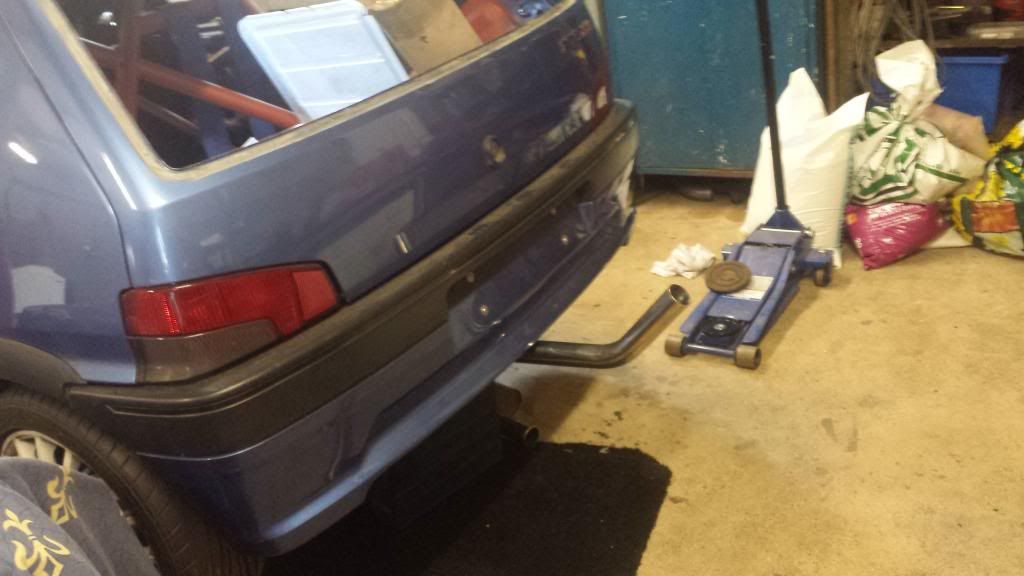 Only kiddin... well... maybe for comedy value.... needed to mount the relays up near the centre console to aid the wiring so took the opportunity to make an OTT bracket... started off with a simple 3 sided tray: 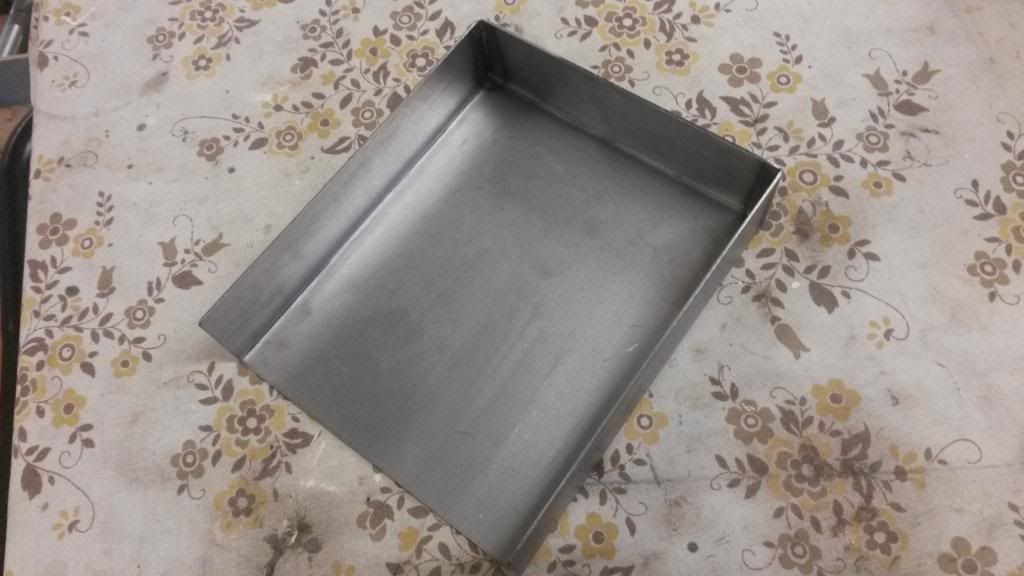 attacked it with a thin disc/holesaw/file.. stitched some M6 nuts on the back and hit it with some temporary black aerosol: 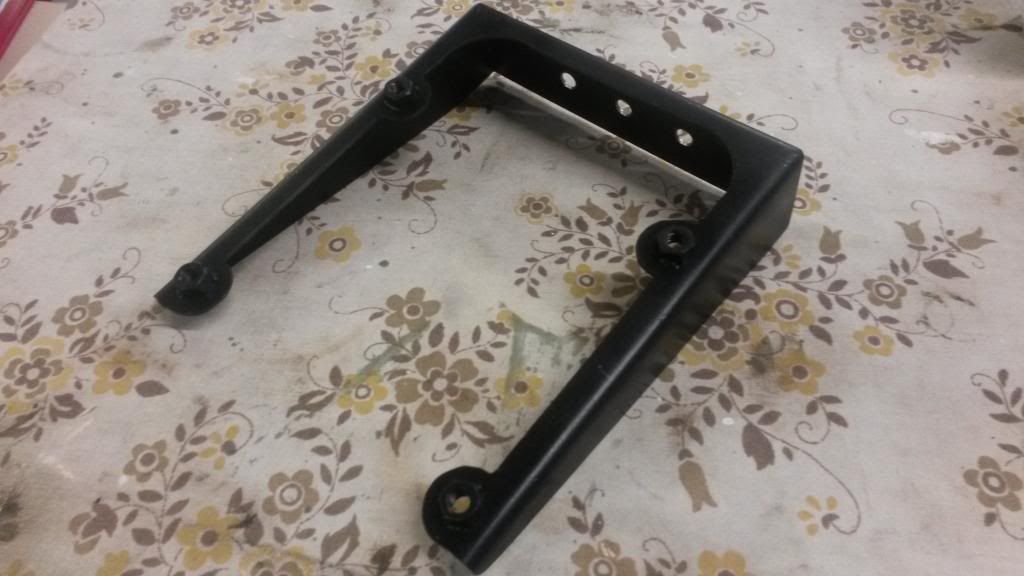 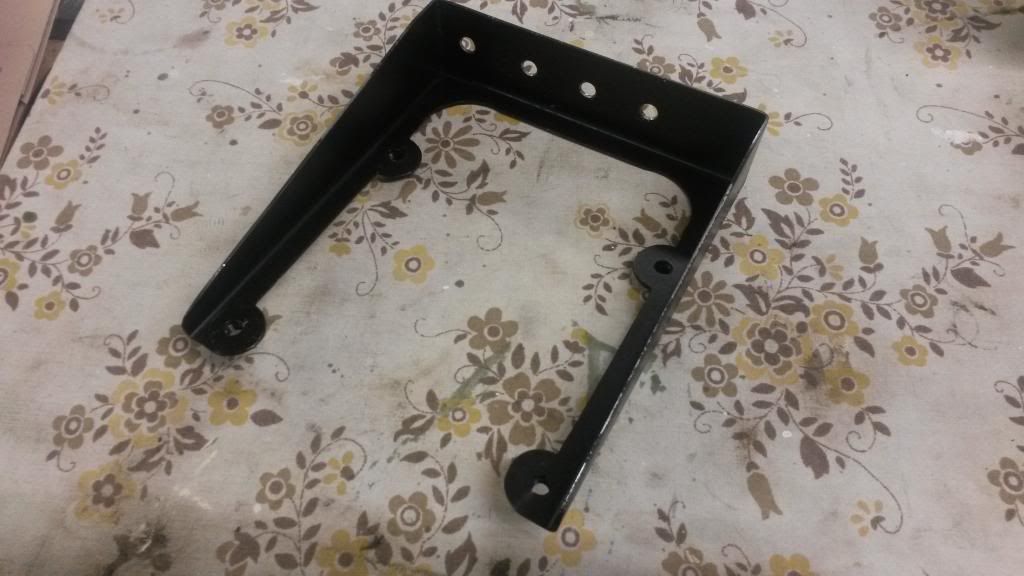 which fits all up like so: 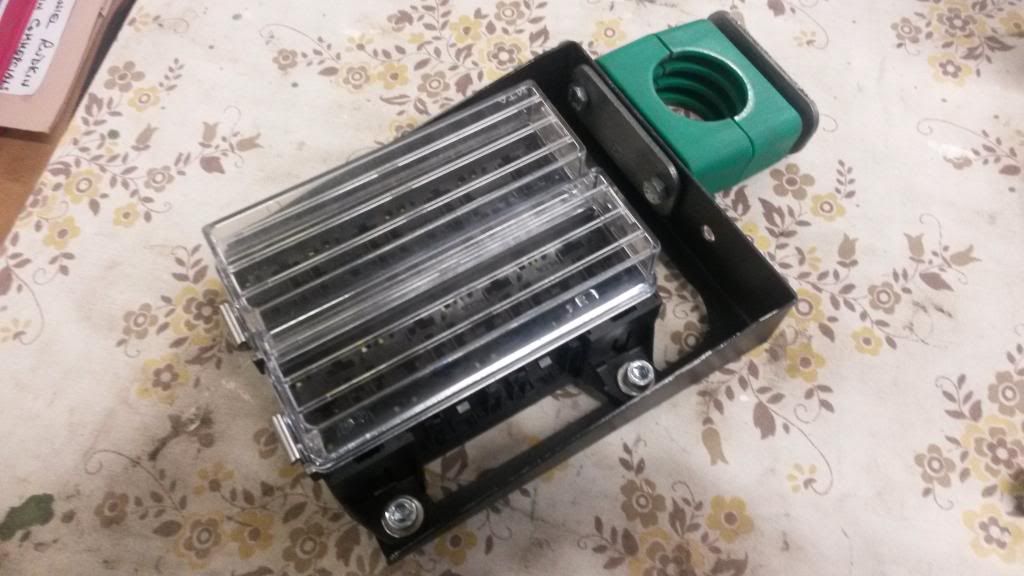 and mounts up here: 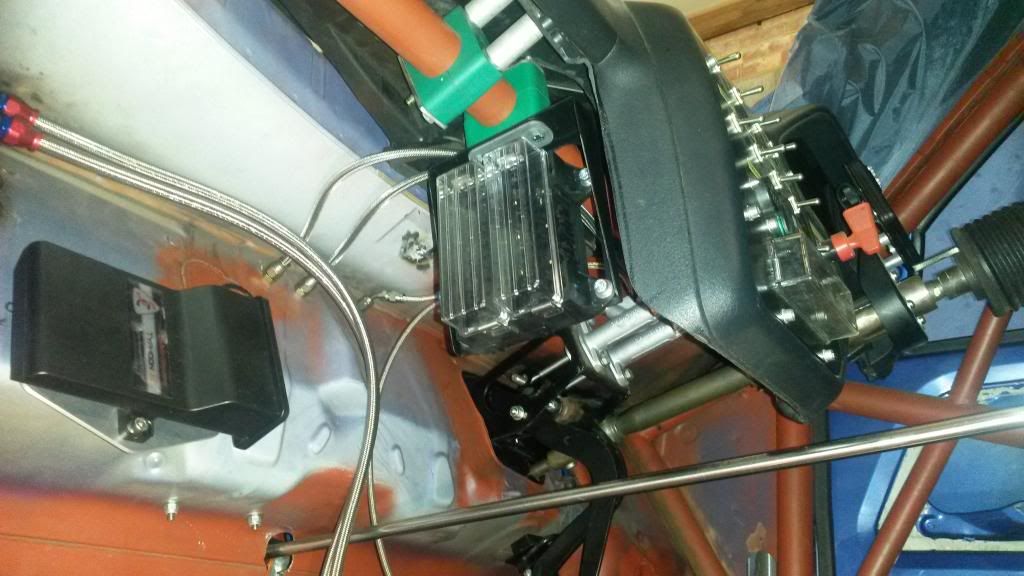 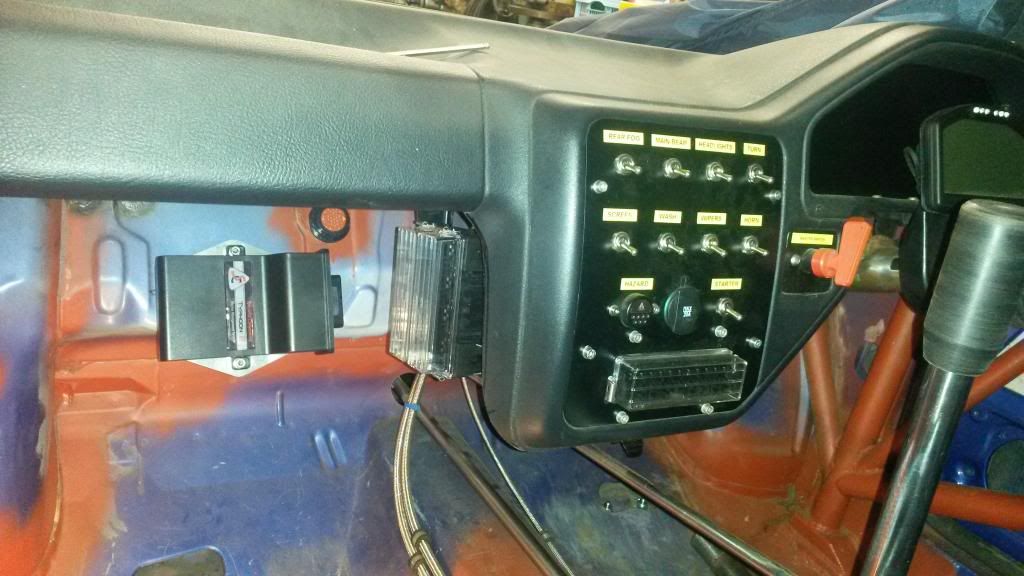 many thanks Stu |
|
| Auteur: | tibb69 [ Mardi 27 Mai 2014 21:15 ] |
| Sujet du message: | Re: English 106 xsi |
Very Nice job guy !!!! |
|
| Auteur: | KRINIX [ Mercredi 28 Mai 2014 7:03 ] |
| Sujet du message: | Re: English 106 xsi |
so beautifull work it's the first time that i see back train like this |
|
| Auteur: | BoOst [ Mercredi 28 Mai 2014 8:00 ] |
| Sujet du message: | Re: English 106 xsi |
nice |
|
| Auteur: | davenport [ Jeudi 29 Mai 2014 19:31 ] |
| Sujet du message: | Re: English 106 xsi |
thank you very much for the kind words.. |
|
| Auteur: | davenport [ Mercredi 06 Août 2014 19:21 ] |
| Sujet du message: | Re: English 106 xsi |
over 30 months ago.... let me say that again, OVER 30 MONTHS AGO.. let that sink in a minute... thats over TWO AND A HALF FUCKING YEARS!! over 30 months ago i tried to get the rattlebox wired, an easy task you may think (i did, originally) i mean, i approached all parties with the same brief - make it work for 2 to 2.5k.... i got nothing other than lies and bullshit, i wont name names but if you read the blogs you`ll find out at least 1 of them, during that time my circumstance have changed, i`m now a dad and i`ve changed jobs.. TWICE!! and tbh these changes along with all the BS and delays came very very close to ending the project but! i`m a persistant bugger, so, i went back to square 1.. i already knew of a few people, Simtek.. Si-leck.. viper.. tim mason.. but basically if you open up google and search "motorsport wiring" "motorsport harness manufacture" "motorsport loom" and write a list of all the UK places.. thats where i was.. probably only 50% of them got back to me, or at least replied with something other than, sorry, not our thing.. of those that did 99% of them either didn`t listen.. couldn`t house the car.. wanted me to make a mockup loom.. or wanted to sell me something i didn`t want!! thru the project my dads been involved with:  i had gotten to know a guy called Clayton, clever bloke, (he works for a company called Parkinsons who make harness`s for various people ranging from the MoD to ginetta) and i liked the way he approached things.. so i got onto him and after a long chat he admitted the project was too big for him to work into his already busy schedule but his mate (boss) Sean was starting up a company and might be able to help.. Emails - texts - vists to the workshop - more Emails and we had a spec (kind of) anything IN the car thinwall pvc wire raychem dr25 shrink raychem transitions/boots deutsch AS connectors anything OUTSIDE raychem 44 wire raychem dr25 shrink raychem transitions/boots and a combination of deutsch AS and DT conectors all ends tagged up with yellow ID markers.. the loom is broken down into a few "sections" basically we have: front lights+horn engine+ancilliaries dashboard (this will include fusebox/relaybox/ecu/dash2 controls/comms leads for ECU+DASH2) main chassis fuel system rear lighting its been a few weeks of working thru, finding details for ecu pin outs/speccing sensors (for which Peter @ KAsensors has been immense!!!) finding operating currents for all parts of the system but things have started to come together now: 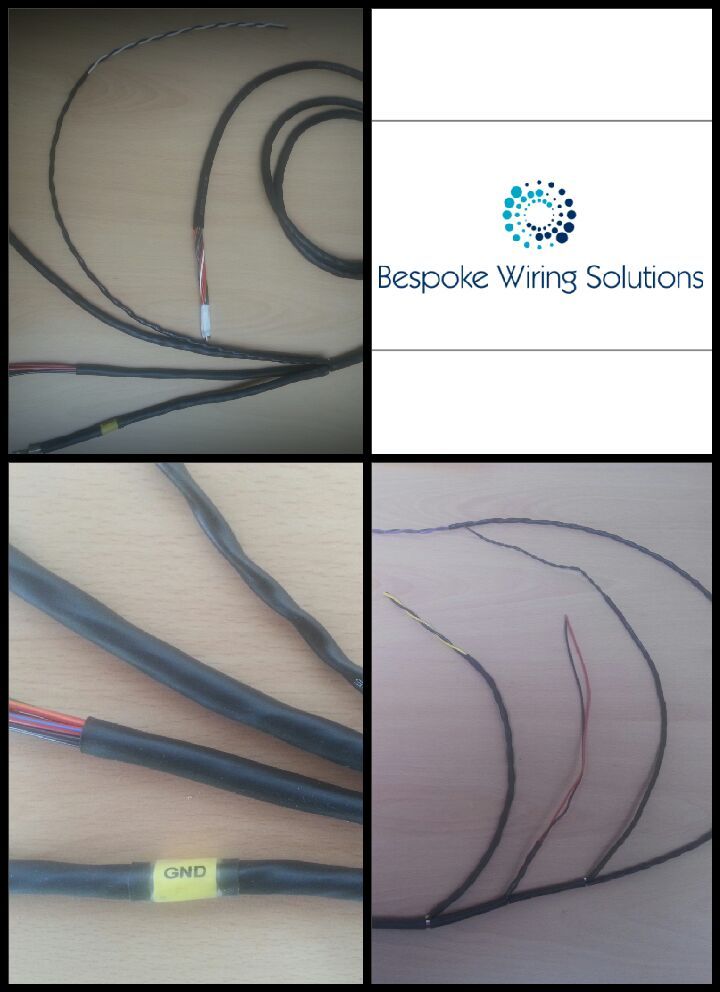 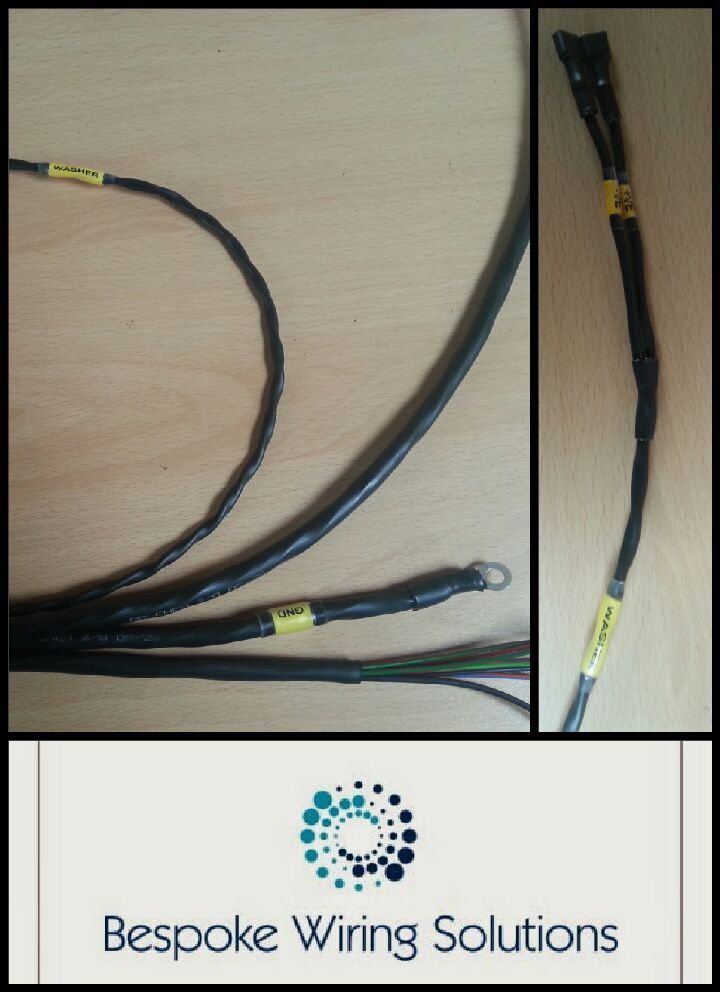 to say i`m happy is a mild bloody unstatement... a big big thankyou goes to Sean @ BespokeWiring and Peter @ KAsensors sorry for the long winded (but not that detailed) update, but i`m actually happy with the actual progress on the wiring front!!! |
|
| Auteur: | xsiOLTY [ Jeudi 07 Août 2014 16:52 ] |
| Sujet du message: | Re: English 106 xsi |
 |
|
| Auteur: | davenport [ Dimanche 17 Août 2014 7:23 ] |
| Sujet du message: | Re: English 106 xsi |
Hello... In between his day job/family holiday Seans managed to keep things progressing.. had a small issue of a deutsch crimping tool going missing in the post!! ££££££££!! But thats been sorted and hes sent over a few more piccies bless him.. 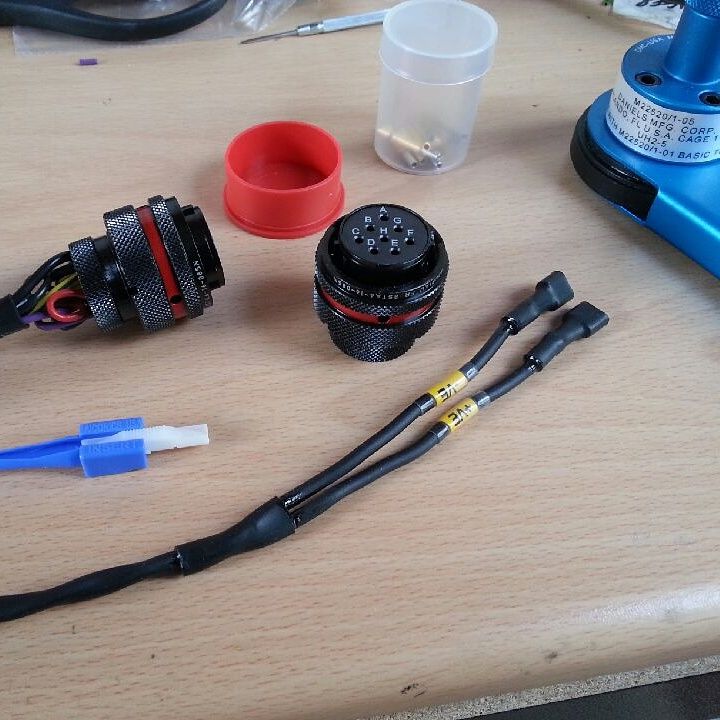 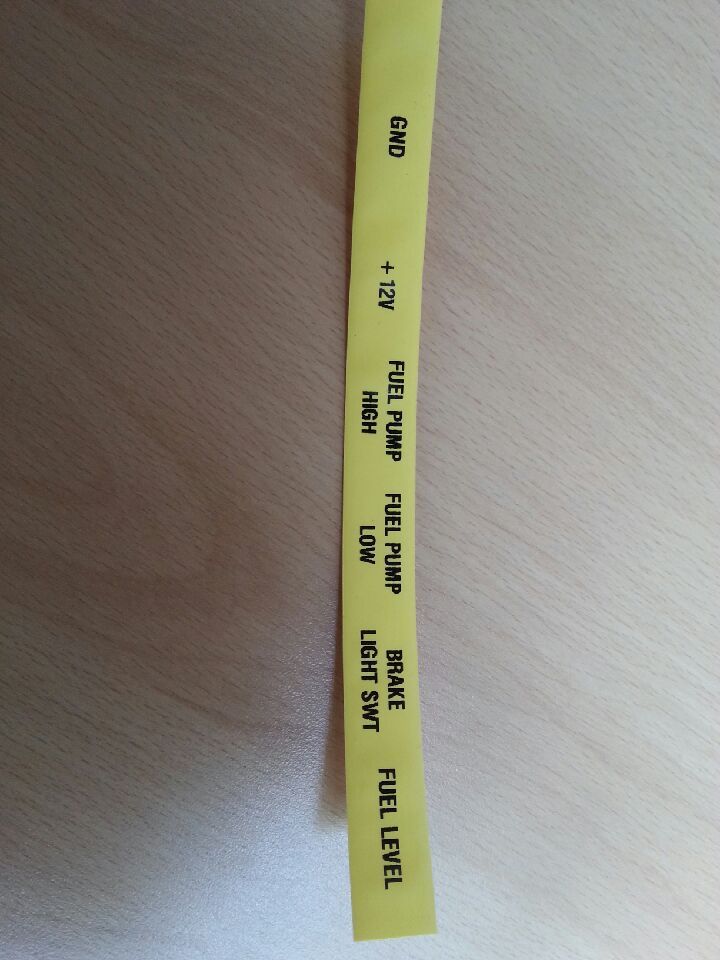 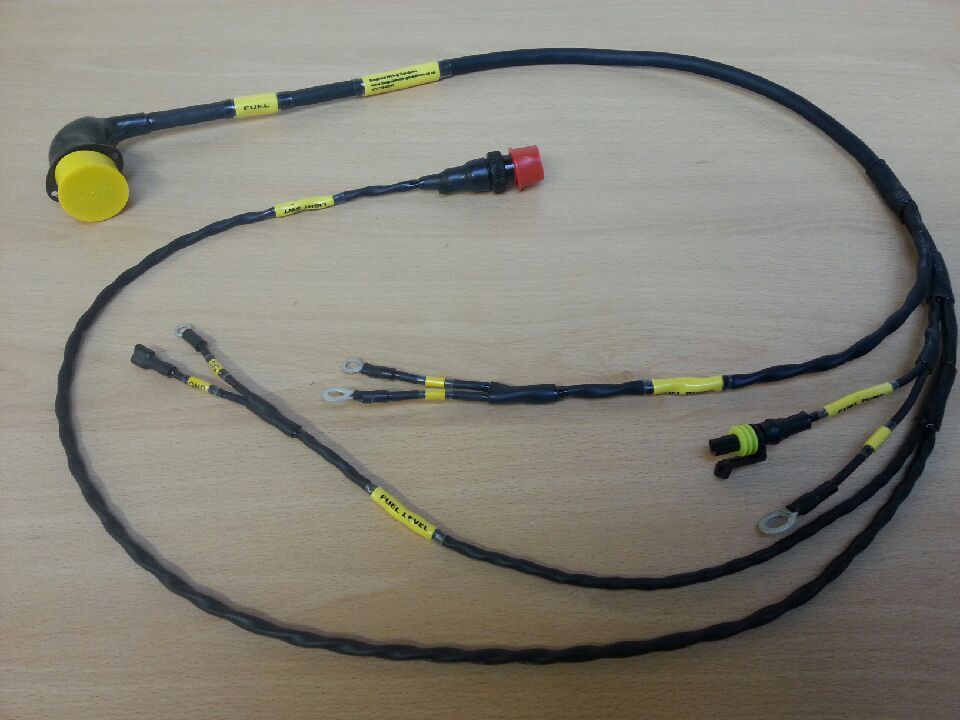 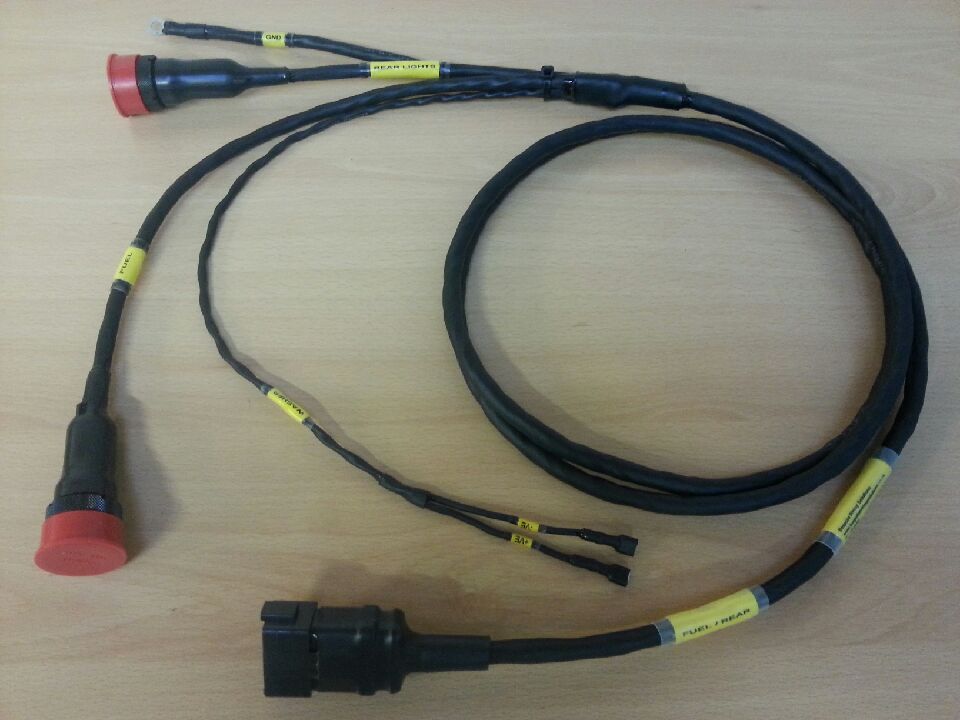 I cannot begin to say how happy I am with it.. its everything I imagined and wanted.. cannot fault his service at all.. |
|
| Auteur: | davenport [ Dimanche 26 Octobre 2014 20:50 ] |
| Sujet du message: | Re: English 106 xsi |
hi folks.. how ya`ll doin??? aint really had a chance to do much but recieved another chunk of harness (runs from under the dash to feed the fuel systems spur and the rear lights spur) so started laying them out in the car and figured i needed a little bracket to mount the Souraiu AS connector: 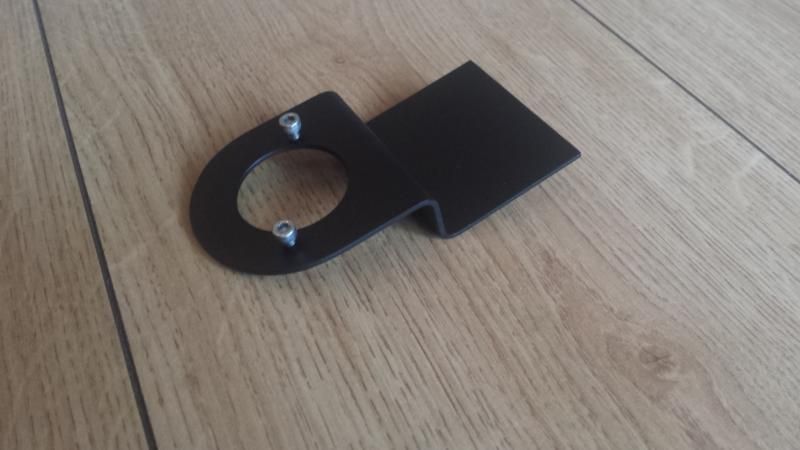 fiddly little bugger as those bolts are M3x5mm anyhow, got that made and fitted up: 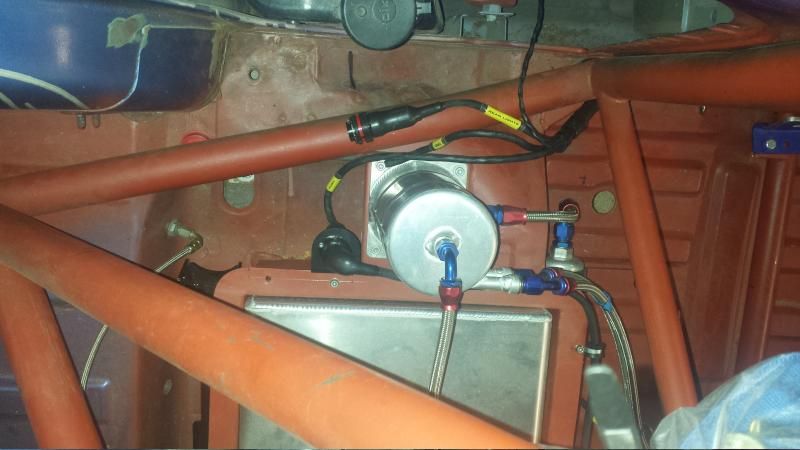 Fuel harness all layed in: 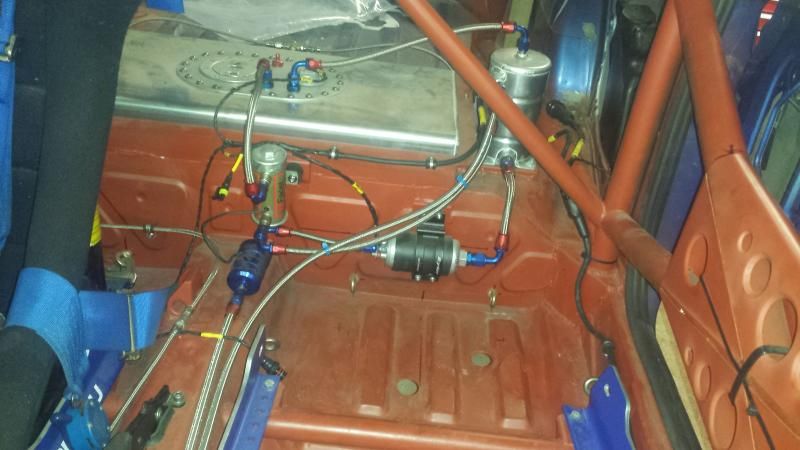 Seans been over to measure up the final bits (engine harness and the 2 small bits that will power the front lights) he`s also took the dash complete to do that: 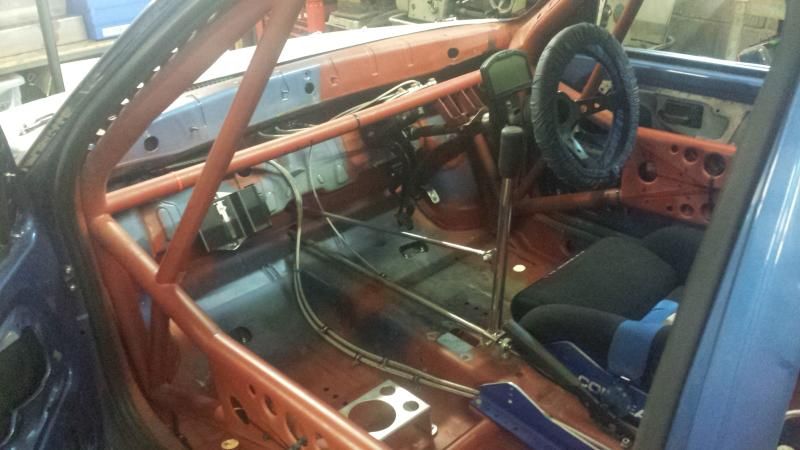 as you can see the fuel lines need pinning down, bit of an issue there, my cheap ebay nutsert tool decided to shit itself after 1.. ONE!!! nutsert, i wasn`t expecting it to provide a lifetime of service and be handed over to Jenson on my deathbed but i did expect a bit more than 1 poxy rivnut...   emails have been sent to the seller but i doubt i`ll get a refund.. probably easiest just to wrap it up in 1 of Jensons dirty nappies and post it back to them.. problem sorted with the rivnuts... i borrowed the works gun:  and just incase i had access issues in tight spaces i made up a quick ghetto tool: 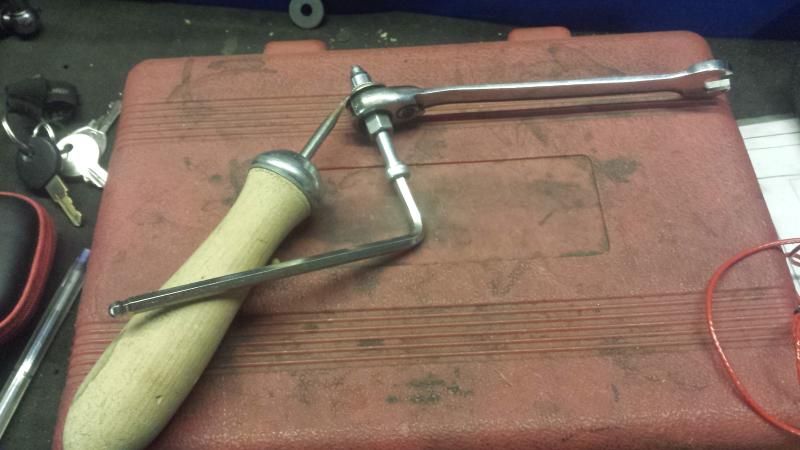 a few more hours today and i ticked off a couple of jobs that have been niggling me for a while: 4th engine mount: 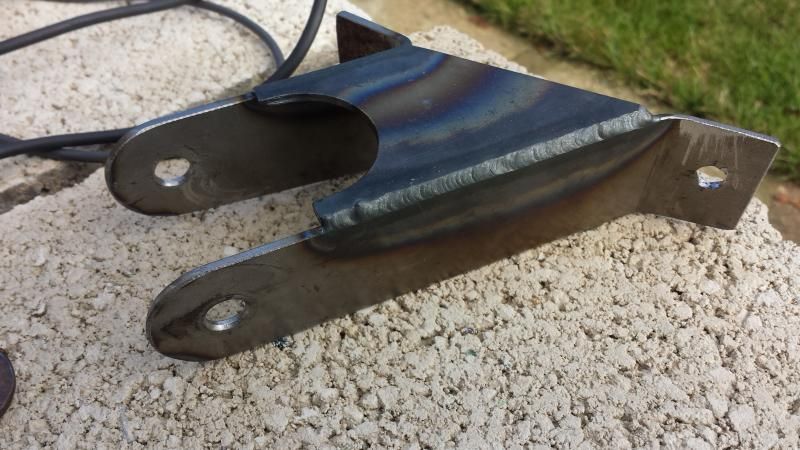 painted and fitted: 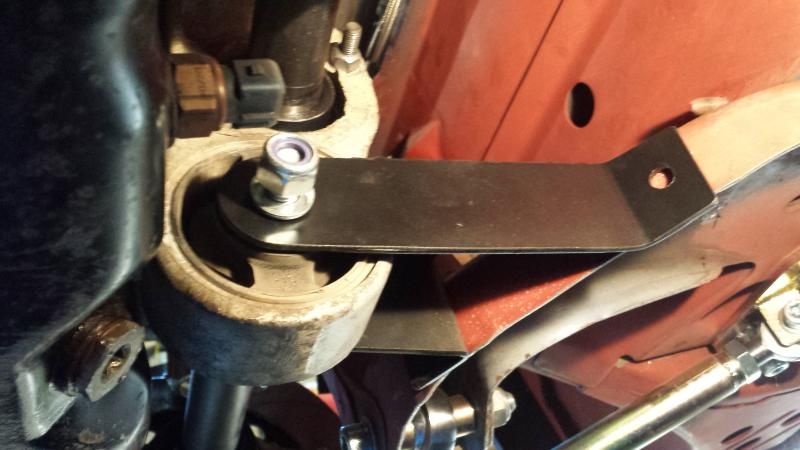 and also the wheel speed sensor bracket: 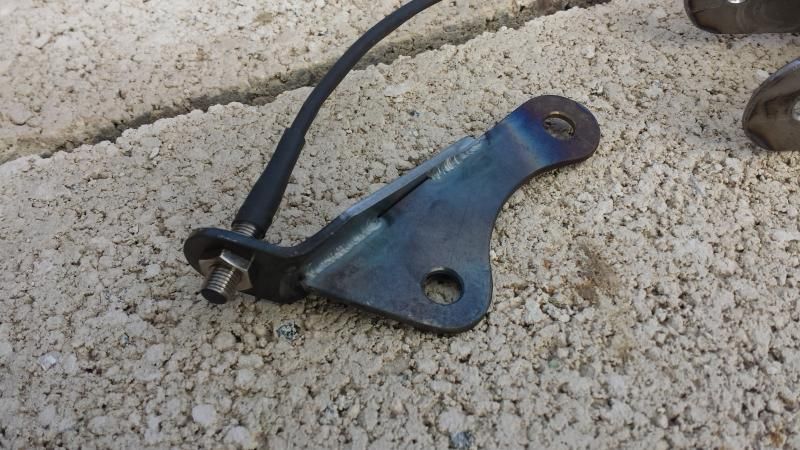 fitted up: 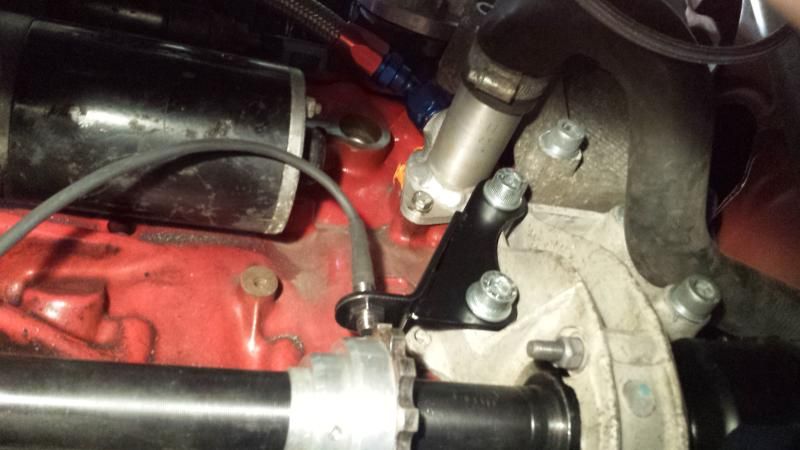 also (if you follow him on FB you`ll have seen this but another little bit of loom is just about done for the passenger side front lights: 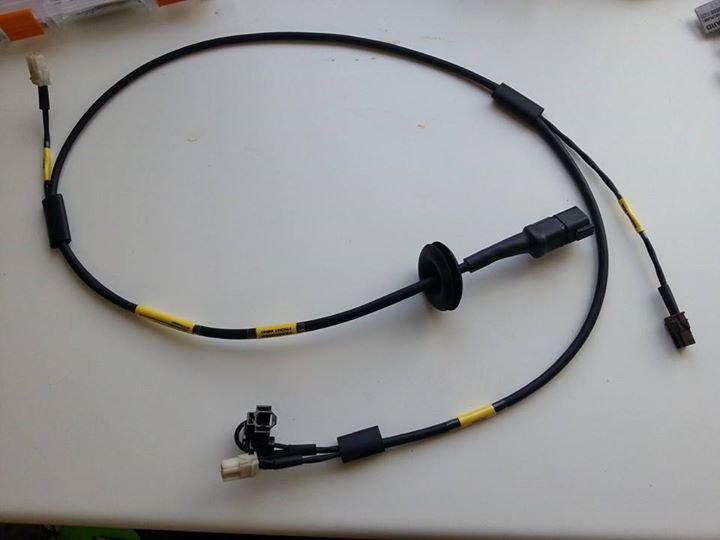 there will be another piece for the drivers side with an aditional spur for the horns, both of these pass thru the Apost under the wing and poke back out near each headlight so all out of sight More wires... 2 small sections- these connect under the dash and pass thru the Apost area up into the inner wing cavity above the liner to feed the side repeater/front repeater/headlight.. the drivers side piece also has provision for the horns located just above the bumper vent.. 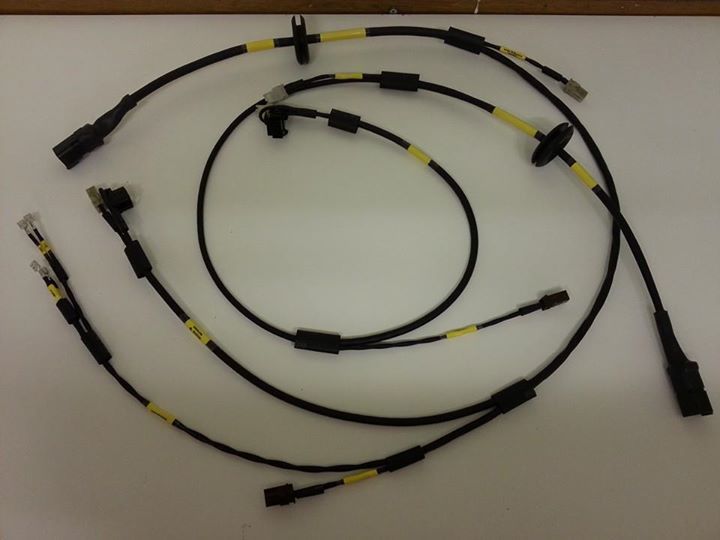 and the brake pressure switchgetting its 'gucci gucci' souraiu AS connecter fitted:  been throwing in those 4 sections today, started off with the rear light section.. which plugged into the chassis harness up near the washer bottle: 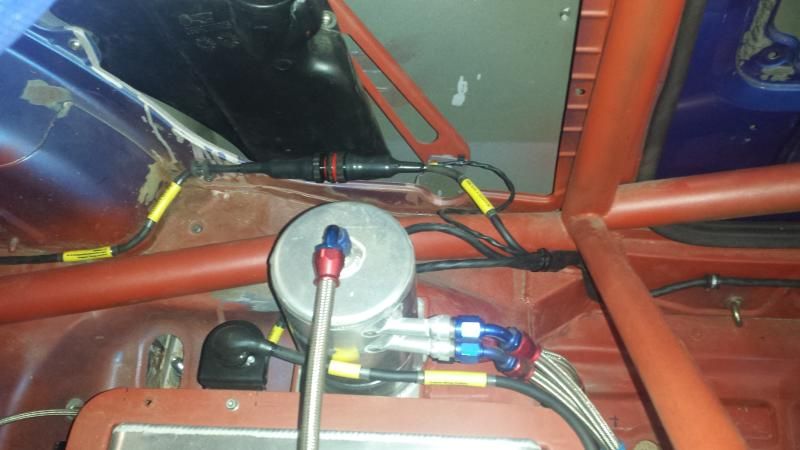 and ran around the back of the car to feed the 2 rear lights and the 2 numberplate lights: 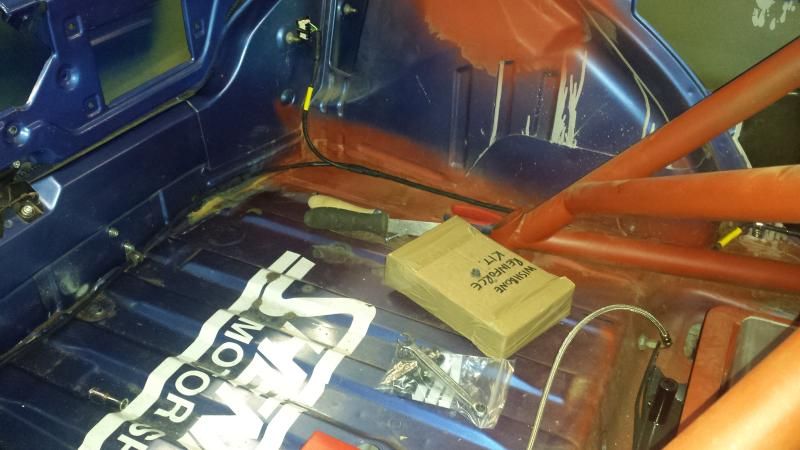 nothing however is that easy and to get the feeds thru the shell to inside the rear bumper i had to open out the small square holes to 20mm dia, find a suitable grommet, unpin the connector, thread the grommet on and then reassemble the terminal: 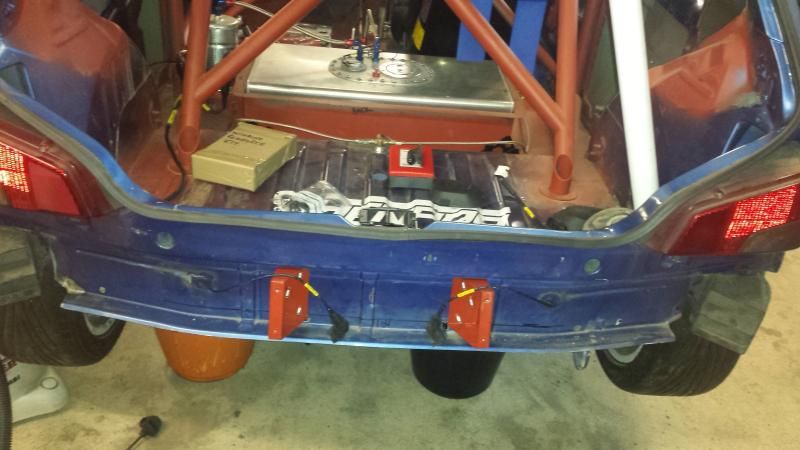 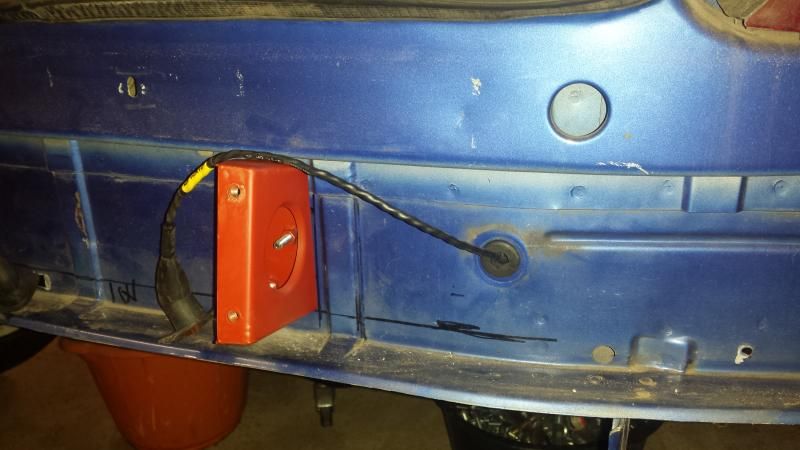 next job, fit in the Tpiece with the brake pressure switch which will activate the brake lights: 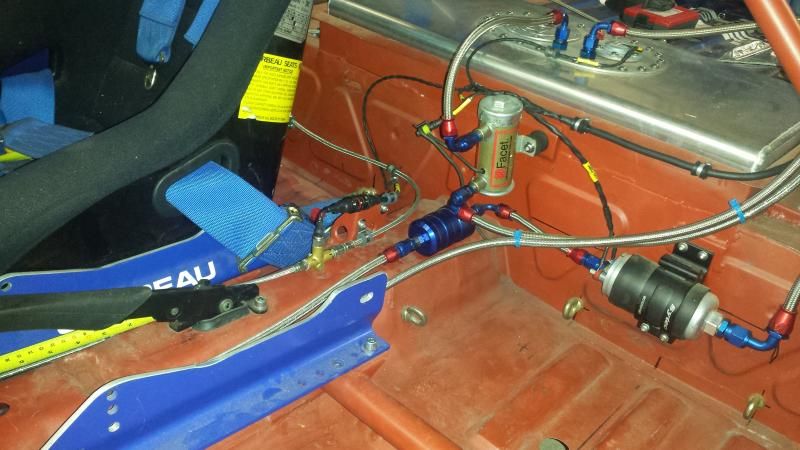 so far so good, the lengths on the wires were all pretty good.. to do the front light runs the wings were whipped off along with the wheels.. passenger side:  pretty hard for the phones camera to pick up but the pattern from the twisted raychem44 wire looks mega, all uniform and even:  the big ass hole in the passenger inner wing where the std loom passes thru will be welded up then a smaller dia 30mm hole put in for the grommet Sean fitted.... drivers side (30mm hole cut and grommet fitted)  lengths again all looked good, but this side also had the feeds for the horns:  wings back on, you can just about make out the deutsch DT connectors cable tied to the dash bar of the cage, theres 1 each side for the front light looms and another on the passenger side that runs down the car, these will all plug into the dash loom when that comes back... |
|
| Auteur: | davenport [ Mercredi 13 Janvier 2016 15:57 ] |
| Sujet du message: | Re: English 106 xsi |
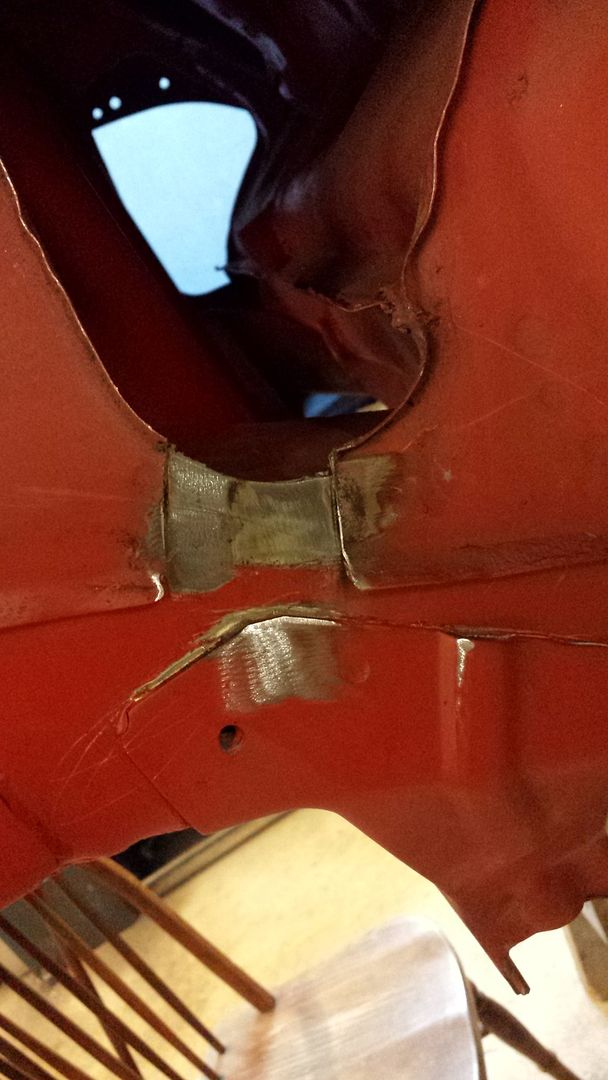
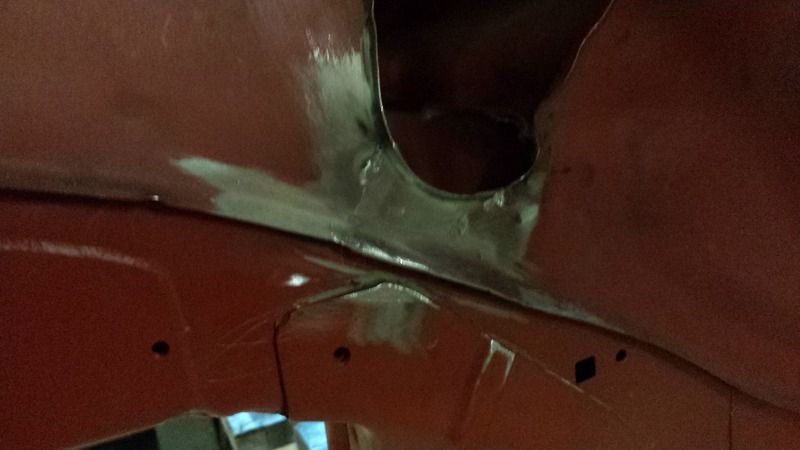
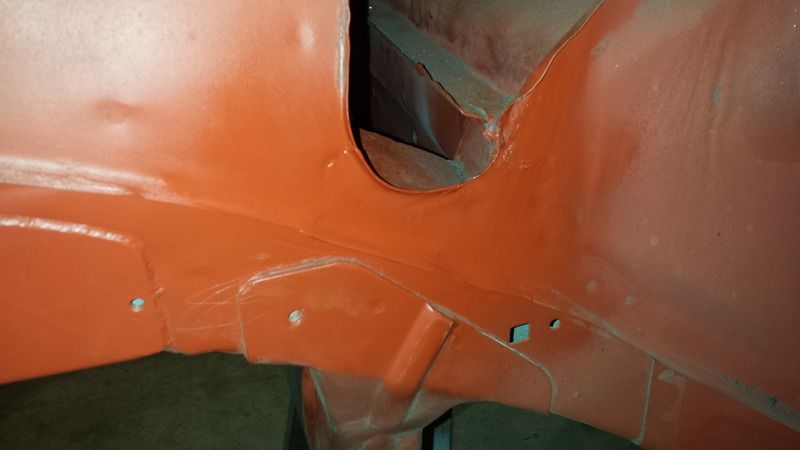
the box of exhausts bits has been piling up over the past few weeks... so, armed with a few sketchy measurements i set about laying a few things out: 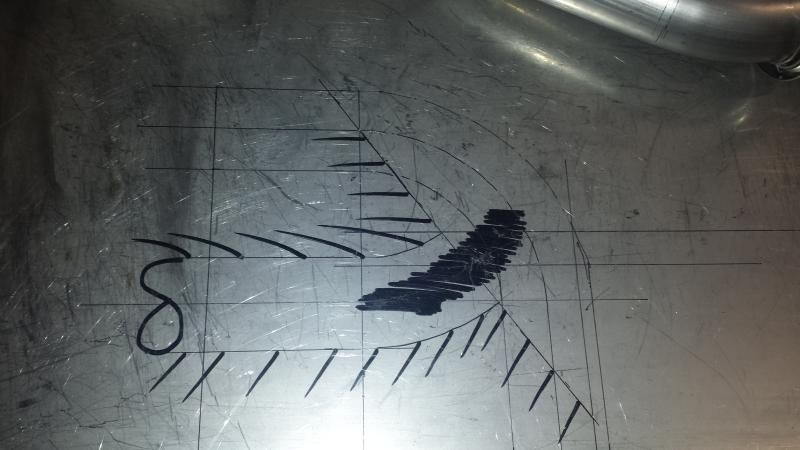 a 2.25" bend was cut up to match that shape, and a piece of 2.5" tube was shrunk down to match up with it: 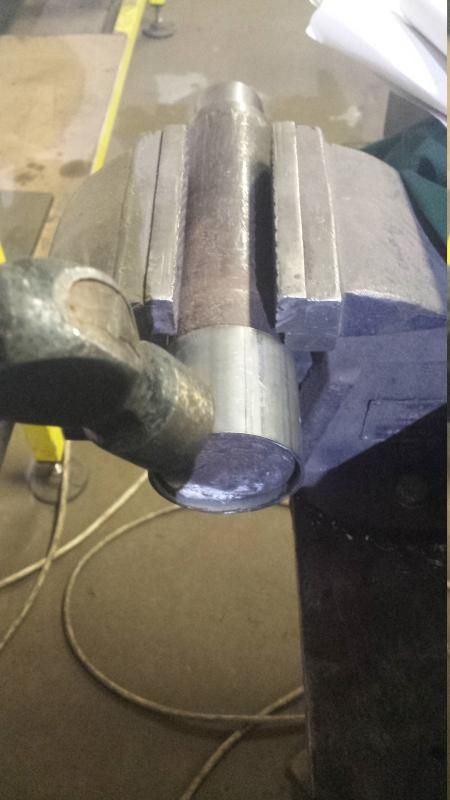 that was then thrown together with the Vband assembly Mike Edwards was kind enough to supply:  and along with some more bits all tacked up into something resembling what i need: 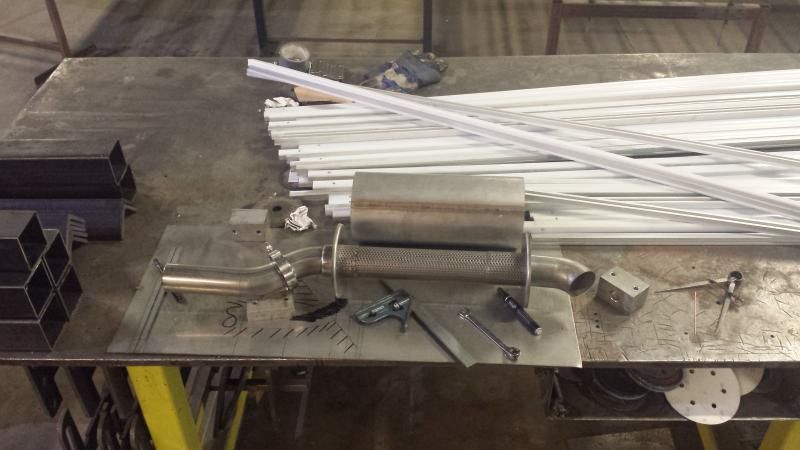 from here i need to make sure everything is right sizewise then strip it down, purge everything and tig it all up.. i`m still not 100% sure on the tailpipe.. i really like the idea of the downswept as i`ve used in the mockup.. if not it`ll be a plain straight piece of tube.. 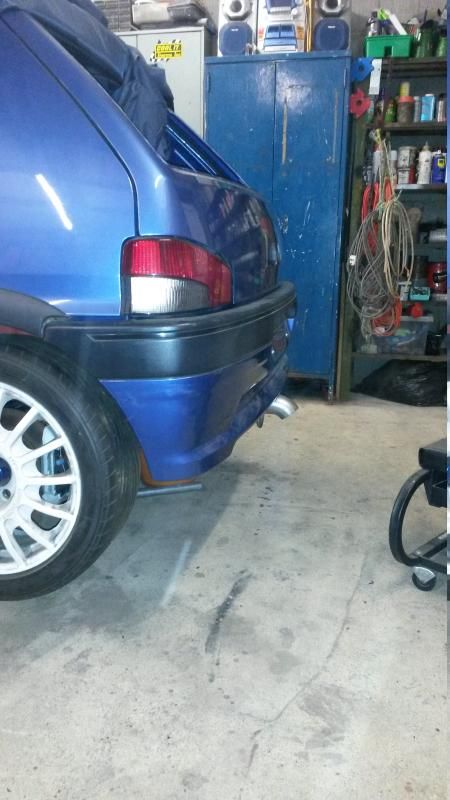 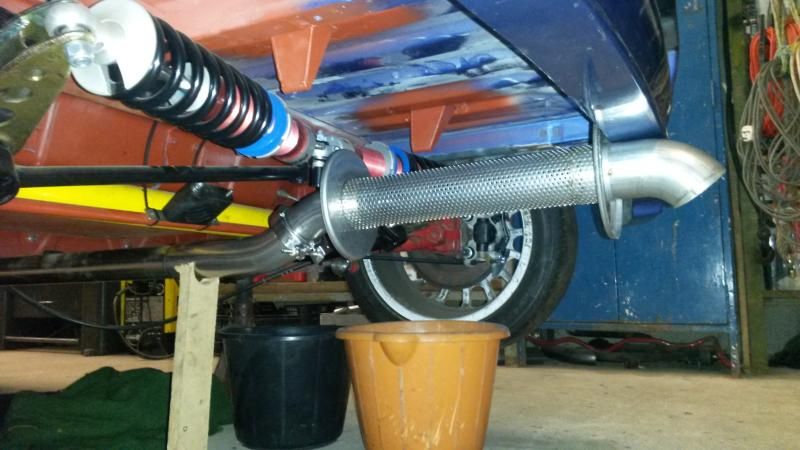 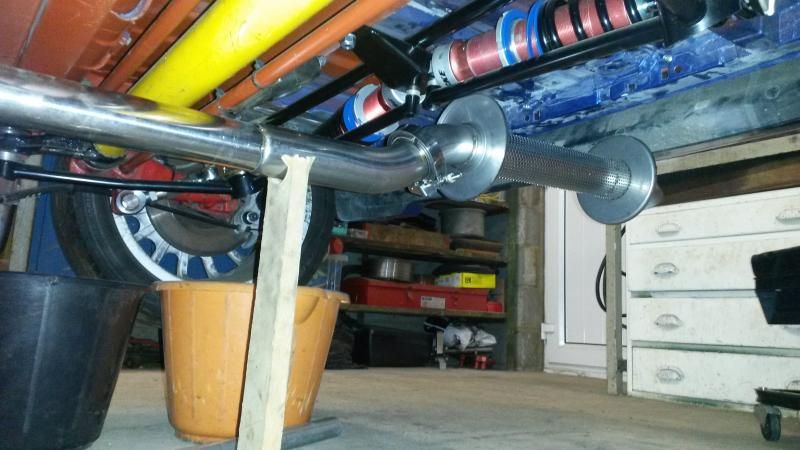 casing needs shortening a bit and a big ol 45° slice taken off the top edge near the dampers.. but other than than i'm liking the looks of it Been putting this off for a while now (i hate drilling spotwelds!) 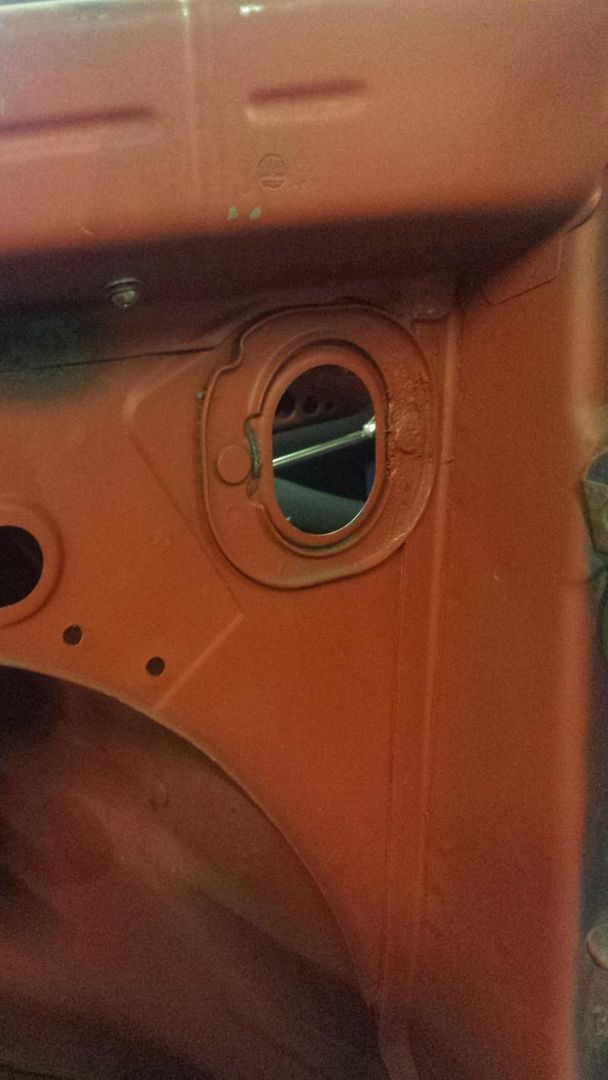 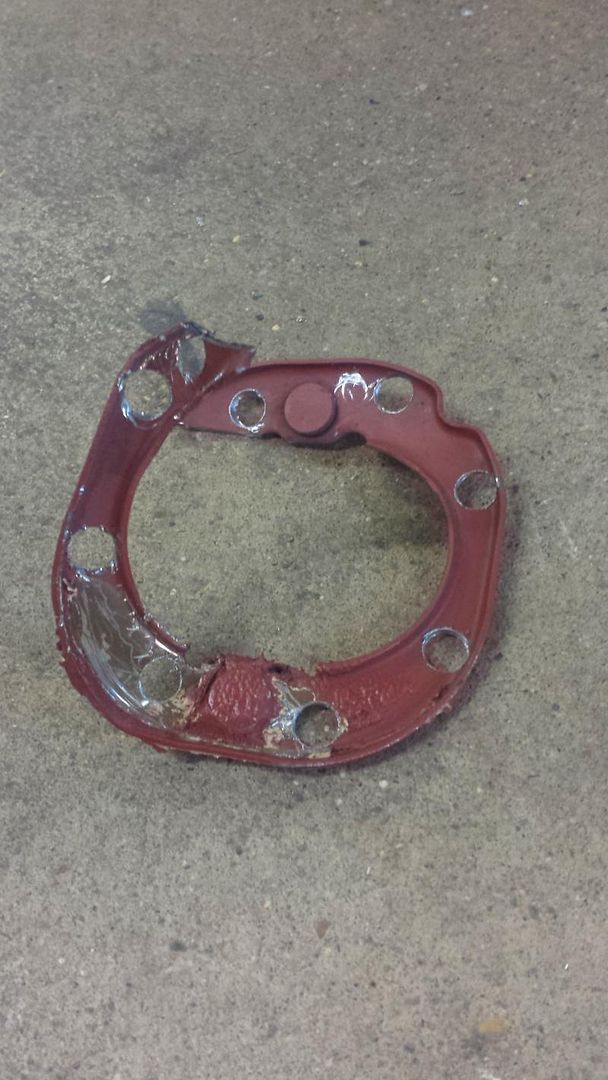 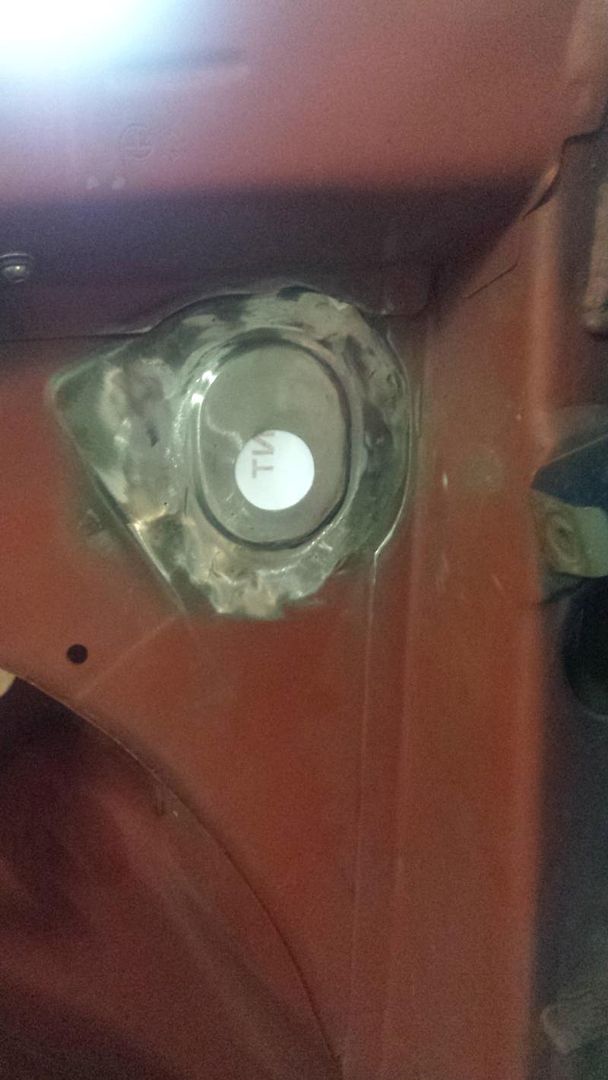 next up.. more exhaust.. Purge gear setup 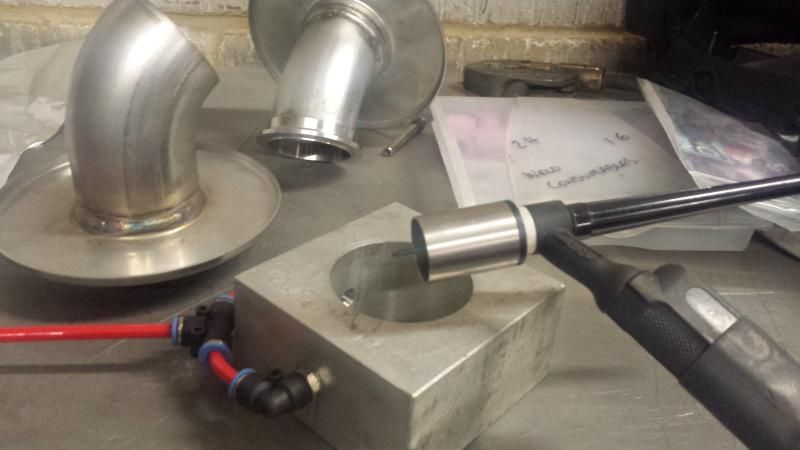 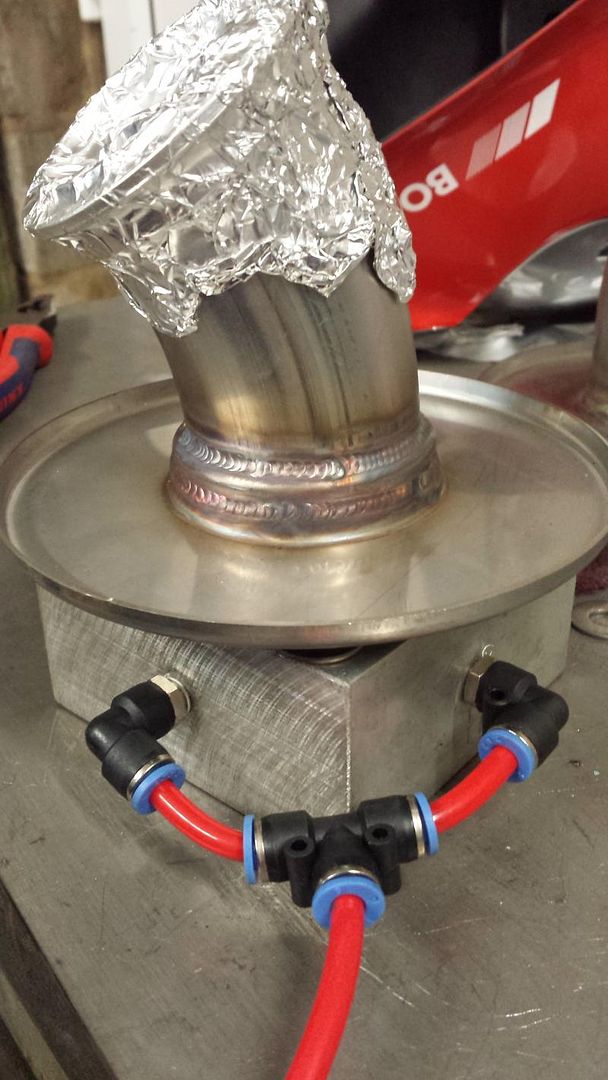 Leaves it all clean inside 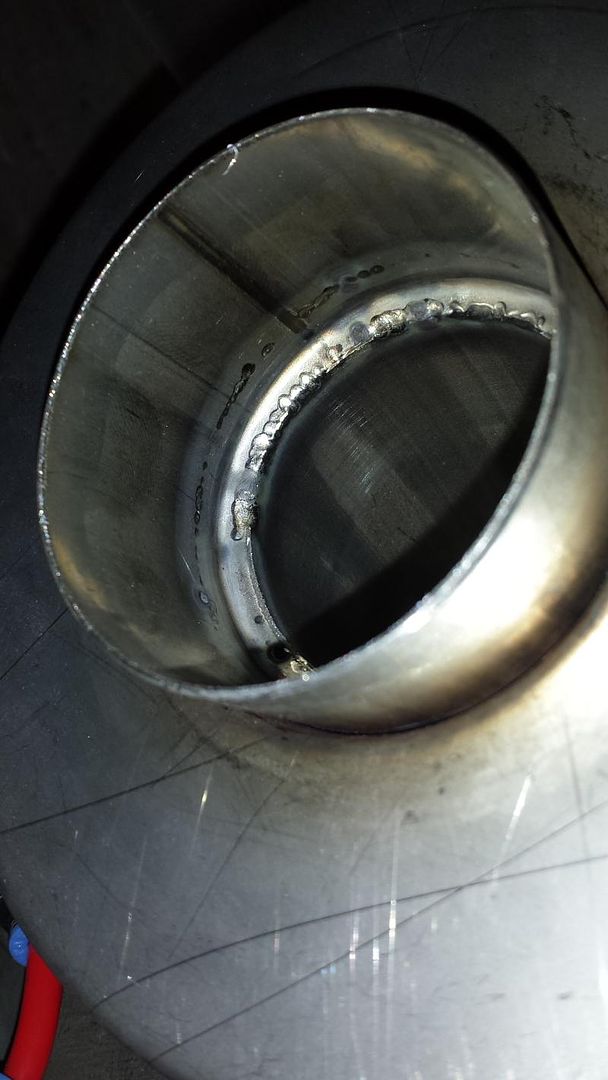 Need to order some wadding and work out how to hang it.. Discovered there may be a small clearance issue with the bulkhead connector: 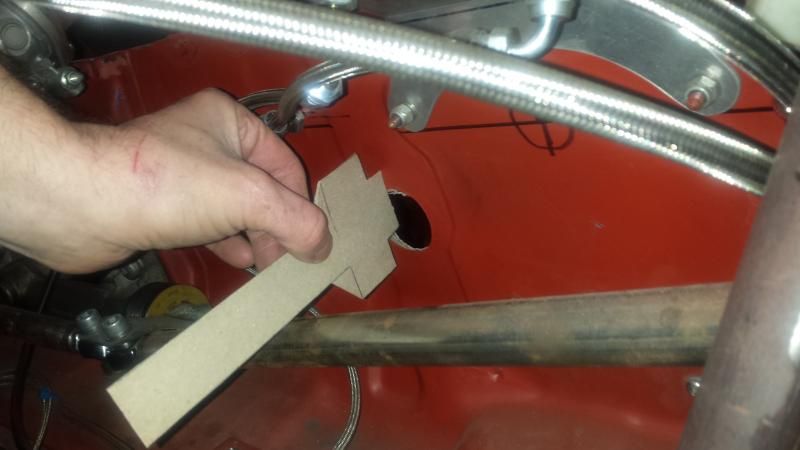 now, i wont name names as to who decided to put it there but its not where i'd asked and quite frankly there a thundercunt!.. So i machined up some delrin blocks and clamped them tight against the bulkhead and hauled the bitch up:  fingers crossed that'll sort it!!! Threw the engine harness in, lengths all look good, still some bits to terminate/dr25 shrink but all in all mega chuffed:   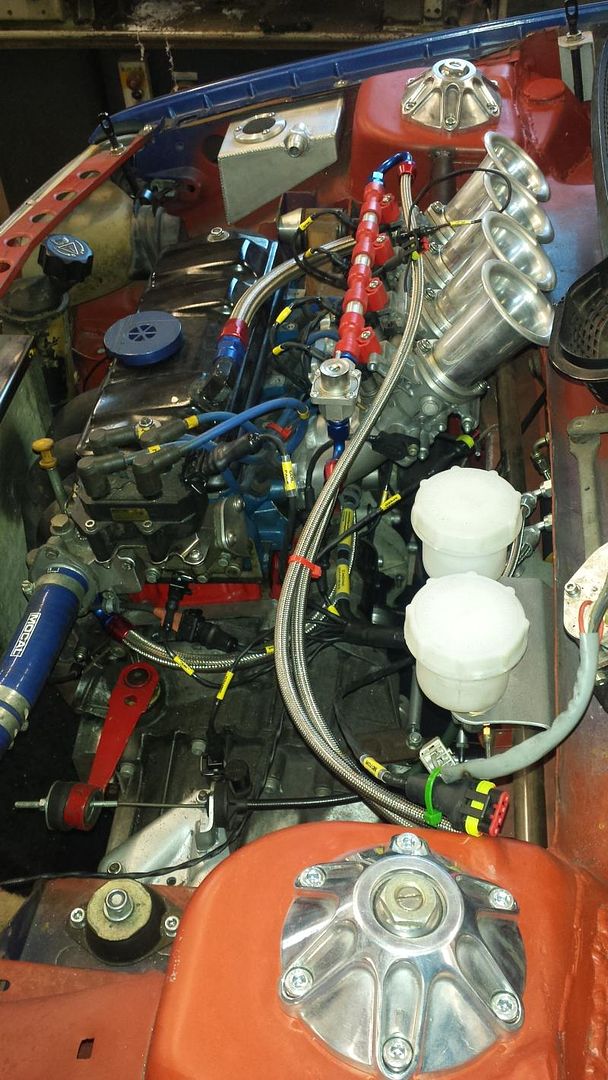 Exhaust - done.. Made a hanger:  Buzzed that on and filled the can: 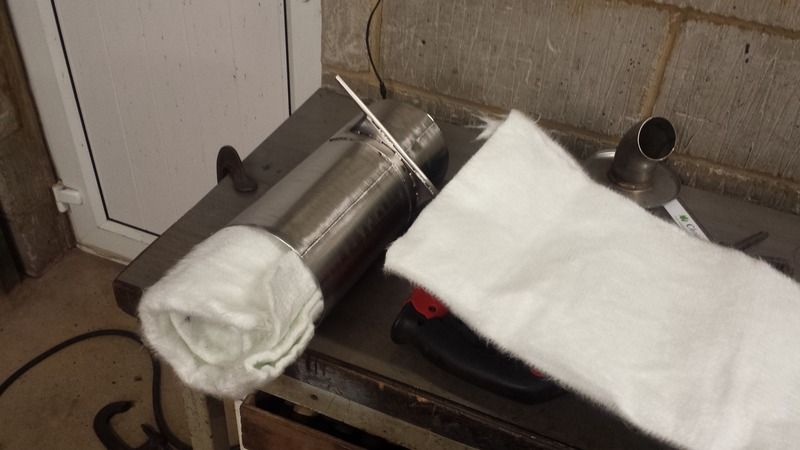 finished up the centre pipe: 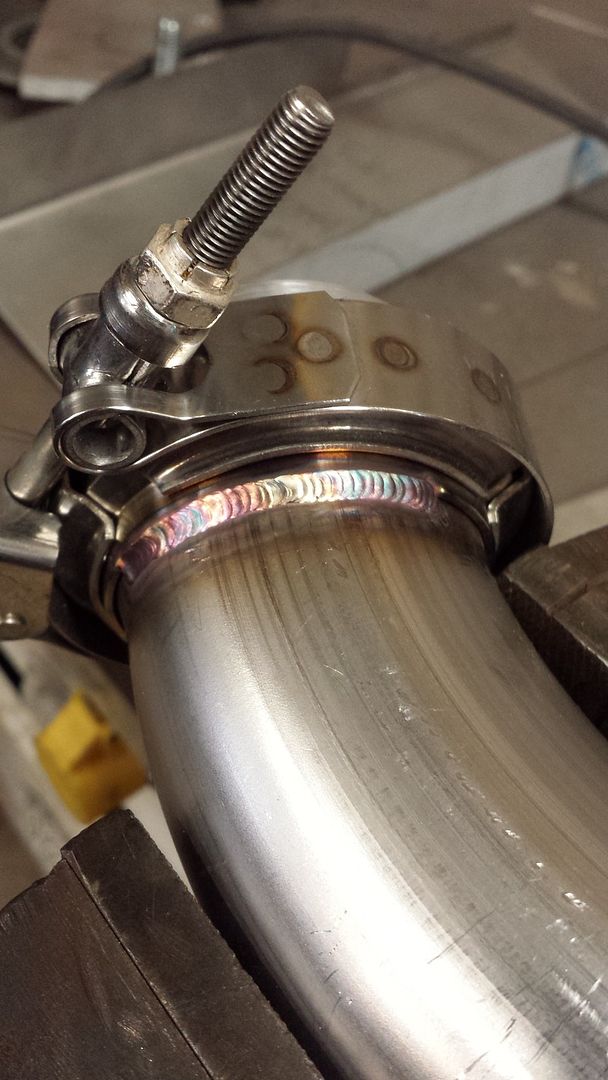 Penetration looked ok: 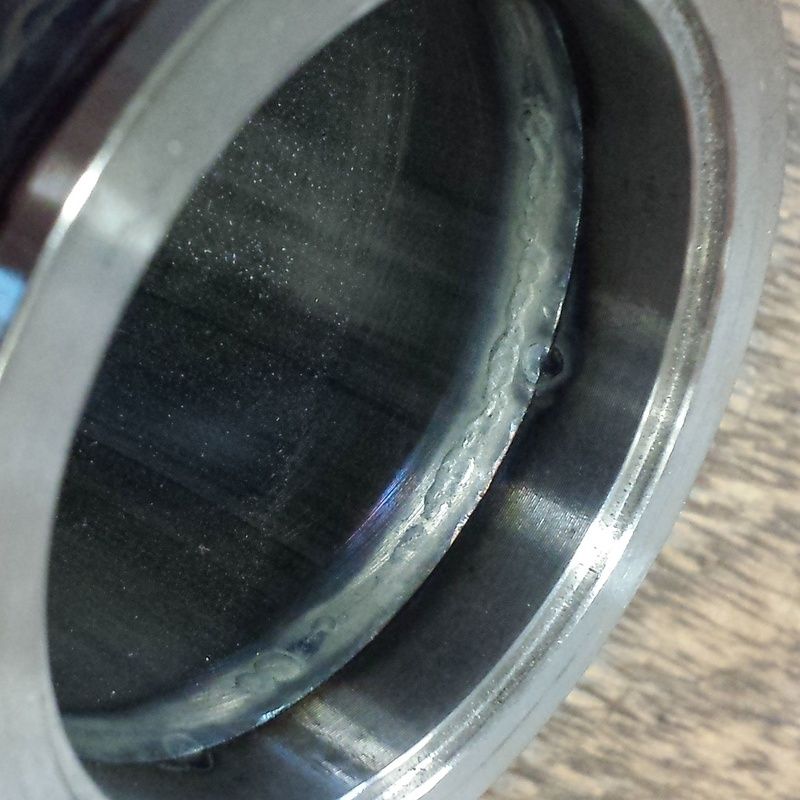 Fitted up:  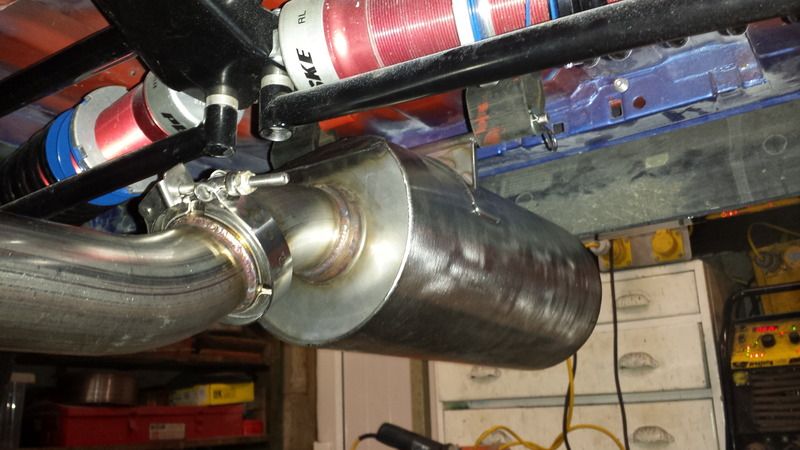 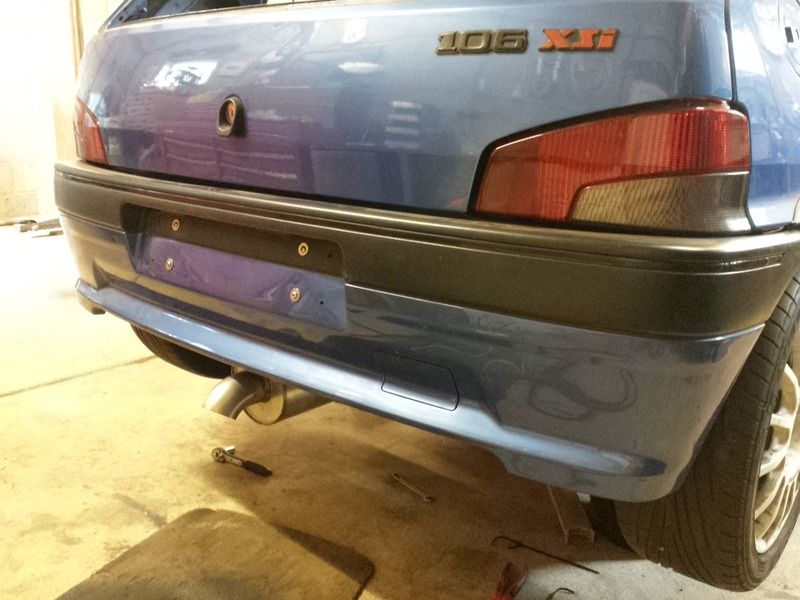 And stuck the girl back on the floor: 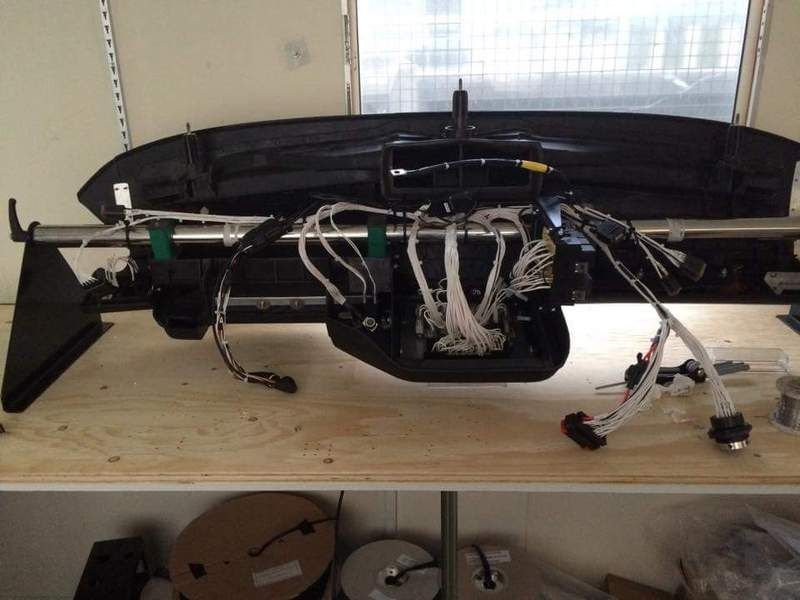 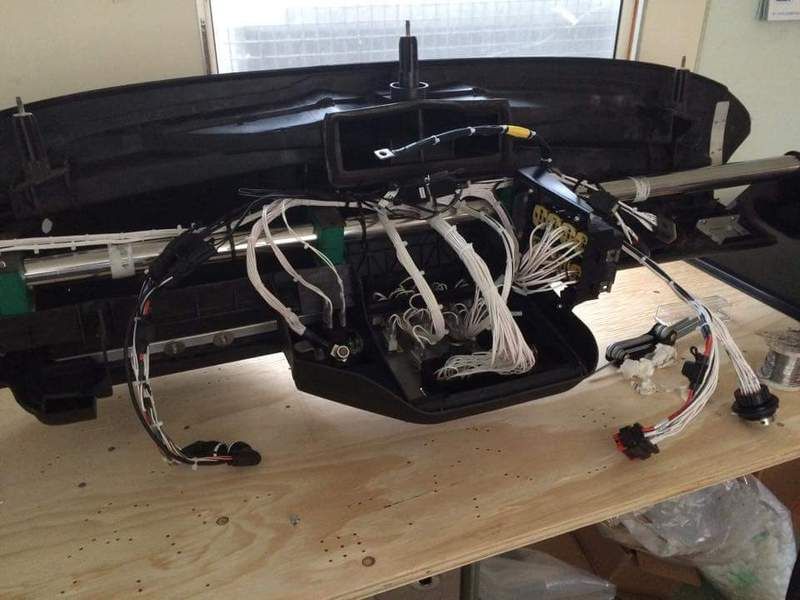 Which means!!!!!! 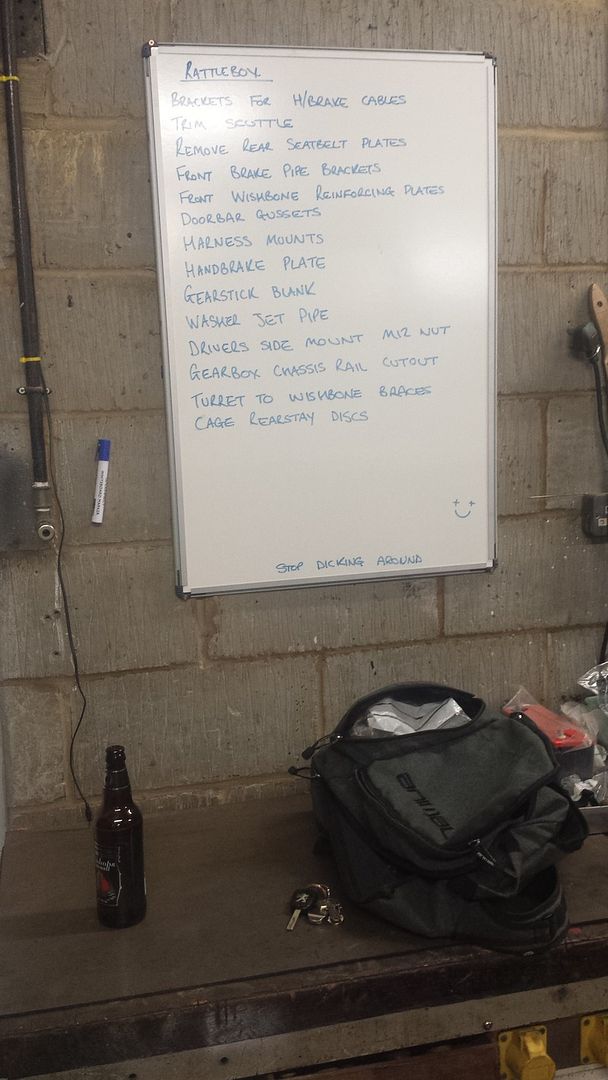 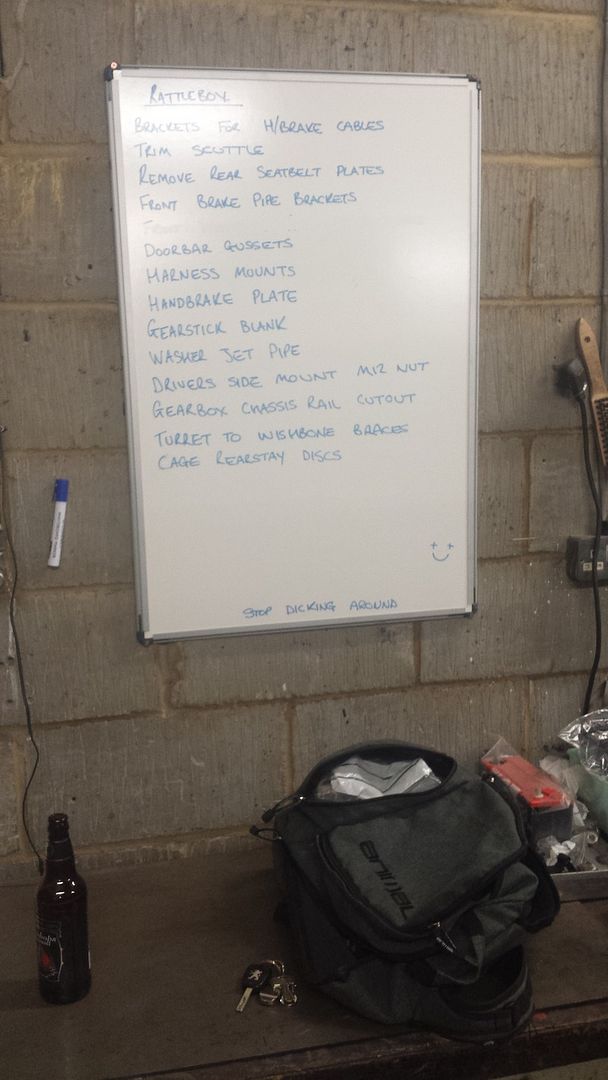 Yesssssssss They're fitted... 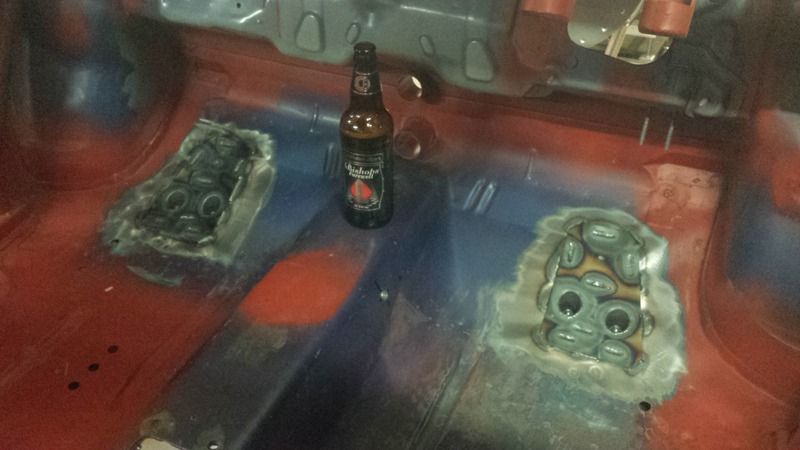 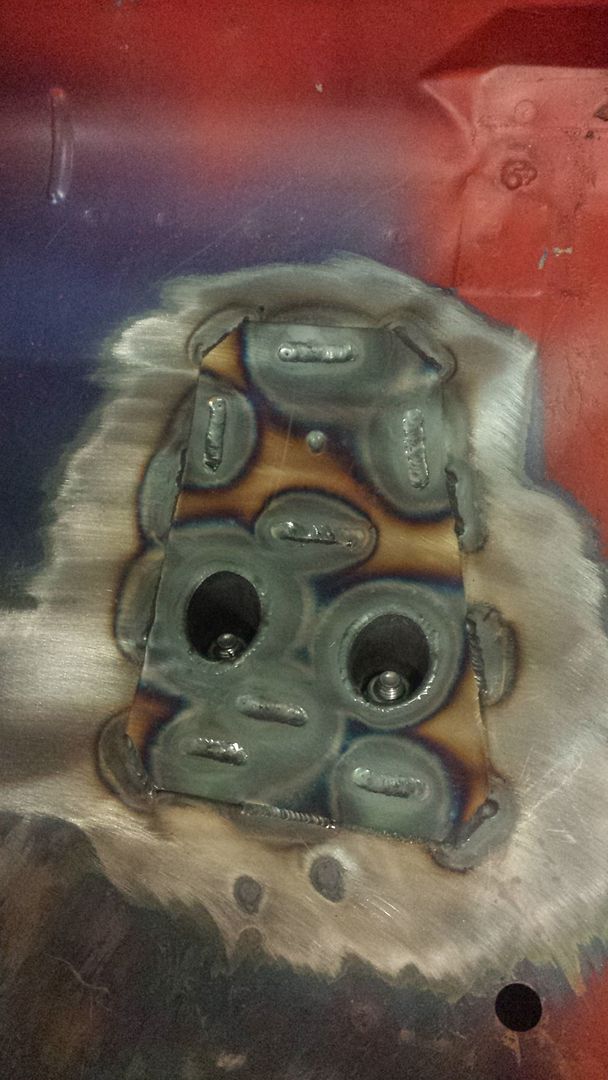 Got the shell spun over and the exhaust hangers welded fully- forgot pics though sorry.. Handbrake reinforcing plate was next. The one i had made was a bit heavy and didnt fit that well.. so.. 1.5mm bit of crgp sheet: 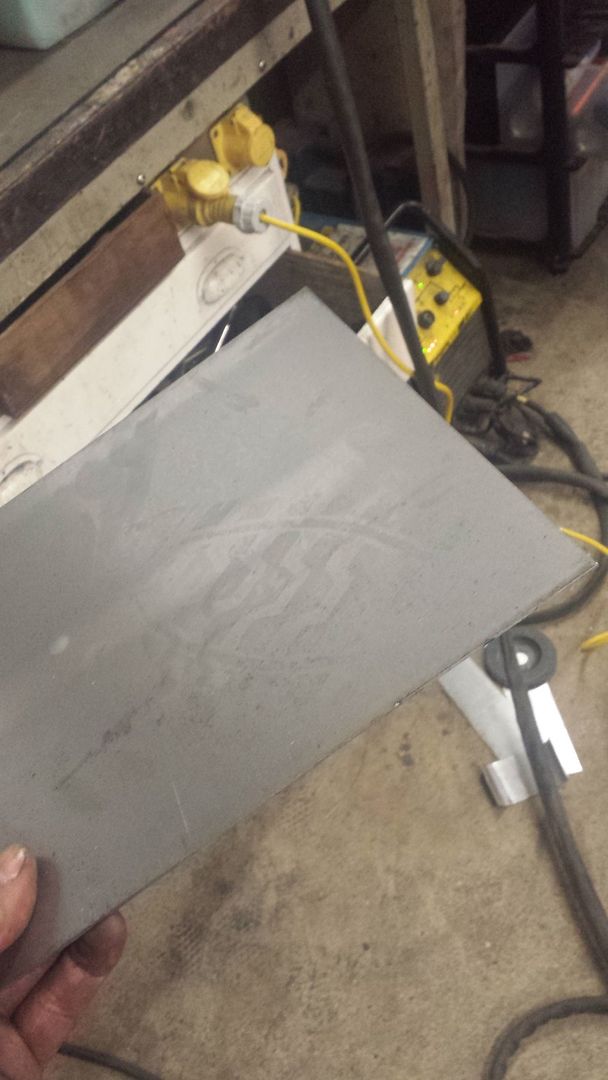 A bit of stepdrill/hammering/cutting disc: 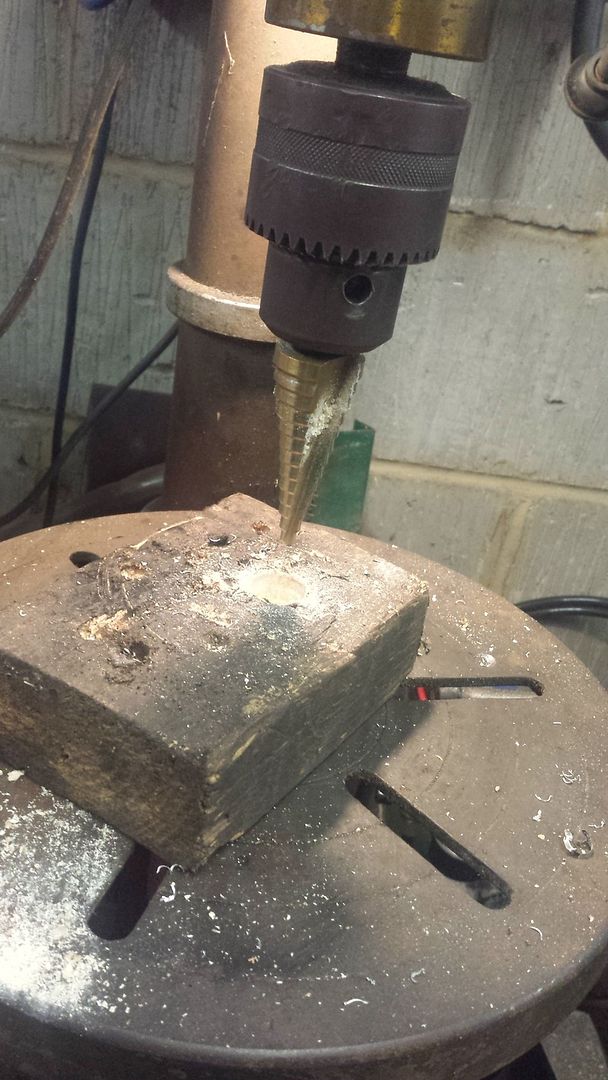 Tacked up: 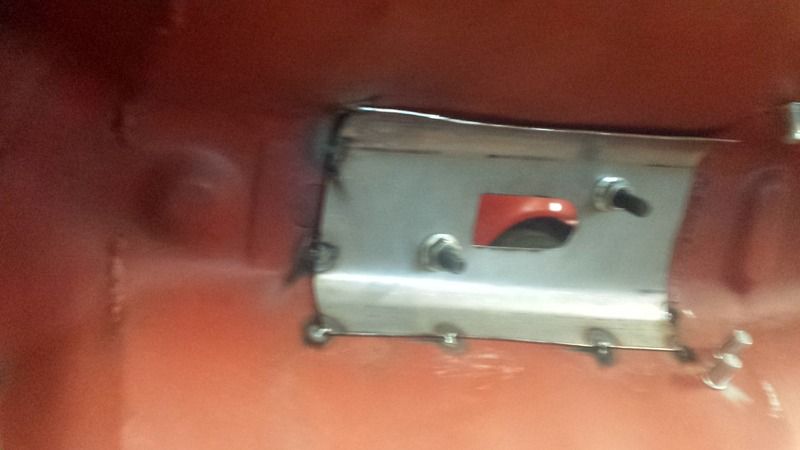 Stitched + nuts welded on: 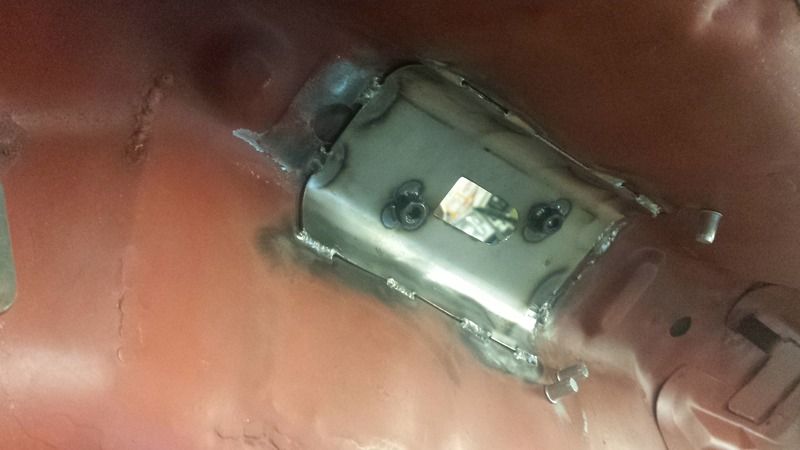 Got those big ass plates that secure the rear seatbelts cut off and cleaned up: 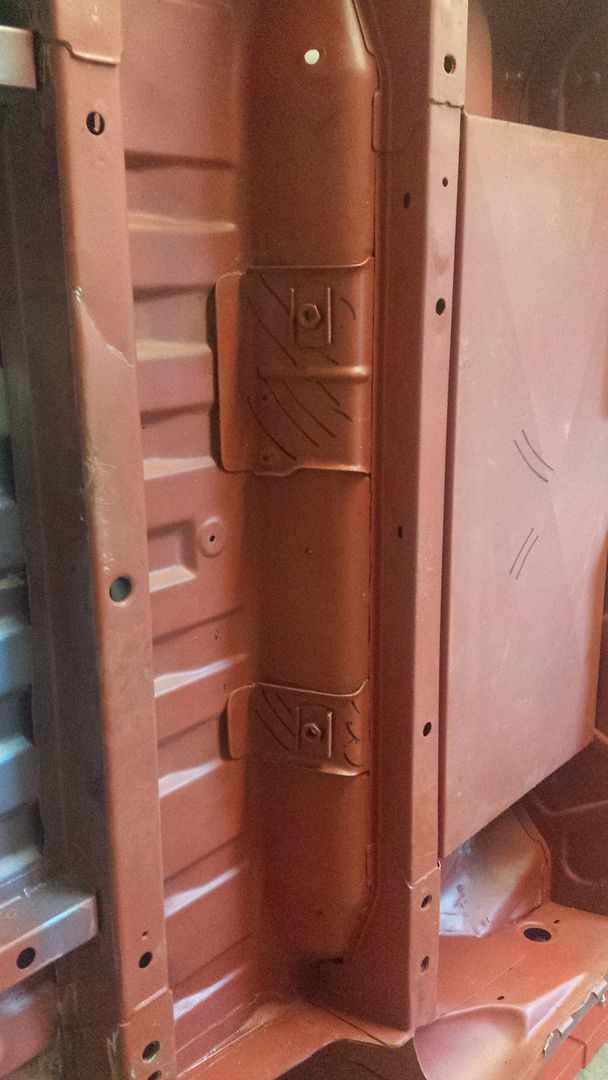 And the list was updated!!: 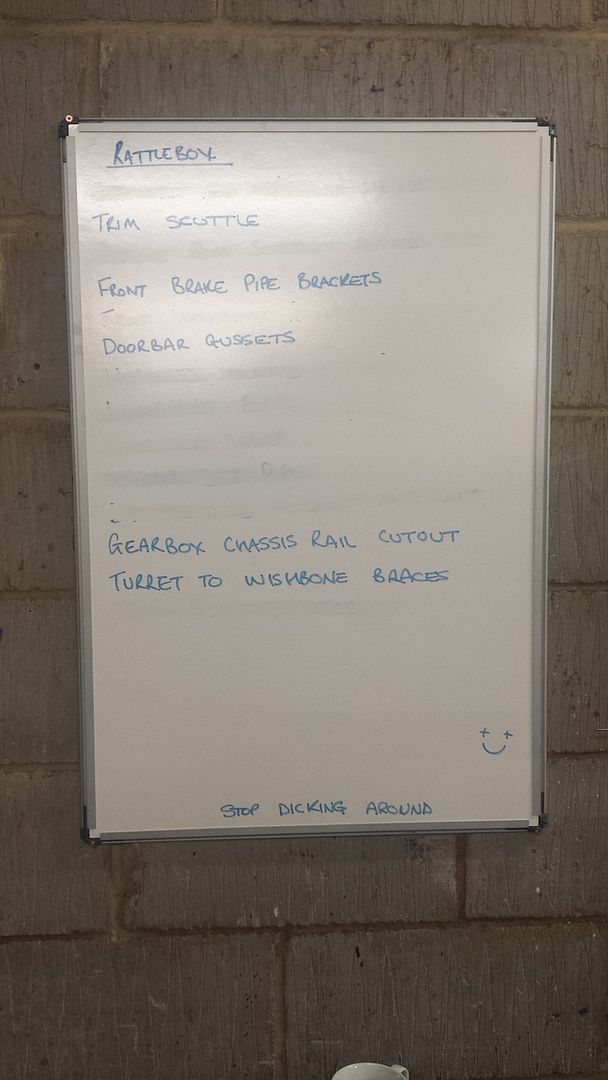 [/QUOTE] [/QUOTE]Chassis rail notched out to clear the moved over MA 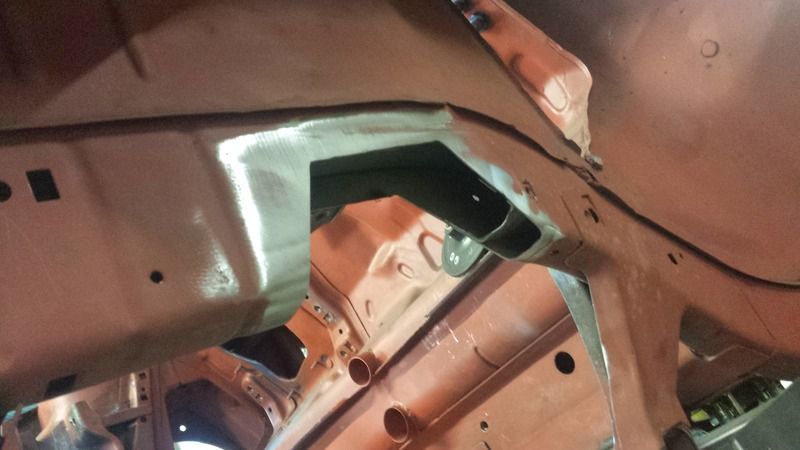 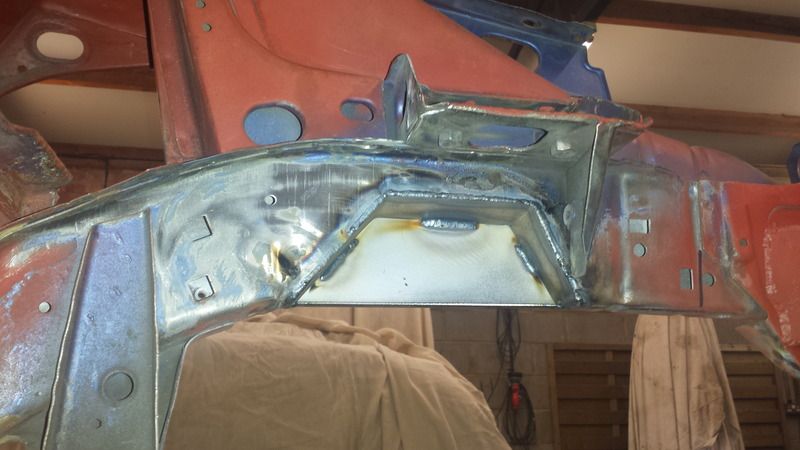 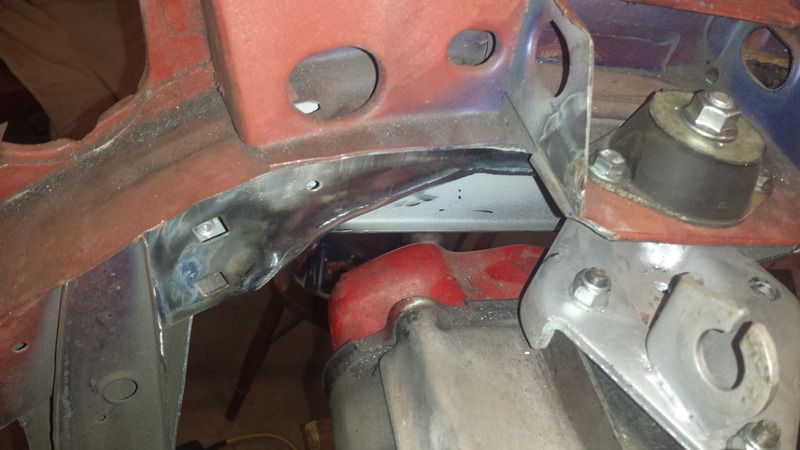 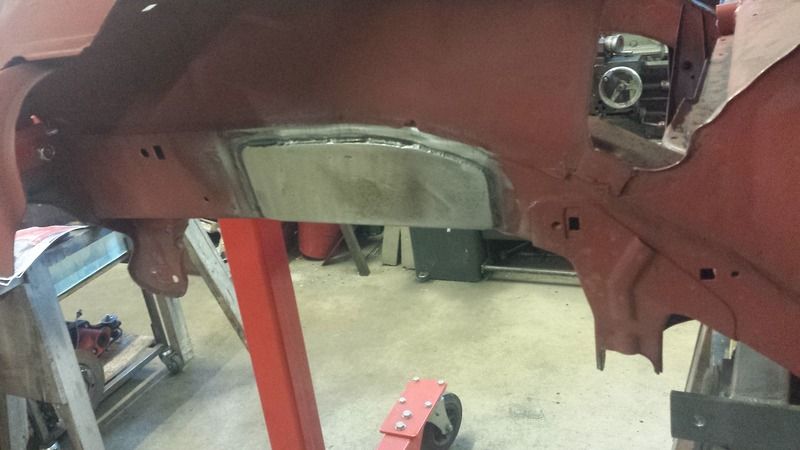 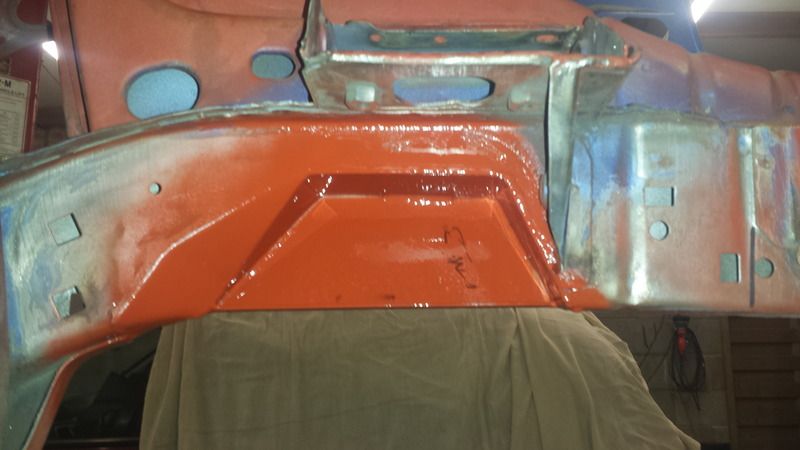 [/QUOTE] [/QUOTE][QUOTE=Stuart Trundle;416765]Turret/Wishbone braces are in: 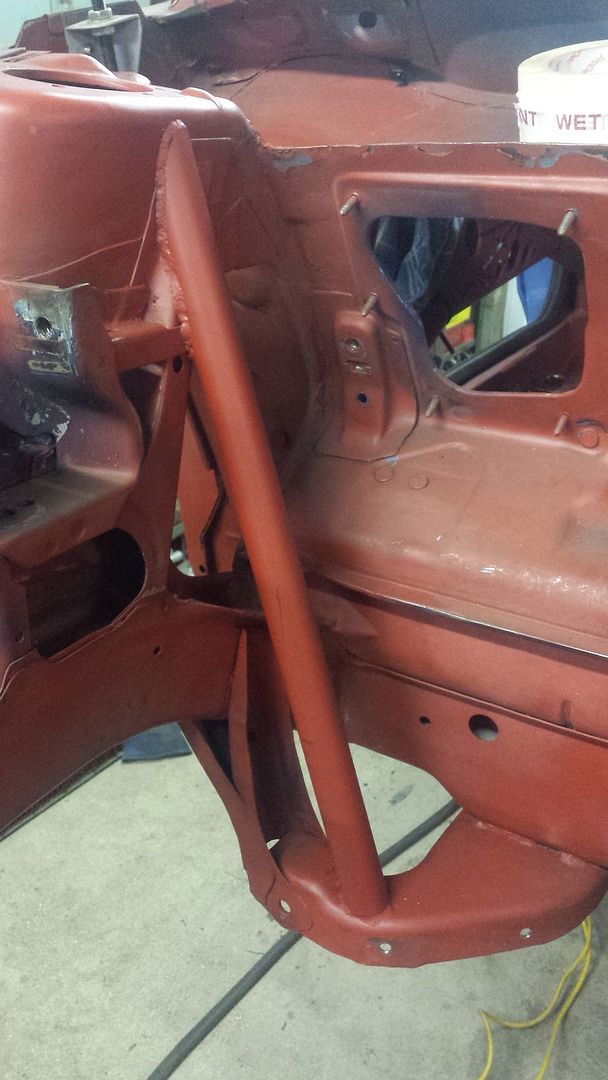 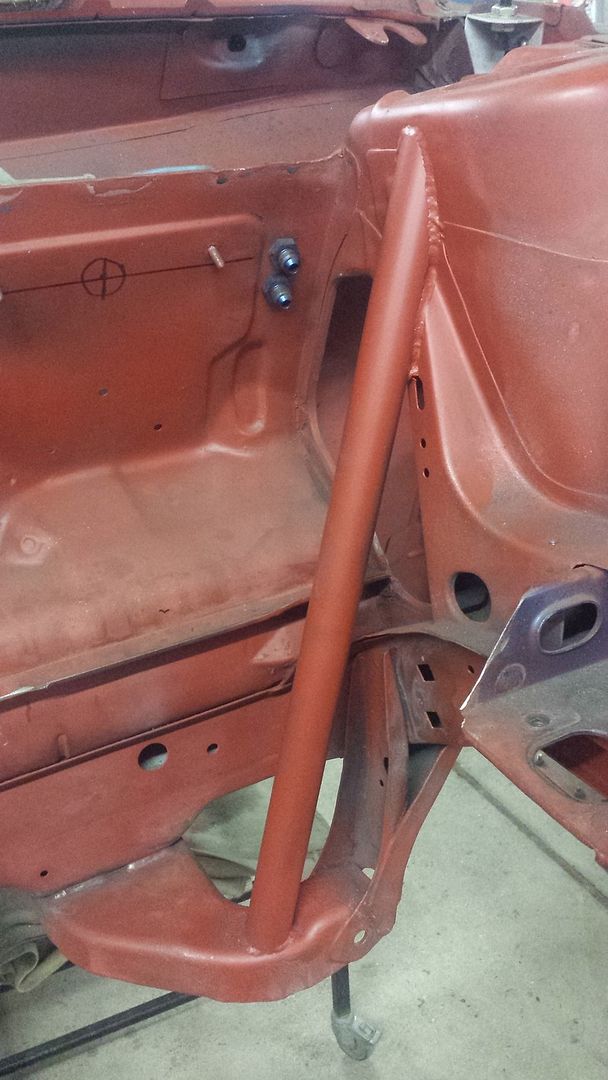 Brake pipe brackets and mountings are in: 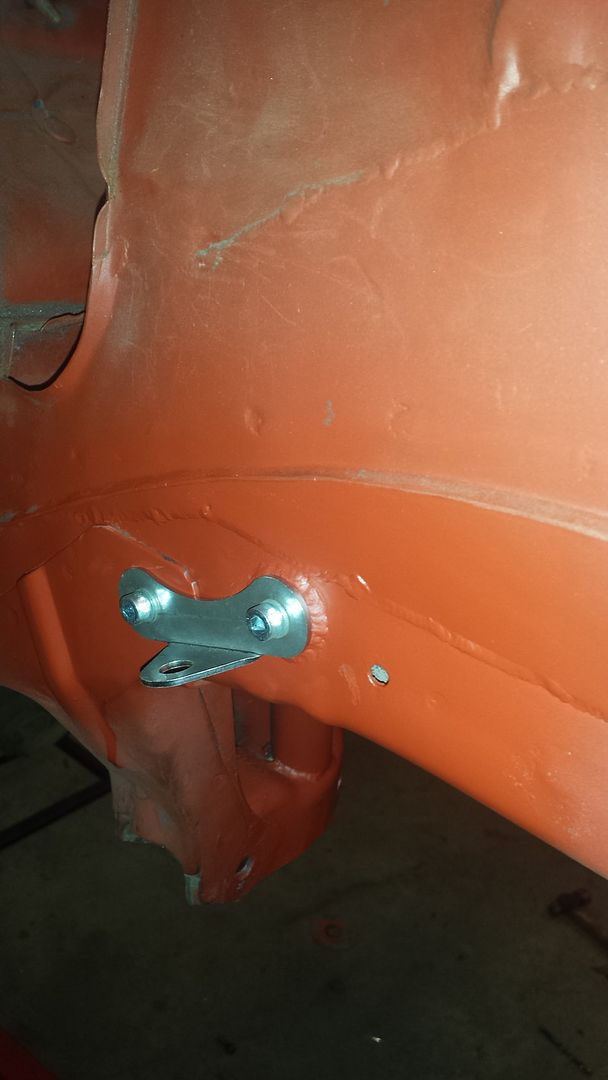 Captive nut has been welded under the brace tube to allow fitting of the satchell lower brace...[/QUOTE] [QUOTE=Stuart Trundle;417106]Well then doorbar gussets FINALLY got welded in place.. 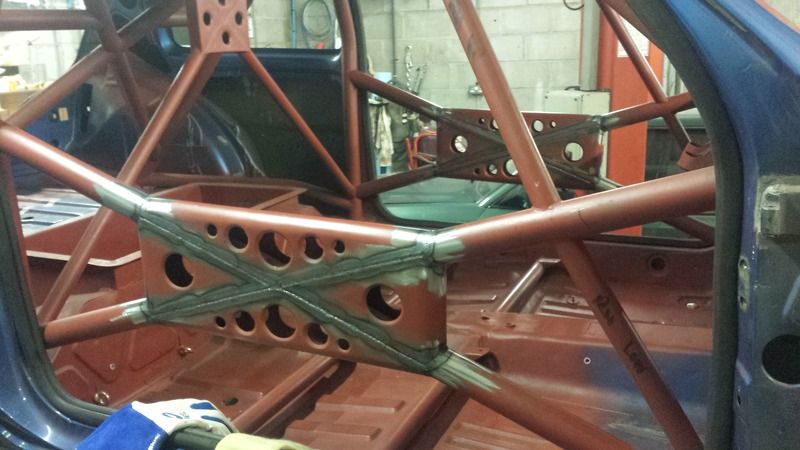 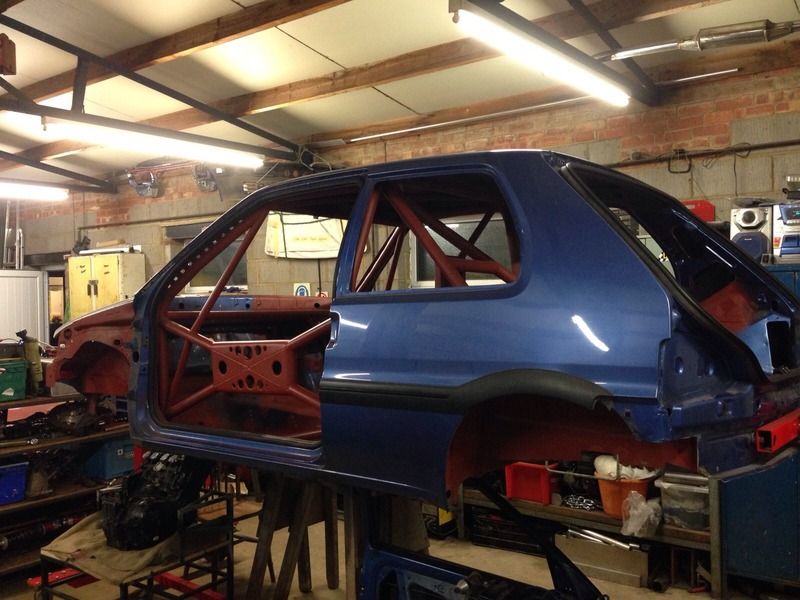 It aint perfect but its ok... 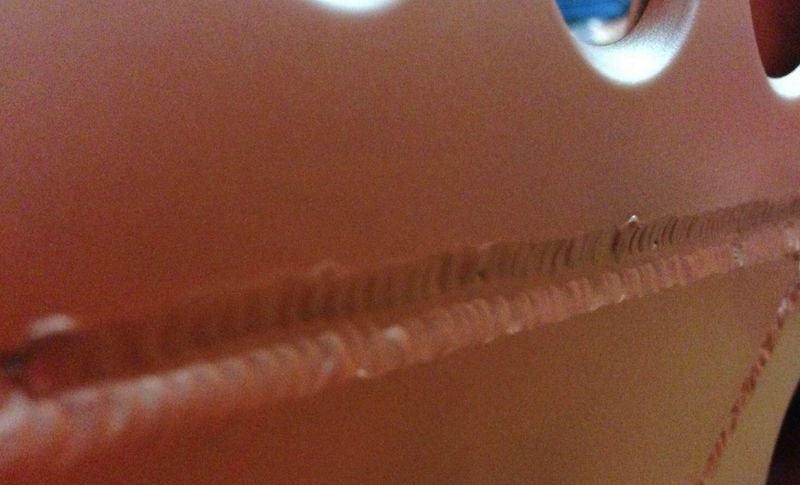 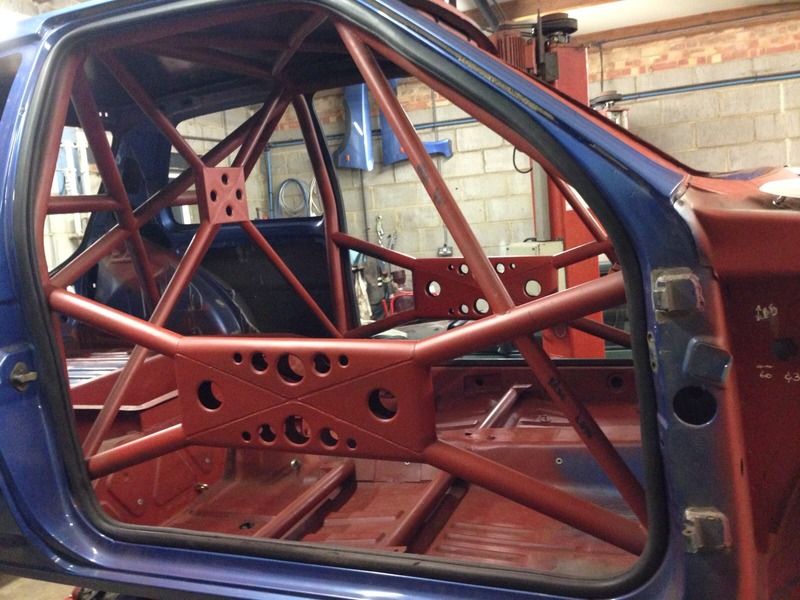 Then i spotted a potential future mod on the V8 my dads involved with.. a very compact alternator apparently 85A output.. will grab some details next visit... 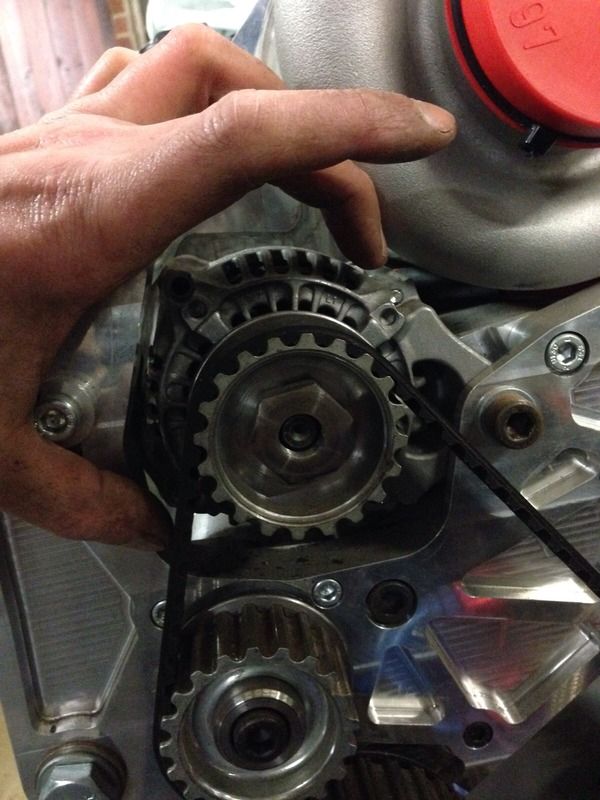 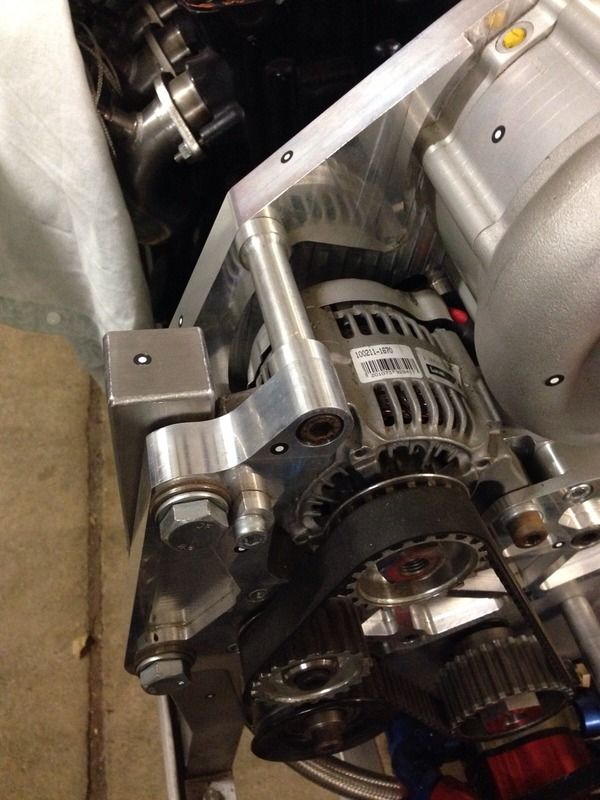 [/QUOTE] [/QUOTE]
|
|
| Auteur: | PF47 [ Mercredi 13 Janvier 2016 19:35 ] |
| Sujet du message: | Re: English 106 xsi |
 super ! |
|
| Auteur: | kiki kawa bounga [ Vendredi 15 Janvier 2016 7:46 ] |
| Sujet du message: | Re: English 106 xsi |
| les soudures sont top |
|
| Auteur: | seb80 [ Vendredi 15 Janvier 2016 8:32 ] |
| Sujet du message: | Re: English 106 xsi |
Échappement central Le train arrière 
|
|
| Auteur: | davenport [ Samedi 16 Janvier 2016 12:38 ] |
| Sujet du message: | Re: English 106 xsi |
Thankyou both very much.. (i did have to Google translate your replies though) |
|
| Auteur: | Briice XSI [ Samedi 16 Janvier 2016 18:07 ] |
| Sujet du message: | Re: English 106 xsi |
What a pretty good job, it's amazing ! |
|
| Auteur: | davenport [ Dimanche 24 Janvier 2016 21:43 ] |
| Sujet du message: | Re: English 106 xsi |
  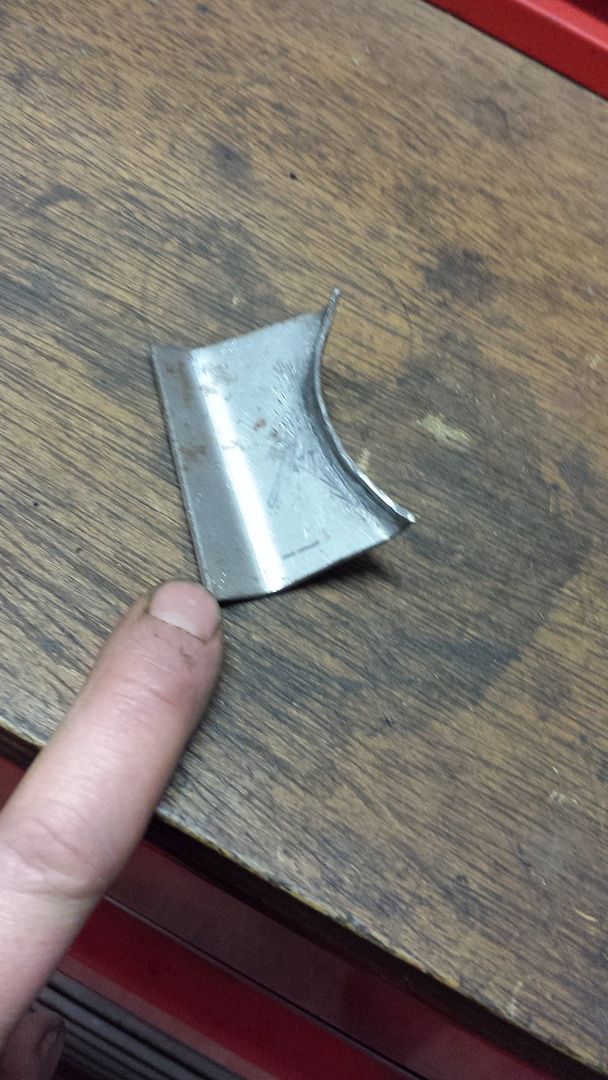   Got me gussets..... 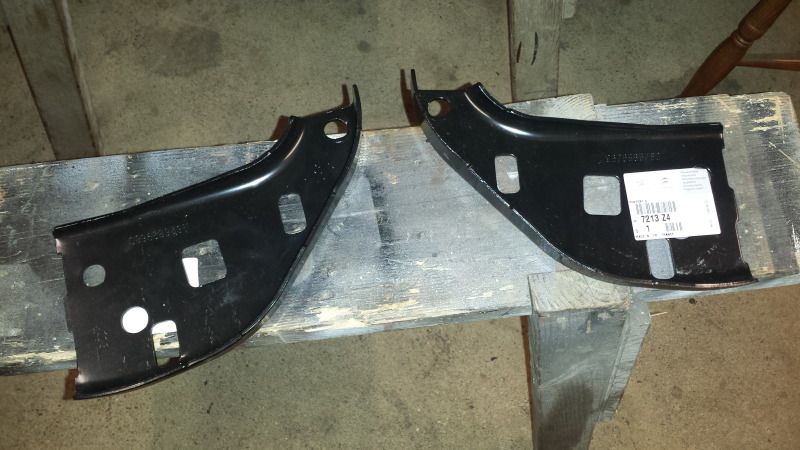 Also decided to bung up all the factory floorpan holes and in a moment of laziness got laser cutter fired up at work and chopped out some discs to make my life a bit easier... 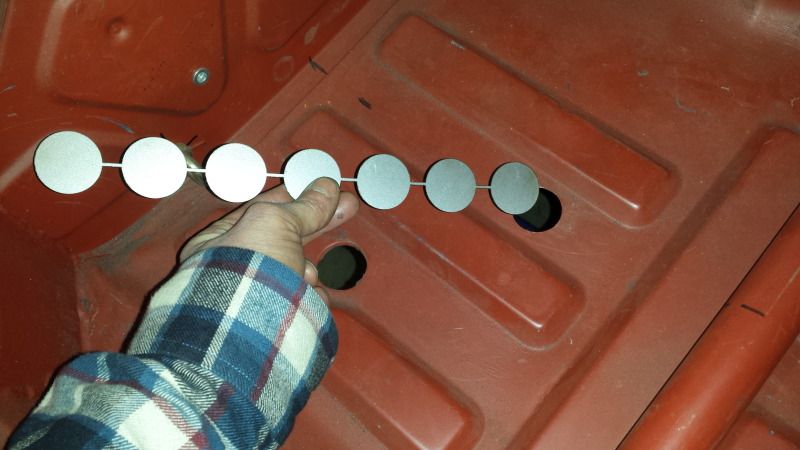
|
|
| Page 5 sur 8 | Heures au format UTC |
| Powered by phpBB © 2000, 2002, 2005, 2007 phpBB Group http://www.phpbb.com/ |
|